Independent Stampin'Up! Demonstrator!

Hey friends!
I've been a demonstrator with Stampin'Up! since 2011. I'm located in Bozeman, Montana, but have customers all over the country. I have a very fun and active downline called "Big Sky Stamper Stars" and we get together in person and online to share what we love. My blog posts feature what I'm up to recently and I try to share new product information, tips and tricks and creative inspiration. You can shop from this site or find out more information about our products and becoming a demonstrator! Thanks for stopping by!

Wednesday, February 26, 2020

Breathtaking Bouquet

Hi Friends!
I'm back today after some fun travel and busy card making on the side. I sell cards locally in my area and have let my inventory decline a little so I'm busy building it back up. It's fun to try out some creative ideas and themes and even more fun when other people like them enough to buy them! My latest location is Rocky Mountain Supply in Belgrade, MT, so be sure to stop in if you need some unique, handmade cards! You can see a list of all the retail locations that carry my cards on the right side bar, just scroll down.

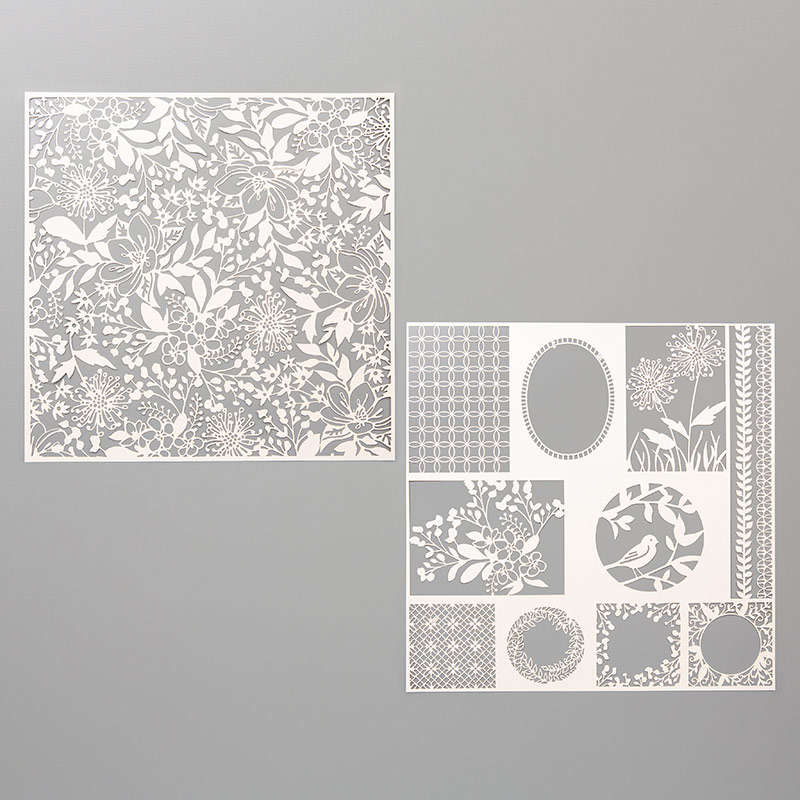
Did you happen to notice the lovely new background stamp in the 2020 Mini Catalog?  Sometimes those background stamps are tucked into a corner and don't necessarily stand out when you browse through the catalog. It's called "Breathtaking Bouquet" and is on the upper right corner of page 31. I have only played with it once so for but wanted to share it because I loved it so much. We made this card in a class last week and it was a quick favorite for everyone because of the beauty and the fun technique. Here it is:


The first thing we did is heat emboss the stamp on Shimmery White paper with white embossing powder. Because it is white on white, it's a little hard to see but it's possible. We discovered that the embossing powder takes a tad longer to melt with the Shimmery White paper because it's thicker than our normal card stock. Once it had cooled, we then used daubers to sponge ink on in "blobs". It is such a detailed stamp that it is impossible to clearly delineate every petal or leaf with a white on white background. Therefore, I told them to just make colored blobs in the vicinity of the flowers, etc. We used daubers because they fit easily on a finger and control the ink much better than a sponge or brayer. You can either daub the ink on with an up and down motion or rub it on in a circular motion, the latter giving you a darker color. We started with the Gorgeous Grape, moved on to Daffodil Delight and then Melon Mambo. Lastly, they sponged Granny Apple Green in all the remaining white spaces. We added some ribbon and a sentiment from the "Perfectly Framed" stamp set, also in the Mini Catalog" and had our card. I think this would be fun to do in different color schemes, including a Christmas theme. We also talked about how gorgeous it would look with a metallic embossing powder like silver, gold or copper on a rich dark background like Black or Night of Navy. There are lots of possibilities with background stamps and it's fun to experiment. I'm anxious to revisit this set soon!

There's still over a month to go in our Sale-a-Bration promotion!  It's a great time to shop and stock up on everything you need and receive a free SAB product for every $50 you spend. We have so many great freebies available now and more coming on March 3rd, so watch for the details. There is some incredible paper coming your way as a choice with your $50 purchase.

Thanks for stopping by! It's fun to share what I love and what I'm up to!

Happy Stampin'!
Sarah


Wednesday, February 19, 2020

Shimmer Detailed Laser Cut Specialty DSP cards!

Hi Stampers!
That was a long blog title post that didn't give you a lot of information did it?  Awhile back, I purchased the "Shimmer Detailed Laser Cut Specialty Paper" to eventually give it a try. I then forgot about it until last week when I came across it while looking for something else. Does that ever happen to you?  I love when it's a happy accident and steers me in a fun way of creativity!  This paper is amazing. The shimmery side is a soft off-white and the detail is intricate and amazing. It's paper that has various designs cut into it with a laser. You get six sheets, three of two different styles, and the reverse side is a plain white which can be used as is or even sponged to any color of your choice. I decided to make some cards using the card sized pieces. There are 5 in all and with the pack of three pages, I got 15 cards when I was done. Want to see?!!


This is where I started. I looked for Designer Series Paper to put behind the laser cut paper. It's a little tricky to find paper that doesn't "fight" with the laser cut design.

Here are pictures of the finished cards:


And now some details on each card:


The paper behind the laser cut design in this card is from the "Finely Woven" DSP pack. I also used some Designer Series Paper In-Color paper for the gingham check background to the sentiment. The Happy Birthday Sentiment is from the "I Say Hello" stamp set, located in the Annual Catalog, pg 110.


This card features the "Follow Your Art" DSP, the leaf and sprig punch and the "Accented Blooms" stamp set and coordinating Tailored Tag punch.


This card uses paper from the Bird Ballad DSP pack and a sentiment from the "Path of Petals" stamp set which is part of the Pressed Petals Suite.


This card also uses products from the Pressed Petals Suite including Pressed Petals DSP for my floral background and the "Path of Petals" stamp set. My small yellow flowers are made with using the Small bloom punch and stamp set from the Sale-A-Bration offering.


Finally, my bird/branch laser cut paper is backed with a piece from the "Garden Lane" DSP pack. I used a retired stamp, ribbon and button for this card as well.

Here's a picture of the Shimmer Detailed Laser-Cut paper. Remember, you get three sheets of each design in the pack!


I have several more pieces of the laser cut paper to play with but this was a fun start. Because this paper is fairly delicate, I hand cut it out with my long blade Stampin'Up! scissors and then trimmed a little if needed with my paper trimmer. I did all three sheets at the same time as the paper is pretty thin. It's not as tedious as it may sound, you just have to take some care to not force anything and rip it accidentally.  This was a fun way to make 15 cards in little time and the laser cut paper is so gorgeous.

I've listed most of my supplies below and a click on any of them will take you to the store where you can get more information or order. This paper is in the Annual Catalog and should be available until May 31st or until supplies run out. I'm seeing a few more samples on Pinterest with this paper so don't wait until it goes viral and is gone!

Have a creative and wonderful Wednesday!
Sarah

Tuesday, February 18, 2020

By the Dock

Hi Stampin' Friends!
Do you ever find yourself wishing for summer in the middle of winter? I'm sure we all do at some point. A favorite aspect of summer for many people is all things water, boats, lake, etc. I've never lived on a lake but I suspect it would have a charm all its own. There is something so mesmerizing about water, especially in nature with lakes, rivers and oceans. These forms of water have been favorite stamping themes of mine over the years and I was so excited to see Stampin'Up! come out with the latest stamp set featuring water, this time a lake!  Have you seen the "By the Dock" bundle on page 49 of the Mini Catalog?  It includes a dock, boat, paddles, birds, fish and frogs!  It did stretch my imagination a little bit to think of ways to use it but I love what I came up with!


These stamps offer a lot of technique options between stamping, watercoloring, blender pens and alcohol markers. This card also features the dry land stamp which is a simple edge of water stamp. For my water, I used our Watercolor Pencils (Bermuda Bay and Pacific Point colors) and then blended out the pencil strokes with a Blender Pen and Wink of Stella. You'll also see some small waves created by using Pacific Point ink and a stamp from the set. Don't forget about your watercolor pencils! They are easy to use and even easier to control where the color is going and how to move it around with dabs of water.


For this card, I paired the By the Dock bundle with the High Tide 3D embossing folder.  My boat and dock and oars were simple to cut out with the dies and I incorporated some great rope with our Baker's Twine.


For this card, I used my Stampin' Blends alcohol markers to color the boat, dock and water. I stamped the boat and dock on Very Vanilla card stock with Early Espresso ink and then colored. You can do a lot of shading with the markers which is always fun.


For my final creation, I wanted to feature some of the extra dies that come in the bundle that do not have a coordinating stamp; frogs and foliage! I knew I wanted an embossed background and after thinking about several options, I settled on the Stone 3D embossing folder, one of the Sale-A-Bration freebies with a $100 purchase. I was trying to figure out a way to incorporate some water and came up with the fun idea of cutting the embossed background in 2 pieces, shortening up the upper and lower edges just a tad and after stamping some water currents, trying to create something that looked like a small stream. It's not perfect, but I think you get the idea! Because the happy little frogs are jumping about, I grabbed my sentiment from the "Above the Clouds" stamp set which features hot air balloons.  I get so excited when I'm able to combine products - makes me feel like I'm getting even more of my money's worth!

If you like lakeside recreating, you should definitely consider purchasing this bundle! You won't be sorry as you create memorable projects for your friends and family!

We are half way through the Sale-A-Bration promotion! I hope you have had a chance to participate in it by earning free product with your purchases. Let me know if you have any questions. You can check out the free product by clicking on the SAB brochure photo on the right. You can also click on my supply list below to get to the online store for ordering and more information. I'm always happy to help so feel free to contact me too!

Happy Stampin'!
Sarah

Monday, February 17, 2020

Special Someone with coordinating dies!

Hi Stampers!
And just like that, it's President's Day already this year!  It is a cliche that time goes fast, but it's sure true!  I've been a little neglectful with posting this winter so far. I'm still stamping as much as ever but getting my projects on the blog often seems like more than I want to handle in a day. Is the winter a hard time for you to accomplish things?  It sure can be for me!

I decided to take things in a "cute" direction today. There is a wonderful animal themed stamp set in the 2020 Mini Catalog called "Special Someone". This set is delightful, light hearted and defines "cute"!  Just to make it more wonderful, Stampin'Up! added coordinating does to cut out many of the stamps included in the stamp set. I made a couple of cards recently to show you but already have several more ideas percolating in my head!  Here they are:


This first card features all three animals in this set, a raccoon, a squirrel and a mouse. Aren't they adorable!  They all have their paws positioned in a way to hold balloons or flowers, which is also pretty cute. I love that one of the coordinating dies is a word bubble!


I also used this set to make a Valentine!  The raccoon is fun to stamp and he easily holds a heart.  Many of the stamps in this set are two step stamps, meaning there is a solid background stamp for one color and then an outlined, sketched stamp for design specifics. You can stamp by just eyeballing it or you can use your Stamparatus with help for perfect positioning.

I can think of all sorts of uses for this stamp set including children's cards, birthdays, thank you's, party invitations, school celebrations, etc.  If you have kids that you make cards for, you should consider adding this set to your stash.

There are many other dies and a Designer Series Paper pack that are part of the Coordination Products release. See them all here:

Coordination Product Release

I've listed my supplies below to help you easily get access to the online store. Just click on any one of them and you'll be taken to the store.

Thanks for stopping by! Be sure to check back often as I post throughout the week with more of my ideas and especially Stampin'Up! news and promotions. Have you Sale-A-brated yet??!!

Happy Stampin'!
Sarah

Friday, February 14, 2020

Heart to Heart Bundle

Hi Friends!
Happy Valentine's Day to you! I hope you feel loved by the friends and family in your life and have found fun ways to express your love for them. I made lots of Valentines this year in my classes, cards for sale and personal use. It was fun to play with the theme of love!

I have a card today that is made from the "Heart to Heart" Bundle, but is actually for a wedding or anniversary card. I think depending on what you put on the inside, you could also make it into a Valentine. We made this card at my monthly "Sip N Stamp" last night and it was a hit!


This stamp set is full of hearts, flowers and sentiments but my favorite stamp is an outline sentiment stamp that coordinates with the Story Label punch in the Annual Catalog. I used Crumb Cake ink to stamp the outline and then my pink/red for the rest of the card is Lovely Lipstick. You'll notice a bit of Designer Series Paper, some burlap ribbon and some grosgrain ribbon under the sentiment to draw attention to it. This bundle includes a fabulous connected multi-heart die which is perfect for a background to any card. I used Shimmery White paper for the hearts and then lightly "painted" them with some Lovely Lipstick ink and an Aqua Painter. I love the effect of just a bit more color. This was a fun card to make and will be even more fun to give!

I hope you have a fun day and weekend as you celebrate those you love!

Keep Calm and Keep Stampin'!
Sarah

Thursday, February 6, 2020

Lovely Lily Pad

Hi Stampin' Friends!
It's snowing to beat the band outside today and I decided to take a shoveling break and blog for a moment!  I'm having a Winter Card Buffet at my house tomorrow and Saturday (10 a.m. to 2 p.m.) and have lots to do to get ready for that as well. It's supposed to snow for the foreseeable future so I'll be busy!

I have another Sale-a-Bration set to share with you today. It's called "Lovely Lily Pad" and is a versatile set to create with. There are stamps you can earn with a $50 order and dies that you can earn for an additional $100. You can also earn a pack of "Lily Impressions" Designer Series Paper as well that coordinates with the stamps and dies. It's an artistic, impressionistic style paper that is watercolored in vibrant colors. The stamps also are reversible, a new feature Stampin'Up! is using on some of its sets so you can use both sides of the stamp set when stamping, getting a solid image and a detailed image.   Here are some ideas for your inspiration!

For my first card to show you, I used the stamps on colored card Stock, Poppy Parade for the lilies and Granny Apple Green for the lily pad. I cut them out with the dies and added some sentiments from the "Label Me Bold" which is in the new Mini Catalog.  I also added some retired ribbon in the right colors!


This card is another one featuring stamping directly on card stock. I used Blackberry Bliss ink on Rich Razzleberry cardstock, Lovely Lipstick ink on Melon Mambo cardstock and Shaded Spruce ink on Garden Green cardstock. I like to go one shade darker with my ink to make sure it shows up well.


For my last card, I used my Stampin'Blends markers to color the lily and leaf images. I used Highland Heather and Mint Macaron. Notice the copper foil accent piece at the top of the card. This is one of the dies included with the set.

I have more techniques and dies to show you with this set in the future.  With so many components, there's a lot to try! Be sure to check out the Sale-A-Bration brochure on the right and see the many samples that Stampin'Up! created with this set as well. It's pretty fun!

Click on any of the pictures below to get to the online store. All of these special products can only be earned with an order so let me know if you have any questions or need help with placing an order. Sale-A-Bration goes until March 31st, or while supplies last!

Back to my shoveling!
Sarah

Tuesday, February 4, 2020

Pleased as Punch with punches and paper!

Hi Stampers!
I've been holding on to this post for a few weeks now as I was very eager to share it with you but also had to wait until the product was released for sale!  February 4th is the day and here I am!

Stampin'Up! is all about coordination of their products and they've taken it to a new level this month!  You are already familiar with card stock, ink, markers, ribbons etc all in the same color but what about coordination of paper with punches?  Woohoo!

I hope you've noticed the new punches for sale in the new Mini Catalog and Sale-A-bration promotion!  We now have an umbrella builder punch, a tulip builder punch, two wonderful heart punches and a cute little mini flower punch. There are several stamps that coordinate with these punches but Stampin'Up! just upped the game by providing us a new Designer Series Paper pack called "Pleased as Punch" to coordinate with these punches. Here are some fun projects I made with this paper!


My first card combines the heart themed paper with one of the heart punches from the "Heartfelt" Bundle. I love these gorgeous colors, don't you!  I put them all on a Buffalo Check stamped background, stamped with Blushing Bride ink.


My second card features the Small Bloom punch which is a $100 redemption with Sale-a-Bration. There is a coordinating stamp set but it's fun to just play with the punch as well. I punched some flowers out of the "Pleased as Punch" DSP and then also punched some random flowers out of my Crumb Cake background.  Don't forget about our In Color Faceted Dots for a blingy accent to your blooms!


My next card features the "Under My Umbrella" bundle and Umbrella builder punch. I loved that there was even a way to punch out the umbrella handles - ingenious! Unfamiliar with the embossing folder I used? That's another $100 redemption with SAB, combined with a stamp set called "Power of Hope". It creates a rock slab sort of effect that I really love.


And, finally, the tulips!  I've already blogged about this punch several times but now there is paper to punch out that coordinates with it. I left this card blank regarding a sentiment which I sometimes do and then add one when I'm ready to send it out and can customize it for whatever occasion I need.

Here's a look at the Pleased as Punch paper up close!

PLEASED AS PUNCH DESIGNER SERIES PAPER

There are several more coordination products that went on sale today, mostly dies to coordinate with Mini Catalog and SAB stamp sets. Here's a link to the online store for more information and ordering:

Coordination Products Release!

Watch for future posts featuring these dies as I dive in and make more samples to share with you!

I hope you enjoyed my projects today - punches are a great way to up your design without a lot of expense or fuss. They are especially great if you are stamping with a group and need to share the supplies. It's easy to pass a punch around the table and everyone can use it!

Don't miss out on Sale-a-Bration and the Coordination Products!  They are only available until March 31st or while supplies last! Click on any of the pictures below to be directed to the online store!

Happy Stampin'!
Sarah

Monday, February 3, 2020

Thanks, Thanks and Thanks!

Hi Stampers!
Back to another week! This winter is going pretty fast. I can't believe we are into February already. Did you watch the Super Bowl yesterday?  We enjoy watching the game (sorry, not the halftime) but really enjoy the fun snacks we consume while watching!  I didn't have a favorite team in the game but I'm glad Kansas City won... seems like it was about time!

I don't know about you, but I go through a lot of thank you cards. I think it's great to cultivate a habit of gratitude and acting on it. It's so easy to think in your head that you are thankful to someone for something they did but how often to you actually say it aloud or even go a step further and send a thank you card in the mail?  Sadly, that's a lost art and courtesy for so many but I love to use my stamps, ink and paper to change that. I sell a lot of thank you cards as well so it gives me hope that others feel like I do!

I was low on my thank you card inventory so I spent some time beefing it up with retired paper, stamps and more. It's a great way to use old things that I still have plenty of and combine it with current products when necessary. Stampin'Up! is always retiring some products to make room for new ones so I have plenty of "old" stuff!  Here are some ideas for you to inspire you to hunt through your stash and see what you can do with some old stuff! You'll probably recognize some old favorites!


Thank you's come in various themes and styles and don't forget to make some that a guy would want to use for someone. They don't all have to be flowers, ribbons and bling!  I've listed any current products that you would be able to buy below. Click on any of them and it will direct you to the store for more information and to order! Did you know the only way you can get current Stampin'Up! products is through a demonstrator?  There is no physical retail location as we are a direct selling company. I would love to be your demonstrator if you live in the United States!  Contact me for all the details or simply start shopping! You will get a "thank you" in the mail too!

Be sure to stop back tomorrow!  There is a new line of coordinating products (mostly dies) that will be released tomorrow and I'll have all the exciting details!  Sale-A-Bration is 1/3 of the way done and there's tons more fun coming your way all the way to the finish line of March 31st!

Happy Stampin'!
Sarah