Independent Stampin'Up! Demonstrator!

Hey friends!
I've been a demonstrator with Stampin'Up! since 2011. I'm located in Bozeman, Montana, but have customers all over the country. I have a very fun and active downline called "Big Sky Stamper Stars" and we get together in person and online to share what we love. My blog posts feature what I'm up to recently and I try to share new product information, tips and tricks and creative inspiration. You can shop from this site or find out more information about our products and becoming a demonstrator! Thanks for stopping by!

Monday, February 27, 2017

More Beautiful You

Hi friends,
Today I'm going back to my favorite stamp set from the Occasions Catalog, Beautiful You. This stamp set has so many uses. If you are on Pinterest at all, you have seen it explode with ideas using this stamp set!  Here's mine today:


This is a rather simple card and it works because of the paper I stamped on. It's from the "Serene Scenery" DSP paper stack and I've used it alot.  I wanted this woman to look like she was walking on a beach.  I embossed the background piece to give the card a little texture and then used our fabulous Stitched Shapes framelits for my sentiment cutout. Like I said, super easy.....

Cards don't have to be over-the-top complicated to be impressive. Sometimes the color scheme is what makes a card, sometimes the stamp set, sometimes the paper you use, etc. That's what design is all about; putting together elements that seem to belong, don't detract and instead, enhance your project.

Hope you Monday is off to a great start!
Happy Stampin,
Sarah

Friday, February 24, 2017

Perfect Birthday card for a guy - Balloons and Tools!

Hi stampers!
I have a great masculine themed card today... just what you need and often don't have! How's this:


There is alot going on here so I'll try to do a good job of sharing the details!  First, I embossed some silver foil duct tape with the hexagon folder. The tape is found at a hardware store and is adhesive. I think it is used in the plumbing/furnace industry. It embosses like a dream and after the backing is pulled away, adheres perfectly to card stock.  Next, I stamped and die cut a hammer and screwdriver. I also colored them with markers and watercolor pencils.  I then used my balloon punch to punch out some balloons and using some red baker's twine, tied around the tools with the string, then made it look like the strings are hooked onto the balloons.  I finished up with stamping and some screw head embellishments. I love the way this card turned out. It's a happy card with happy colors and of course, balloons!

I always wander around hardware stores if I'm there with my husband and look at what products could be used for a card. Crazy, I know. It kills the time and also gives me great inspiration!

Have a great weekend and stay crafty!
Sarah

Thursday, February 23, 2017

Beautiful, Glimmery Dragonflies

Hi Stampin friends!
We have some new Sale-A-Bration products to enjoy and my favorite is the new glimmer paper!  It comes in four 6 x 6 sheets of Mint Macaron, Bermuda Bay and Sweet Sugarplum!  I couldn't wait to design a card using this fabulous paper:


Isn't that amazing?  I used my favorite dragonfly thinlit, a set of 5 dragonflies all hooked together so it's actually only one cut. I decided they needed some pearls too - haha!  I also want to draw your attention to the sponged Mint Macaron piece underneath the dragonflies.  This is our Irresistibly Floral Specialty Designer Series paper that we used a sponge brayer on with some Mint Macaron ink. It's an amazing way to ink up some paper in a subtle way, with any color you choose. Other than the glimmery dragonflies, I think what really makes this card is the color scheme... a soft mint green and luscious sugarplum light violet. I also never waste an opportunity to use my "Vertical Greetings" set. You will get sick of me referring to this wonderful set that gets your sentiment across vertically rather than horizontally!  I use it all the time!

Hope you enjoyed my dragonfly card! See you tomorrow!
Sarah

Wednesday, February 22, 2017

Cupcake Truck

Hi friends!
I want to share a card that was recently done in a couple of my classes. It features the free Sale-A-Bration stamp set, "Tasty Trucks". I love this set!  So fun to build whatever them from tacos, cupcakes, hotdogs, pancakes etc. Food trucks are popping up all over and this fun set picks up on that theme.   Here's the card:


This gorgeous Succulent Garden Designer Series Paper provided my color scheme, gray and coral. We cut out the window of the truck by hand and punched a 1.25" hole in the gray background so the window showed the floral paper behind it. The cupcake punch is retired now, but you could put anything in the window of your truck. We added some diamonds on the cupcake and wheels for some bling.  Fun card for a fun birthday!

Don't miss out on this stamp set! It is only available for free with any $50 purchase until March 31st. Think I'll go follow the next cupcake truck I find and try out their samples!

Happy Stampin'!
Sarah


Tuesday, February 21, 2017

Ink on acrylic blocks!

Hi friends!
I'm back today with another inking technique that you will love!  This is so easy and it doesn't require anything you don't already have at your fingertips... acrylic blocks and ink pads! Here's my card:


To make this beautiful watercolor like design, I took our "Block E" acrylic block which is a little bigger than 3x4" and rubbed ink on the block directly from the ink pad. I started with the purple, then the orange and then the yellow. The inside color is a little trickier to apply as you don't have an edge to swipe the ink pad off of, but it still works! After the block is completely covered with ink, I squirted water on it with a mister about 5-6 times and then flipped the block over and quickly applied it to watercolor paper. I applied pressure for about 30 seconds to let the ink/water really soak into the paper and then lifted up the block. You will get a completely different result every time you try this depending on the amount of ink and water but it is really fun to try. I let the whole thing dry and then stamped the bridge on top with dark purple. You could trim your piece down to cut off the white edges, but I left them as sort of a mat effect.

Here's another card, same idea, only I applied ink to the acrylic block with markers, not ink pads. The look is more subtle and blotchy, not striped.


Because I used a marker here, I could place botches of color wherever I wanted.   You should try this easy and visually stunning technique on your next project!  It's so fun!

I love all the subtleties and variations of this hobby. That's what keeps me inspired and motivated...figuring out how to do something I haven't done before!

Today's February 21st and that means the 2nd half of Sale-A-Bration is here!  We have three new freebie products that are available with any purchase of $50 or more. Here's a peek:

2nd release SAB

Have a great Tuesday!
Sarah

Monday, February 20, 2017

A different twist on layering!

Hi there stamping friends!
I hope you had a fabulous weekend!  Our weather was a mixed bag so it was good to have some indoor and outdoor plans. And now it's a Monday again.... I just ran a ton of errands and am ready to be home.

I thought I would share some cards this week featuring some ink techniques. None of these are new, but new to my customers that showed up at my recent class.  Here's my card and I want you to see if you notice something very unusual about the layout:


A sharp eye will see that the card itself is smaller in width but longer than the first layer. the first layer is wider and shorter. This all came about because of some already cut and scored card stock that was only about 3-1/2" wide!  I decided I could still use it for a card and just make the front of my card wider. I loved it!  The inking technique used on this card is spritzing the ink on shimmery white cardstock using our SU spritzer and my ink concoction of 5-6 drops of ink, Bermuda Bay in this case, from a reinker bottle and topping the tube of the spritzer off with rubbing alcohol. It's a great way to cover some serious territory on the surface of your project and really fun to do. You can make any color blend with reinkers and rubbing alcohol. I used the Avant Garden stamp set, a Sale-A-Bration freebie! If the stems on my flowers look hand drawn, they were!

It's great to try new stuff and see what happens!  Check back all week for more about ink!

Happy Stampin'!
Sarah

Friday, February 17, 2017

Surprise Birthday card!

Hey Stampers!

At the risk of sounding a little crazy, I have to tell you that sometimes I actually "dream" a card idea. It happens at least once a month and it can vary from lots of details to a vague image to solving a problem I've been wondering about. This has happened to me for years. In fact, I figured out how to "cast off" with knitting in a dream. Anyway, I don't really question the whole thing and the rest of my dreams are crazy enough that I don't really put stock in them at all, but if a dream gives me a great design idea, I try it!

That is the origin of today's card. I want to show you the card, then I'll explain it!


I was excited to try the Balloon Pop-Up Thinlit die, but I had a little different twist on it. This is where my dreaming came in.  Here's the die set:


I could figure out what every piece was except this:


I knew I could get the answer via Stampin'Up!'s Youtube videos, but I wanted to try to figure it out myself. I must have been really wondering about it all, because that night I dreamed this was a hinge.  It sorta looks like a hinge on a cabinet door, doesn't it.  Then my dream exploded into this hinge idea for a card. The front layer would actually hinge on the card and swing open to reveal a surprise and then the card would open to reveal even more!  Here's the rest of the pictures to help you understand!


What a fun card to make!  I had to use some heavier paper for my first layer but love how this turned out.  It ended up being a great way to use this die in an out-of-the box moment.

I hope you've been inspired!  My designs are relatively easy for all levels of crafting experience and will bring you lots of creative fun!

Have a great weekend!
Sarah

Thursday, February 16, 2017

Sleeping Baby

Good morning from Bozeman!
We had an incredible sunrise this morning... I captured it all on my I-phone and have some pictures at the bottom of my post... sooooo pretty. My artistic efforts pale in comparison to the original Creator, God.

I have some baby cards for you today. I'm not completely thrilled with them as I think they are lacking but I haven't figured out exactly what they are lacking. That just encourages me to try again! Here they are, a girl and a boy:


The more I look at these, the more I think they are fine, but nothing out of the ordinary.  I would like to do a better job with coloring, get more shading in there. I used the Watercolor pencils and then blended the color with a blender pen, but it's not very shaded at all. I stuck with the star theme by using the star embossing folder and also some metallic enamel stars. The ribbon is the free product ribbon in the Sale-A-Bration brochure, available with any $50 purchase. What do you think?  What should be done to jazz these cards up a little...maybe some layering? I'd love to hear your thoughts!  We can all learn from each other....

Let's move on to something that is truly gorgeous... today's sunrise! I took these pictures from our deck and honestly, I never get tired of the view!


Now that's some glorious art!  Have a good day!!
Happy Stampin,
Sarah

Wednesday, February 15, 2017

Sometimes you need to apologize....

Hey Stampers!

If you've ever had the notion that greeting cards are old fashioned, you need to reconsider your notion!  Alot of rubber stamp companies are very trendy with the culture, in a good way. They use phrasing we've all heard and express thoughts we would say out loud. Today's card is a great example of that:


This really couldn't be any more simple, but that is what is called for with an apology... just a straightforward SORRY.  None of us like alot of excuses, frills, rationalizing, etc. We want to get to the heart of the matter and honestly, apologizing isn't fun but oh, so necessary!  This card makes the point in a simple and direct way.   I used the "Nailed It" stamp set and some Moroccan Designer Series Paper. I hope you notice the awesome adhesive "screws" at the top, a great embellishment that goes with this set.  The other thing I did was layer two colors/styles of ribbon, a wider one under a more narrow one.

That is pretty short and sweet, just as it should be for this type of card. My supplies are listed below if you are interested in any of the products I used to make this card!

I worked on my March calendar of events/classes yesterday and it is very full!  Check it out at my Stampin'Up! website, the first click/pic on the right. Dates and times are subject to change as it gets closer to March, but I'm hoping to pull this all off!  Come and join me!

Have a great Wednesday!
Happy Stampin'!
Sarah

Tuesday, February 14, 2017

Wahoo!

Hi there Stampers!
I hope your week is off to a great start!  I have some projects I'm working on as well as a couple of classes this week so I know what I'll be doing. Happy Valentine's Day as well!  I got some cards off in the mail and have a couple of men to buy some chocolate for... my dad and my hubby.  Whatever your perspective on the day, I hope it's an opportunity for you to feel loved and be loving!

My card today is somewhat the result of an unplanned die cutting moment!  I have just gotten the Star Blast Edgelits die recently and wanted to try it. I had been using the Affectionately Yours Designer Series paper for something else and had a scrap on my table still, so wanted to use that color scheme. I then grabbed a scrap piece of Watermelon Wonder for the star blast cut. the die didn't fit square on the scrap of paper so I angled it as I cut it. My plan was then to square up the bottom with my paper trimmer. As I laid it down, I realized that the angled cut on the bottom would be a totally unexpected design element that I really liked, so, you guessed it, I left it alone.   Here's my card:


Moral of the story, never discount your unexpected twists and turns and think before you cut!  I like this so much better than what my original plan was. It's hard to see, but the metallic accents in the paper and behind the Wahoo piece are actually copper foil paper. This edgelit is designed to be a pop-up on a package, decor item or inside a card so I'll be trying that next!   Maybe even some sparkly glimmer paper... hmmm...

Back to the drawing board for me!
Happy Stamping',
Sarah

Monday, February 13, 2017

MOJO484 - Sweet Little One

I had so much fun playing along with the Mojo Monday blog last week, I was looking forward to Monday so I could do it again!  It's a fun challenge... there's a given sketch for your design but you can take it in whatever theme or color direction you choose. Here's my submission this week:


Here's the sketch so you can see what I had to work with:


It would have been super easy and obvious to do a Valentine card, but I wanted to think out of the box a little bit. What would call for a bunch of hearts?  How about a new baby card!  I chose the heart paper from the Falling In Love Designer Series Paper and a great baby animal stamp set, "Little Cuties".  I love how it turned out! Can't wait until next Monday!

Happy Stampin'!
Sarah


The Best Is Yet to Come!

Hey stampers!
I've been having alot of fun with the Balloon Pop-up Thinlit Dies lately. You can use them as intended, a pop-up in the middle of the card, or a stand alone piece on the top, which is what I've done today. I combined the thinlit with some fun paper from the Party Animal Designer Series Paper. Here's my card today:


I used Pacific Point card stock for my balloon piece and then cut away all the border so it's just the balloons and banner that are left. I overlaid gold foil and gold glimmer paper on top of the balloons and then hand cut out a banner.  This was super easy and has some many potential applications like graduation, retirement, new baby, etc. Anything that  calls for balloons works for this set!  I have some more to show you in the next couple of days so come back for more!

Happy Monday!
Sarah

Thursday, February 9, 2017

Memories AND Fun!

Hi Stampers!
Thanks so much for the comments and attention with yesterday's post focused on two different challenges. I'm trying to up my game a bit and that was fun!  I think it does force you to stretch yourself a little when you impose some "rules" with your design process and I look forward to more of that.

Today, no rules!  There is a particular stamp set in the Occasions Catalog that caught my eye right away, but I stalled a bit to buy it because I wasn't sure what I would do with it. I loved the concept and images and hadn't really paid too much attention to the sentiments. Then, I looked closer at the sentiments and had to have it!  It's called "Bookcase Builder" and has a very unique concept. Here's my card and then I'll tell you more about it!


Different, huh?  The stamp set includes a "shelf" stamp and then tons of things to put on your shelves to create an overall theme.  I knew I wanted the antlers at the top of my shelves, so I kept the theme somewhat masculine. My color scheme evolved... I picked Delightful Dijon for the trophy, Always Artichoke for the greenery, etc.  I started at the bottom and worked my way up, adding the next shelf when I saw how high it needed to be. I didn't plan this all out or use a Stampamajig, I just eyeballed the entire thing. I felt like I did really well with the exception of the floating bottles, they were not stamped low enough on the shelf ;)  I was going to start over, then I decided it's good for you to see my flaws (they happen a lot!) and relax about the need to have everything perfect.

For my background, I chose the newest embossing folder, "Hexagons Dynamic Textured Impressions Embossing Folder".  Before I embossed, I did ink up the raised side of the folder with some black ink just to see what would happen. I loved the effect! I wanted to get a tad more blue in there so chose some washi tape from the Moroccan Designer set and added some Metallic Enamel shapes.  Don't you love the sentiment!  I think that is the perfect way to say that in the midst of plans and dreams, life happens and it is wonderful most of the time. The older I get, the more important all my memories are to me!

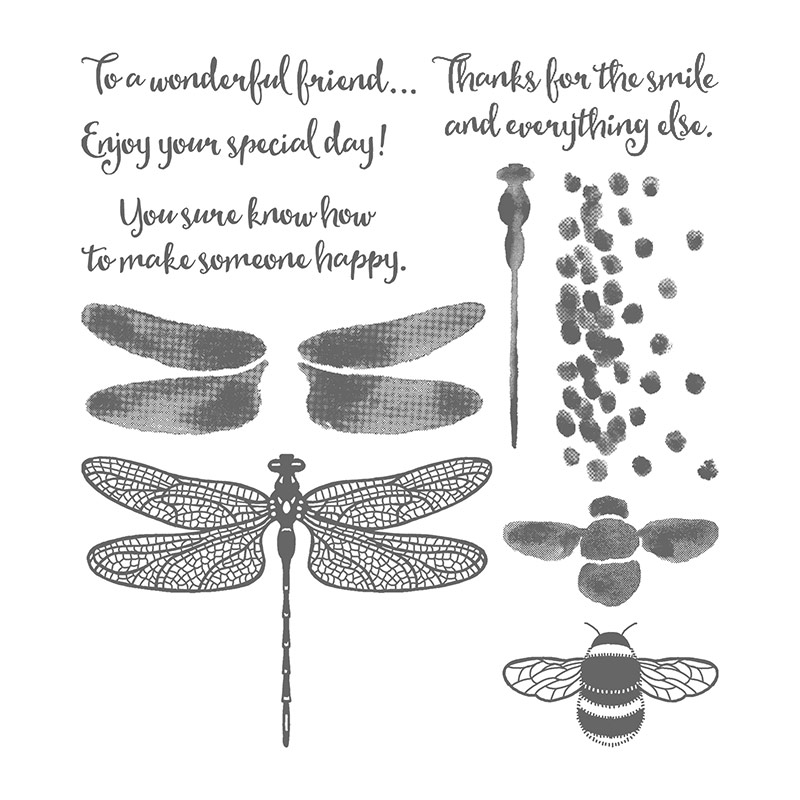
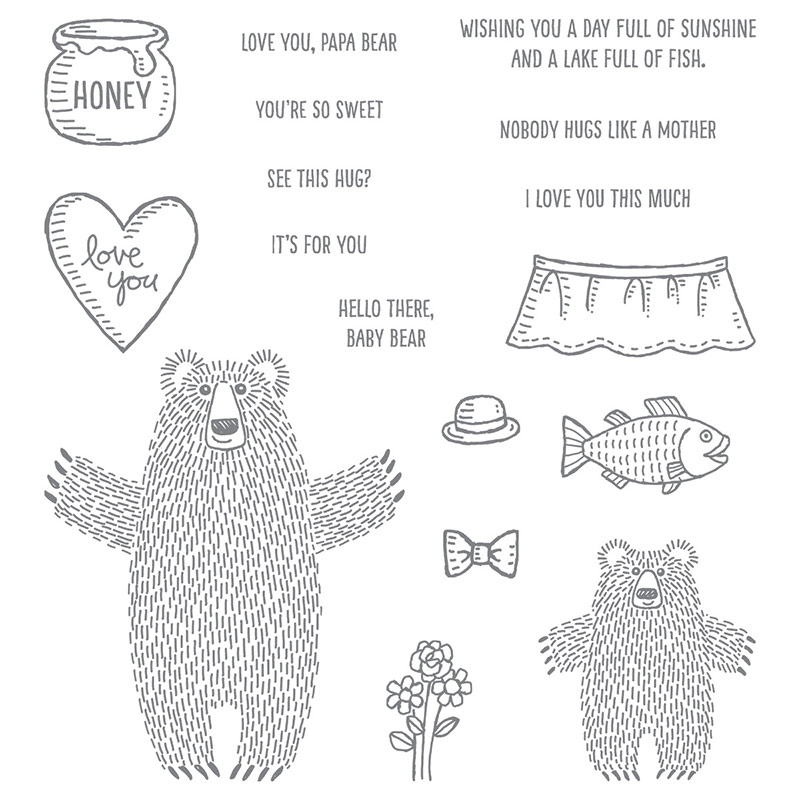
Here's a close look at the stamp set so you can see all the possible ways to take this bookcase idea!


I hope you are inspired today and can think of some ways to build your own bookcase!  I'm anxious to spend some more time with this fun set!

I want to invite you to follow me on Pinterest!  I pin all my cards as well as many from others that I like. I even pin some cards that I don't have on my blog so take a look!  Here's a link:

Pinterest - Sarah Cade

If you scroll to the very bottom of my blog posts, you will see a Pinterest icon and if you click on that, you can easily pin the pictures featured in my blog post.

Happy Stampin'!


Wednesday, February 8, 2017

Two Challenges in One

Hey Stampers!
I'm curious... have you ever heard of card challenges in the papercrafting world?  Have you ever participated in one?  I have observed them from the sidelines for a couple of years now, not feeling like I had the time to think it through and participate.  With my new found unemployment?/retirement? I decided I should give it a go.  One challenge I particularly like is called Mojo Monday. Their challenge changes each Monday and revolves around a particular layout design that you are required to follow.  Another challenge that has intrigued me is a color challenge where you are to use specific Stampin'Up! colors.  Once I decided to go for it, I decided to jump in with both feet and combine both challenges... a Mojo Monday design with Color Challenge colors. Here's my card and then I'll give you some more details:


The Color Challenge was from Splitcoast Stampers Tuesday Color Challenge. This week it was black and Real Red. I needed a valentine for my hubby so that's where I went with it.   Here's a link to that site:

Splitcoast Stampers color challenge

The layout from Mojo Monday was very specific. Design layouts give you the skeleton of a design and you are free to incorporate what you want for a theme, colors, etc.  Here's the link:

Mojo Monday

I enjoyed my first attempt and plan on doing this some more... maybe several times a week if I can. My goal is to progress in my design/color/technique skills as an artist and card maker and pay more attention to what the rest of the world is doing in this hobby and learn from them.

Let me know if you decide to try a challenge!  It's fun!

Happy Stampin'!
Sarah


Tuesday, February 7, 2017

Scooping up some Birthday Wishes

Hey Stampers!
Today I'm combing a most popular reason to send a handmade card with a most popular theme  - Birthdays and  Ice Cream!  Kids of all ages love both so it's a natural combo for a card. Stampin'Up!'s Tasty Treats suite makes it easy!  Here's my card:


As you can see, this is full of color and yumminess. My Designer Series Paper background choice is a specialty paper with the ice cream treats glossy and embossed right on the paper.  I used a small strip to make it go further but also to leave me some room on the edge for a sentiment. I kept my dish of ice cream with three scoops simple by using plain, coordinating card stock so there wasn't a fight with the background for attention. The cutest part of all is the silver spoon cut out of Silver Foil paper.   Just for fun, I added some washi tape too!  Are you wondering about the sentiment?  This is such an important stamp set to have... why?  Because the sentiments are VERTICAL!  This is so rare in stamps and I promise it will open up your design options to a whole new level!  It is the "Vertical Greetings" stamp set found in the Annual Catalog on page 109. Here's a look at this wonderful stamp set:


The classic topiary style trees are wonderful, but it's the greetings that make me love this set. They are narrow and vertical... perfect for the edge of any design! This is a must have!

I hope you like my card for today!  I'm excited to be spending a lot of time in my stamp room this week to come up with more blog samples, class ideas and just plain fun! Is there a particular type of class you wish someone would offer? Let me know your ideas and I'll see what I can do. I love stretching myself and figuring out new things.

Hope you have a lovely day!
Sarah

Monday, February 6, 2017

Thanks for the smile ;)

Good morning!
After a fun weekend, I'm back with some crafting goodness for you!  We did watch the Superbowl, were rooting for the underdogs and now you probably know what happened... Oh well! It's all over for now.

I've been playing quite a bit with new product from the Occasions Catalog and am sharing some ideas as I go. There are so many possibilities with each stamp and framelit set, it can be overwhelming!  Here's my latest creation:


I revisited the "Falling In Love" Designer Series paper and also the Dragonfly Dreams bundle. I love this paper-- it creates the Bokeh art style that is so popular in soft pink and taupe tones. It's a little difficult to tell, but I used copper foil sheets for my metallic and copper thread as well. If you look closely, you can see that I have a double layer dragonfly. The bottom layer is a dragon fly stamped with Soft Suede on Sweet Sugarplum card stock and cut out. The top layer is a detailed dragonfly cut out on the copper foil paper... again a bit of an experiment. I think vellum paper would have some nice options too with this set.

Have you tried the dragonfly set yet?  It's great!  Here's an up close look at it:


As you can see, you can create a very detailed image or a more watercolor type image with the dragonfly and the bee and also use for 2 step stamping ideas.

I'm getting ready for some classes this week. Check out my calendar on my SU website and see if any of them work for you!  I'd love to see you!

Happy Stampin'!
Sarah

Friday, February 3, 2017

Yummy Monster

Hi there stampin' Friends!  Yahoo, it's Friday!  I have a leisurely schedule for the weekend so am looking forward to that!  We will watch the Super Bowl, but couldn't care less about the outcome. Our favorite team, the Vikings, are never in the Super Bowl - haha!

I decided today was a great day to post the following card because of all the yummy treats and dishes that will be consumed in honor of a football game.  We do like our traditions, don't we!  Here's my card:


I bought this stamp set because I don't have many children-appropriate themed stamps and wanted to beef up my meager supply. I thought this monster was cute and friendly, not scary.  This would make a perfect shaker card with a window in the stomach, but I decided to go back to watercolor pencils and coloring. I used watercolor paper, watercolor pencils for color and my blender pen to blend the color a bit. If you're wondering where I found that background Designer Series Paper, it is from the "Party Animal" set. Isn't it cute with the cake, forks and candles!  I did hand cut out the monster, rather quickly, and not with any eye to perfect edges.  I guess nothing everything can come with a perfectly shaped framelit, right?

I hope you are enjoying my blog and the ideas I'm throwing at you for your inspiration. My cards are designed with an eye to being accessible to any level of crafter, not too detailed  to bog down and not extremely layered to end up un-mailable. A certain level of "cuteness" also helps!

Have a great weekend and see you back Monday!
Sarah

Thursday, February 2, 2017

Bear Hugs!

Hey Friends,
I have a great idea for you today. It's a way to show love at Valentine's Day or anytime and it involves a hug. What could be better than that?!!  Today I'm featuring the Bear Hugs stamp and framelits  These were first introduced in last year's Occasions Catalog and were so popular, they have been kept around for another year. Maybe they will even last yet another year, who knows!  I love the bear with his wide open arms, ready to hug!  There's also a baby bear and some fun accessories to stamp and cut. Here's my card:


I also chose to keep the color scheme simple with two contrasting colors, Watermelon Wonder and Tip Top Taupe. My washi tape and taupe paper are retired, but the rest of the card is current! If you wanted to add some further dimension to this card, you could stamp the bear on some Tip Top Taupe cardstock and die cut it out and pop it up as well as the heart. All sorts of possibilities! I thought you would like a close up look at this fun stamp set, so here that is:


Thanks so much for stopping by to take a peek at my card today! This is such a fun form of art and I love sharing it with you.  What have you been up to lately?

Happy Stampin'!
Sarah

Wednesday, February 1, 2017

Love of a Lifetime!

Good morning stampers!  It's Wednesday, that wonderful half-way point of the week, where there's still time to tackle some things but also start looking forward to the weekend. I have some great Designer Series Paper to feature today!  It is absolutely gorgeous and my camera skills do not do it justice!  Here's my card:


The paper comes from the "Falling in Love" DSP set and is an array of soft pinks and blues on one side and taupe monocolor images on the other. I loved this one because it seems to have ice crystals on some delicate branches.  To add some sparkle, I applied my clear Wink of Stella pen to the branches, again, difficult to see in a picture.  I stamped my sentiments right on the DSP and then embellished the card with some ribbon, pearls and fern-like branches. I love the sentiments!  They are from the "Falling for You" stamp set.  This card could be altered with any color scheme. You have the neutral color paired with another color-- blues, greens, purples, reds, etc. I chose Sweet Surgarplum, one of the new In-Colors this year, because it hasn't received a lot of attention from me! I hope I've given you some inspiration on a way to feature the background paper in your design.

We are getting close to the halfway point of Sale-A-Bration!  Don't forget to put together an order and if it totals at least $50, you can choose a free item from the SAB brochure!  Three new items are coming soon, February 21st to be exact. Two of them are additional stamp sets and the last one is a pack of 6 x 6 glimmer paper assortment that is gorgeous!  More details soon....

Happy Stampin' and Happy Wednesday!
Sarah