Independent Stampin'Up! Demonstrator!

Hey friends!
I've been a demonstrator with Stampin'Up! since 2011. I'm located in Bozeman, Montana, but have customers all over the country. I have a very fun and active downline called "Big Sky Stamper Stars" and we get together in person and online to share what we love. My blog posts feature what I'm up to recently and I try to share new product information, tips and tricks and creative inspiration. You can shop from this site or find out more information about our products and becoming a demonstrator! Thanks for stopping by!

Sunday, March 31, 2019

It's the Last Day to Sale-A-Brate!!

Hi friends,
And just like that, 3 months have gone by, full of fun and stamping. Stampin'Up!'s biggest promotion of the year ends today!  I wanted to remind you why you don't want to miss out.  There's still time to get some of the exclusive Sale-A-Bration products that can only be obtained by submitting an order. With every $50 increment, you get to choose a SAB freebie and there are tons of things left to get!

The best way to remind you is to show you so here are some of my favorite SAB products, used in cards!


All of the cards have been featured on previous blog posts in the last 12 weeks. Please ask me if you have any questions and need product information!

And, here's where to go to see the specific SAB products!  I'm around today if you need to chat about an order, or you can shop online at your own convenience!

SALE-A-BRATION FREEBIES!!

I hope you are having a great weekend and I'll be back tomorrow with some exciting new product information which deals with the huge topic of storage for all our wonderful stamping supplies!

Thanks for stopping by!
Sarah

Friday, March 29, 2019

Combining old with new, or you really should clean out your craft supplies once in awhile ;)

Happy Friday!
That's sure to put a smile on your face! Whatever your week has looked like, we are on the edge of the weekend and that is everyone's favorite.  Are you intrigued by my blog post title today?  I am in the midst of deep cleaning my craft room/supplies for an annual garage sale of craft supplies that I have in April. It's a good time for me to purge things I no longer want or need and even forgot I had. Today's theme is under the "forgot I had" category! 

In past years, I've bought Stampin'Up! kits or note cards and not used all of them. I found a stack of particularly wonderful notecard pieces from a Sale-A-Bration probably 4 years ago at least and also some background "post card" type pieces from a guy's kit that goes back even longer. Who know why I didn't use all the supplies at the time, but anyway, buried deep, were these pieces of heavier, almost water-color like paper with patterns and designs on them. I was so excited I immediately cut them into smaller pieces and made cards with some new stamps!I had a great time watercoloring on them, embossing them and stamping them. Would you like to see?


First, here's my stack!  I got a good supply of cards out of some random left over kit paper pieces and some new stamps with new cardstock bases!

Here's the details!


For now, I'm not going to take the time to list all my supplies. I think you can guess what stamps I used and the whole point of this post is to encourage you to dig deep, see what's lurking under the top layer of your stuff and see if you can't repurpose it in some way. I promise you will feel like you lost #10, climbed a mountain and had a spa day all at once, hahaha! We all carry at least a tiny bit of guilt about the craft supplies we have purchased but not used in years or EVER.  This will go part way in assuaging that guilt and you get some pretty cards when you are all done!

This was so inspiring I'm going to keep cleaning! I'll let you know what other "treasures" I find and what I did with them.  Until next time, don't forget this is the last weekend to Sale-A-Brate!  Shop online for easy ordering or contact me! You can also still join as two more people did yesterday!  We are the Big Sky Stampin' Stars and we are growing like crazy!

Happy Stampin',
Sarah

Thursday, March 28, 2019

Pressed Flowers

Hi Everyone~!
How are you doing today?  We are bracing for another winter storm but so far, it is late.  Maybe it got lost? Maybe it stayed in Canada?  Who knows! I don't mind as I have several errands to run and don't want to be slowed down by yet another dump of snow.

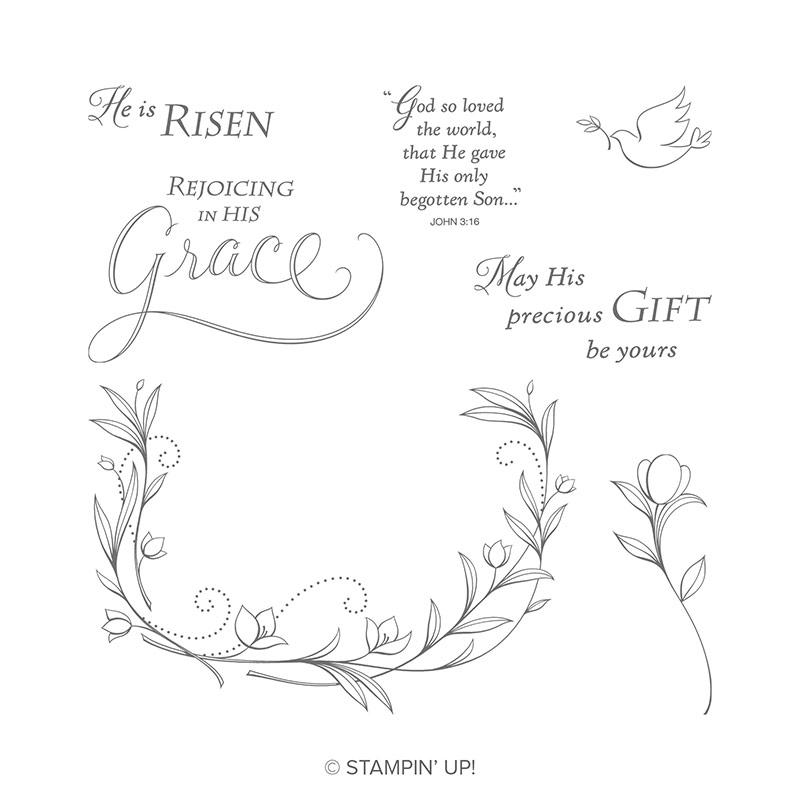
Naturally, all that has me thinking about spring again!  It's pretty hard at this time of year, not to wish for the sight of green grass and flowers. Today's blog post are all about flowers!  There is a great sketchy-sort of flower design stamp in the Annual Catalog Hostess Stamps section called "Pressed Flowers". They are fun to work with because they almost look hand painted, which of course makes me really feel like an artist!  Here we go:


I used one of my favorite techniques on my first card, stamping and then embossing the finished stamped product. I love the additional texture it adds.  I also used Stampin'Write Markers to color my flower stamp, Night of Navy for the flowers and Mossy Meadow for the stems. That is a simple and awesome way to multicolor a stamp. I also used the "Darling Label" punch from the Punch Box Tin featured in the Annual Catalog.


My second card employed another favorite technique. I did all my stamping of the leaves, flowers and burlap-like border piece, then stamped the entire piece with the Crackle Paint background stamp. It's a little scary to stamp over your work, so test the saturation of the ink by stamping on some grid paper first and see how dark your ink is. If it's too dark, stamp off first on the grid paper and then stamp your project.  This card features the much loved and soon-to-be retiring Tranquil Tide and Fresh Fig inks. Boy have they gotten a work out over the past two years, from everyone!


For this card, I went a more vintage route with "burned edges" using some Soft Suede ink and a dauber. The sentiment is from the "Around the Corner" stamp set, also in the Annual Catalog and the swirly border is from the "Lovely Lattice" set, a Sale-A-Bration freebie. There's still time to get some freebies, one with every $50 purchase, until Midnight, March 31st! Did you notice the embossed background Merry Merlot card stock?  I used "Quilt Top" embossing folder!


Lastly, I wanted to show you a card that my downline team member, Sherry Heis made, for a recent swap we participated in. Her card reminded me of this set in the first place and inspired me to see what I could come up with. She put a ton of layers and work into her card and framed the flowers with a light stamp of Soft Seafoam ink using the Bokeh Dots stamp (a huge favorite of mine).

This is the magic of stamping!  A fairly simple stamp set can make projects look so different through the use of color, layering, texture and design. All those elements combine in a way that is pleasing to look at and so satisfying to create!  For most of us hardcore stampers, the process is just as valuable as the end product!

You can purchase this stamp set with our "Stampin' Rewards" program. Once you have a $150 order, your own or a combination of other customers, you start earning 10%  of the total back in money to use on any products, but especially valuable to purchase "hostess stamps" with.  These stamps are priced at about half the regular price to reward those with larger orders.  With Sale-A-Bration winding down, you still have time to benefit even more from a large order!  Take stock of your adhesives, envelopes, reinkers, cardstock, etc and see where you have some gaps. Maybe you have enough restocking to do that you will get to that $150 threshold and be able to earn SAB freebies as well as purchase some hostess stamps!   If you've been following my blog for awhile now and haven't jumped in, just contact me and we'll start a conversation about the best approach for you. I can help you work within a budget, focus on a specific project or just diving into this super fun hobby. Believe me, no brilliant art skills are needed to stamp. You just have to like to "put things together" and create something out of a bunch of supplies, tools and ideas.  And, did you know it's perfectly okay to copy what someone else thought of?  That's why there's Pinterest and blogs like mine!  We want to share our ideas to inspire you to try it as well and perhaps come up with some of your own.

Thanks for stopping by!  Your interest in my work is so appreciated and keeps me wanting to make more!
Happy Stampin',
Sarah

Wednesday, March 27, 2019

Spring Into Easter!

Hey Stampin' Friends!
Have you realized how late Easter is this year? That gives you lots of time to still make some Easter or spring-themed cards, right?!  I had a class yesterday featuring that theme and we really had fun!  I thought I would share those cards with you today. All of these were made in about 2 hours, including a fun little treat basket.


For the first card, we went to an old favorite bundle, "Hold On To Hope" stamps and "Crosses of Hope"  framelits. These have been around for 2 years now and I hope they stick around for awhile longer!  Anytime you need to make a faith-related card, they are a good go-to set.  We cut the cross shape out of our background Designer Series Paper (Wonderful Romance set) so the card stock would show through behind the elaborate cross.  We raised the cross, which was cut out of copper foil paper, with a single dimensional in the middle of the cross. We later covered this up with strategic placement of the purple floral piece. This was a fun card to make!


Of course, no Easter themed class would be complete without the adorable bunny from the "Fable Friends" stamp set!  He couldn't be any sweeter and easy to color with the Stampin' Blends.  My sentiments were from the Sale-A-Bration coordination set, "More Than Words". It's a versatile set that will cover an entire year of good wishes. This is only available during Sale-A-Bration which ends on Sunday, so be sure to order yours if you want it! Curious about the tall grasses?  Those came from the stamp in the SAB rooster set, "Home to Roost".  I love the added layering effect we got by doing some shadow stamping, i.e. Ink once, stamp 2-3 times!


Our 3rd card also used the "Fable Friends" stamp set. This card features the Mother goose and her babies. We stamped them in Early Esspresso on Soft Seafoam Card stock and then embossed the card stock with the Subtle textured embossing folder. These creates a linen-like feel to the paper. The flowers are from the "Pop of Petals" bundle found in the annual catalog. There are several flowers and leaf images as well as a coordinating punch.  It's hard to see, but we also used Wink of Stella sparkle ink on the flowers as well.


Our final card was one I featured in a blog on Monday, so I won't go into more details here. They loved the chance to use this wonderful stamp set, "His Grace".

Here's a quick pick of our Easter baskets too.  I saw this technique on a Ronda Wade video by the way!

I think most everyone is looking forward to spring arriving soon, hopefully, maybe!  Here in Montana, we are supposed to get 3 more days of snow this week so spring lives in our hearts and our crafting creations for now, not in our yards or gardens, haha!  My supplies are listed below if you want to check out what I used for these cards. A click on any one of them will take you to the online store where you can place an order. Anytime you hit a $50 increment during Sale-A-Bration, you will get to choose an SAB freebie!  There are still lots of great products available and this promotion doesn't end until Sunday at midnight!  If you're sitting on the fence about placing an order or joining as a demo (fabulous deal - Get starter kit for $99 and choose $175 worth of product), jump in!  This promotion won't be back until next January and while it's always a good time to shop and join Stampin'Up!, this is the best time!

Hope you are dreaming of spring or even experiencing it, wherever you are!
Blessings,
Sarah

Monday, March 25, 2019

His Grace - an Easter Stamp set!

Hi Stampin' Friends!
I am having such a hard time getting my groove back after spring break!  I read some good books over the break and now all I want to do is read, take naps and read.   I need to break my spring break!  I did spend some time in my stamp room today in hopes of finding my mojo. I think it's been misplaced temporarily but I know it will pop up soon. Whenever I am feeling uninspired and uncreative, I remember some advice I saw on Facebook or somewhere that was just start... just start with something. At least that will get back into your groove and who knows when the inspiration will hit, but you are in your groove.

I decided to make a card with an Easter set that I've actually sold quite a few of, but hadn't played with yet!  It's called "His Grace" and is on page 30 of the Occasions catalog. It's a sweet set if you like to celebrate Easter in a religious way. Bunnies and chicks are super cute, but they are not the real meaning behind Easter!  Here's what I did:


I specifically chose Balmy Blue for my flower colors as I had already done several things with pinks, yellows and purples. I stamped the leafy/vine image on the left and the right. They make a super nice border for the sentiment.  For my die cut leaves, I used the "Bouquet Bunch" die set and for my sentiment, I used one of the "Floral Framelits" dies.  I colored with the Stampin'Blends alcohol markers which are the most fun tool to come out in a long time!  After I was finished stamping and coloring my background piece, I ran it through the Big Shot with the Subtle embossing folder. This gives a linen-like texture to your paper which is so beautiful.

I hope to make some more cards with this fun set, but at least it got me out of my creative doldrums! I thought you'd like to see the entire set:


That gives you a good look at several possibilities for sentiment stamps and more. I think some of these could also be incorporated in a Christmas card as well.

If you need an Easter idea, there are some pretty samples in the catalog too. It never hurts to check out other ideas when you are stumped for your own!

This is the last week of Sale-A-Bration for 2019!  It has been amazing for me and many of my customers and team members. It's not too late for one last order or if you've been sitting on the fence with joining Stampin'Up!, go for it!  We have a fun team of very creative women who would love to get to know you, no matter where you live.  Contact me for all the details and see if that's a good option for you!

Off to go find my mojo....
Sarah

Friday, March 22, 2019

Very Vintage - A Hostess Stamp Set!

Hi Friends,
I hope you are doing well!  It's Spring Break time here in Bozeman and I just got back from a fun road trip with one of my daughters to the Pacific Northwest!  We got to see friends and family on our journey as well as some of our favorite places when we go out there. Spring is a beautiful time out there, especially with the warm weather and flowers and green grass - all unheard of here in Montana!

I took a brief break from blogging to enjoy my time away and now I'm back with some new energy and ideas.  The flowers I saw inspired me to choose the "Very Vintage" stamp set to blog about today!  It's the first hostess set that I got, way back last summer when this current catalog first came out. I love the vintage look, which I take to mean plenty of botanicals, muted color schemes, faded out images, torn edges, etc.  I hadn't given this set any love in a long time so played with it recently and want to share some of my ideas with you!


For this first card, I worked mostly with Grapefruit Grove and Early Espresso colors.  I used two different sheets of Designer Series Paper, from the Painted Seasons set and the Nature's Poem set. This stamp set also has a stamp coordinating with the punch from the "Darling Label" punch box product. It's perfect to frame small sentiments.


For my second idea, I decided to go full out vintage!  I have roughened the edges of my card, sponged them with some Soft Suede ink so they look aged and possibly burned and then used some muted colors of Tranquil Tide, Fresh Fig and Crumb Cake.  I even used a retired punch that puts a notch in the corners!


For my last card, I wanted to use shades of purple. There is an awesome Highland Heather sheet of DSP in the Needlepoint Nook set that worked just right!  I kept this fairly simple and monochromatic. I also used the same punch for my sentiment as I did in the first card.

So, to obtain a hostess stamp, whether or not you host a party, all you have to do is place an order exceeding $150 and you will have $15 in hostess dollars to spend on any product of your choice. The hostess stamps are located in the back of the catalog and can only be purchased with hostess dollars. They are unique and reserved for customers/hostesses who place larger orders.  I always love to look at them and see what I "have to have" and then plan my purchases accordingly.

We will be down to the last week of Sale-A-Bration soon!  I've had an awesome first quarter of 2019 and am so grateful to all of you who submit orders, join my team or just be my friend. You are making my days full of inspiration and beauty and I sincerely appreciate it!  It's not to late to get in a last order or even sign up as a demo. I can walk you through it on the phone so you can live anywhere in the United States and still be part of my fun team. We have a private Facebook group, lots of training and of course you will have access to the whole Stampin'Up! network of groups, social media platforms, specials and insider news and promotions. It's so fun to be part of something that you enjoy doing anyway!  Contact me for all the details. It's costs $99 to sign up by purchasing the Starter Kit, filled with $175 worth of product, all your choices. From there, you can stay active by meeting a $300 a quarter minimum quota of orders/purchases or you can become inactive and go back to being a customer. It's all your choice and you can easily do whatever works for you.

It's good to be back! Thanks for stopping by!
Sarah

Friday, March 15, 2019

Floral Frames

Hi Stampers!
Have you ever started your day without your keyboard working?  I'm old-fashioned and still do most of my computer work from a desk top and a monster-sized keyboard. Today, I had nothing.... However, I did remember the ol' unplug and plug it back in trick and for some reason, everything is back to normal and all is right with my day - whew!

It's spring break time here and one of my daughters and I are excited to hit the road for an impromptu road trip to Oregon and Washington. We will be seeing some friends, a cousin and who knows who else along the way. I'm even doing a card class in Seattle which should be really fun! Hope I remember to take everything!

I have another fun bundle to share with you today. It's flowers and leaves with some really fun framelits that can be used for multiple uses. The name of the set is "Floral Frames" and that pretty much describes it. There stamped and die cut frames with a floral motif that can be used to set off your sentiment. I want to share some ideas I had using this bundle:


This card was used in a class this past week and the gals seemed to love it. I'll describe it from the outside in.  I used the "Happiness Blooms" Designer Series paper for my background which is very vivid and somewhat larger design motifs. I felt I needed to tone down the color just a tad, so I added a layer of our Vellum card stock. It perfectly does the trick but allowing you to still see the DSP but muting it a bit.  Next, I cut the large floral frame out of Night of Navy card stock, then stacked on some leaves that were cut with the dies. Good news, there are two dies for every type of leaf, making it easy to cut multiples!  I then stamped and die cut my sentiment piece and flowers. A quick word about the flowers. I used Pineapple Punch ink to stamp them, but felt there was still too much white so I grabbed my Pineapple Punch Stampin'Blends markers to color the flowers in. I used the lightest shade of marker so you can still see my stamped lines.  I loved it!


This next card features the stamped floral frame, which I stamped on Very Vanilla card stock. I then stamped the flowers again in Berry Burst and used dimensionals to put them on top of the flowers that are already on the frame. They coordinate perfectly!  You can see all three leaf dies in action here. I also embossed my background with the Tufted embossing folder. I used one of our scallop punches for my center sentiment.


For this last card, you can see the floral framelit a little better and the large circle center it leaves for you to add more to. I worked with some of our circle punches and layered it up.  Gorgeous Grape and Granny Apple Green are a popular color scheme these days and you can see why... They are so striking together.  I used the Scalloped Stripe embossing folder for my background.

You can check this set out yourself on page 135 of the Annual Catalog or click on any of the items in the supply list below and you'll be directed to the Online Store.

I hope spring is just around the corner wherever you live. We still have weeks of winter but the glaciers in our yard are beginning to recede just a tad so there is hope! Have a fun weekend and do something creative!

Happy Stampin'!
Sarah

Thursday, March 14, 2019

Pop On By - All About Houses!

Hi Stampin' Friends!
I realized this morning that I had not shared the cards we made in a recent class entitled "Pop On By"!  This is a fun set including wonderful stamps and a unique die that cuts a 3 dimensional house for the inside of a card. It wasn't hard for the gals to make and they had lots of choices in creating their house.  Stampin'Up! has created a couple of these "pop up" cards and they are fun to work with. The die is amazing as it cuts and scores in all the right places.  Curious?

The first card we made included using the house die. I had everyone make 2 bases and four houses with colored card stock that they would later trim away and use on their base.  Here's a picture of my card which was the example to follow although we improved upon it as we went!


You can tell it's 3D by looking at the area where my hand is.  They had a ton of fun decorating their houses, flower boxes, curtains and more. I so wish I had taken a picture of the results!  Here's a look at the front of the card, which used the "Golden Afternoon" stamp set.


This is the perfect go to set when you need a card front but the main attraction of the card is in the inside!

The stamp set that comes with this bundle is equally wonderful. We made two more cards with the stamps alone to play with them. The house stamp and house die do not coordinate together, they are two different sizes, however, the house stamp is very easy to cut out.


For this card, I paired the "Pop On By" house stamp with the "Sheltering Tree" stamp set, a real favorite for a couple of years now. It's easy to make some grass, trees, leaves and even a cute swing.  My house is stamped on Crumb Cake card stock and then colored with the Stampin' Blends alcohol markers. I used my paper snips to cut it out.


For this card, we stamped the house and then after coloring it with the Stampin' Blends, we tried out some other stamps including the tree branches and the fence. The wreath is a die cut from the set as well. Be sure to grab a paper hole punch to make a center in your wreath. It's easiest to make the hole before you cut out the wreath while you still have something to grab on to!

Houses are a wonderful motif for handmade cards. They automatically evoke a feeling of home, coziness, warmth, welcome etc.  I want to play with this set some more and experiment with other ways to decorate a house with the die and other methods for coloring the house stamp. This bundle is in the Annual Catalog on page 41. You'll see some examples in the catalog of Stampin'Up!'s creative team working with this set.

In case your curious about putting the Pop On By card together, I did a quick video showing what I discovered! Take a look and see some of my tips and tricks!


Thanks so much for stopping by today!  It's always a pleasure to share what I'm up to with my stamping passion. I plan to spend the next 2+ months soaking up all the goodies in the Annual Catalog and Occasions Catalog, before they go away the end of May.  My goal is to do a blog post 4-5 days a week featuring all new products, ideas and cards.  Please come back as often as you can! You can also "follow" me by clicking on the link to the right and then you won't miss a post!

Until next time,
Sarah

Wednesday, March 13, 2019

Here Comes the Sun

Hi Stampers!

I can't believe it's almost the middle of March already. The first couple of months of this year have gone really fast despite the endless winter here in Montana. I was hoping we would actually see some sun today like we did yesterday, but alas, it's clouded over and there's snow in the forecast again. It's a good day to stamp so I am looking forward to that!

I wanted to share a fun Hostess stamp set with you today. This one comes from the 2019 Occasions catalog and is pretty fun to work with. There are sentiments in a circular shape with some small graphics to add some interest as well. You'll see what I mean with my examples!


Who doesn't love the song "You are my sunshine, my only sunshine". I have super vivid memories of singing that at the top of my lungs while swinging on our swing set in the backyard, pumping my legs as fast as I could!  What a fun memory and song!  This stamp set evokes that song and I couldn't resist pairing with our "sun" framelit that retired a few years ago.  I love the different fonts in this set as well.


For this card, I focused on some rich blues and greens and used the "Garden Impressions" Designer Series Paper. I hope you noticed the mountains and tree images I snuck in the middle of the circle, with some lighter shades of blue and green!  I had to hand cut the "Believe" sentiment in order to get it to fit between all the other words. It was just a tad wide. The circle word stamps are one stamp and I didn't want to cut them apart and lose the shape of the circle, but you could certainly do that.


This was the easiest one to work with because the words were only on the lower half of the circle so I had lots of room at the top for my "grow through". I also used "Garden Impressions" DSP for this card.  It's varying shades of Calypso Coral and Petal Pink as well as Shaded Spruce for my green accent.

This was a fun set to play with and different with the circular layout of the words. Because it is a hostess set, you do need to have an order of at least $150 to be able to purchase it but the set is only $10 itself. I think it's a nice little add on to an order! By the way, my supplies are listed below in case you want more information on them. You can click on any of them and it will take you right to the Online Store!

I also want to share an announcement from Stampin'Up! with you. Apparently they are having some issues with the manufacturer of the framelit dies on some of the products. There are some that have already sold out and others that are close to being sold out. If you are interested in any of the following dies/bundles, be sure to get them as soon as possible before they are gone!

#150592 Wonderful Romance Bundle, pg 11 Occasions Catalog

#150603 Climbing Roses Bundle, pg 9 Occasions Catalog

#150576 Birthday Cheer Bundle, pg 17 Occasions Catalog

Unfortunately the wonderful Doily framelit has already been depleted. On all of these, you can still get the stamp, but the framelit supply is very low. Please let me know soon if you "have to have" any of these.

It's frustrating to have backorders and "no longer orderable" statuses on products for all of us. Unfortunately, these products are ordered and made well ahead of the sales time and forecasting sales is not a perfect art. While Stampin'Up! does manufacture it's own stamps, it is reliant on other companies for many other products including punches and dies and can't control their production and potential issues.  If there's something you wanted that you can't get, I can usually steer you to a great substitute product that will work for what you had in mind. Just contact me and we can talk about the possibilities. There's always a new catalog to look forward to as well with all new products and some old favorites!  I know I'm excited to find out what new In-Colors will be introduced in May!

Have a lovely day, sunshine or not!
Sarah


Tuesday, March 12, 2019

Little Twinkle bundle

Hi Stampin' Friends!
With our snow stopping for a few days, we have had some spectacular starry skies over Montana. In fact, the colder it gets, the brighter the stars seem. One of my favorite things to do is crawl in the hot tub just before bed and stare at those stars. I've heard the thought expressed that it's like the stars are windows to the earth for people in heaven. I don't know about the theological or astrophysical reality of that, but I do think about my parents quite often as I stare at the night sky.

As you may have guessed, my post today is about the stars and also the moon as well. Stampin'Up! has a cute bundle in the Annual Catalog featuring a great stamp set and punch. In true SU fashion, while it is a "baby" themed set, they've included many other elements to make it more versatile. I always feel like I'm getting a better deal if I can use a product for more than it's original intended use.  Anyway, I had fun with this set recently and wanted to share some ideas!


I want to note there is coordinating Designer Series Paper called "Twinkle Twinkle" that is really special. It has some great pastel colors that work well for a background and to actually stamp on. The dark color to anchor the color scheme is Night of Navy  which sounds appropriate, right?  For this card, I stamped on the DSP background and punched the moon and stars out of silver glimmer paper. I popped up the moon with mini dimensionals and used glue dots for the stars, which also gives a little dimension.


This card was an option at my recent "Punch Party". For this card, I tried a different use of the punch. I actually punched out the moon and stars from my Designer Series Paper and then put silver glimmer paper behind the holes.   That is a second way to use the punch. I also stamped the diamond-shaped star image and hand cut it out with some foil paper to frame it. This card needed a little more bling so I added some clear rhinestones.


For my final card, I wanted to make a baby card. I punched the moon and stars our of some retired Bermuda Bay glimmer paper and then stamped on some Designer Series Paper. The star stamp coordinated well with a retired SU star punch.

All of these were fun to make. There are also some additional coordinating products such as Baker's Twine with a thread of silver running through and some adhesive backed star sequins.  I've listed my supplies below in case you are curious about this fun set. I will be hanging on to this bundle for a slightly different twist on some baby cards and more. While I don't yet know if this set will carry over into the new Annual catalog, it is still available until May 31st so you shouldn't have any trouble getting it if you want it!

Are you a "follower" of my blog? It's easy to do so, just click on the follow button and you'll be notified whenever I post and then not miss a thing! I'm excited about the 18 "followers" I already have and would love to see that number grow ;)

Don't forget you can check out more news, class schedule, product ideas and inspiration on my SU website. There's a link just to the right ===>>> to click and you'll be taken right there. I try hard to keep all my social media and website info up to date and some days, that is quite a job!  Thanks so much for stopping by and checking out the latest! Have a great Tuesday!

Happy Stampin'!
Sarah


Monday, March 11, 2019

Climbing Roses

Happy Monday Stamper Friends!
I hope you had a great weekend!  We got to spend some fun time with our kids so that always makes a weekend better, right?!  It gets hard to coordinate schedules, but it is so worth it.

I'm back to my blogging this week, trying to get some posts out that continue to showcase Stampin'Up! products that I haven't given attention to yet on my blog. One such bundle is the "Climbing Roses" bundle. What caught my eye on this bundle was the fun framelits!  The stamps are great and have some really nice sentiments and fonts, but there are two framelits especially that are fun to have in your stash. I'll show you some ideas and talk about them as we go.


This first card shows off one of the framelits I like, an interlocking circle pattern that is really gorgeous with our foil paper, in this case, gold. I added some retired washi tape for a little more gold and then used my Stampin' Blends alcohol markers to color the roses and leaves. I felt like this color theme really made a statement!


This second card uses the interlocking circles again, only with Grapefruit Grove foil paper. The other framelit I just love is this sentiment framelit with the tiny border of cut out circles!  I really think that is sweet... looks hand punched, doesn't it?  I also used one of the stamps in the set, a diamond pattern for my background. I stamped this using the hinge method with the Stamparatus and it worked really well.  There are some nice leaf framelits in this set too so I cut some out with vellum cardstock.


For this card, I stamped the roses in the background on my Designer Series Paper. It was a little hard to see so next time I would use lighter paper or black ink instead of Blackberry Bliss. There is a beautiful rose and leaf framelit that I cut out with silver foil paper and then I used the same sentiment background piece with the punched border and some leaves.


Here's a good look at the stamp of the roses and leaves and also another look at the diamond patterned background stamp. This time, I didn't use the Stamparatus to line it up, I just stamped randomly here and there. I again used the Stampin' Blends to color my flowers and leaves.

What do you think?  This ended up being a fun set to work with because of all the different options for stamping and die cutting.  Sometimes it's hard to get excited about ANOTHER floral stamp set, but I'm glad I got this one. Roses are a favorite for some many occasions and with the added bonus of framelits, I will use this a lot.

Looking at the calendar, I'm realizing we only have 3 weeks left of Sale-A-Bration!  It's been my best SAB ever and I hope you've enjoyed shopping, hosting and joining. There is still time to participate and receive even more bang for your buck.  Don't forget, with every $50 increment of purchases, you can choose a free SAB item. There's also $50 extra hostess rewards if you put in an order of $50 or more. And.... you can sign up to be a demo for only $99, get $175 worth of product and enjoy a 20-25% discount on all product as long as you stay active.  There are a few details so be sure to contact me if you have questions and I'll help you!

My supply  list is below and clicking on any item will take you directly to the online store. Hope you have a great Monday!
Happy Stampin'!
Sarah