Hey Stamper Friends,
How are you today? Blogging has been on my list for two days now and I'm finally back. I'm having my annual retired stamp and other SU products sale this week so that means a lot of deep cleaning in my stamp room and other nooks and crannies. You know what is amazing? Even after I haul several loads of stuff to the garage to sell, my room is still full!! How does that happen? A personal goal of mine is to get rid of as much non SU stuff as possible. I did papercrafting prior to becoming a demonstrator with SU in 2011 and I have too much "contraband" that I never use and don't even like anymore. I'm sure I can find a good home for it! What do you do with your stuff that you are ready to let go? One of my daughter is a 1st grade teacher so that's a good dumping ground for paper. She can put it in the teachers lounge, stacks and stacks of it, and it's gone by noon! Ah well... enough of casting off old stuff.
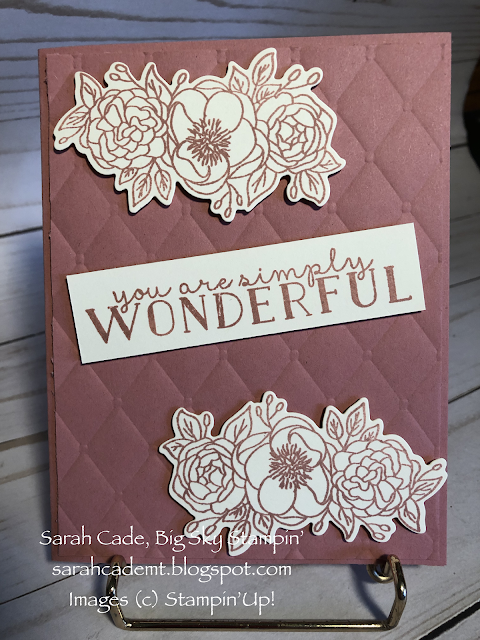
How about switching the subject to new stuff!! There's a gorgeous kit coming out on May 1st that I wanted to share with you. The most striking thing about the kit is the lush color scheme of Night of Navy, Melon Mambo and Rose Gold foil highlights. Want to see a picture?
Isn't that pretty! This is a unique collection of products that are not available in the catalog or in any other format. It is a collection of coordinated supplies that you can use to make whatever you want! It does not include ink or card stock or adhesive but Stampin'Up! is assuming you already have that or can readily get it! The set does include stamps, dies, gorgeous Designer Series Paper, 2 full spools of ribbon, Rose Gold Shimmer Paint, embellishments and punch out accents. While not having a specific goal in mind for the project may intimidate some, I know there will be lots of samples flooding Pinterest, shortly after May 1st. There are already some great ideas from stampers who were lucky enough to test drive this wonderful kit.
Take a look at this for example:
These are all samples using products that come in this collection. The stamp set is awesome too!
So what are the details? You will be able to order this kit on May 1st from the online store or let me order it for you. I need to hear from you by April 30th if you want me to get it so I'll be ready to go on May 1st. I'm planning on hosting a class using this collection at a later date, mutually convenient to all who purchased the kit and are able to come. The cost of the entire collection is $80 plus shipping. This is very reasonable considering all that you are receiving for it. I will update my blog and other social media on May 1st with a link to the online store for easy ordering. As with many new and short term Stampin'Up! products and promotions, the supply is limited so I would order on May 1st or soon after if you really want one of these kits at your house! Don't forget to add Melon Mambo and Night of Navy ink pads and card stock to help complete what you need, unless you already have them! I'm excited for May 1st to get here!
My preorder boxes have been arriving the last few days! I'm trying out some of the new stuff coming in the new 2019-2020 Annual Catalog and getting really excited to share that with you. I'll be offering some sneak peeks here and there prior to June 4th when the catalog launches so stay tuned for those and other exciting Stampin'Up! related news.
Don't forget there are two places to go to save money! The Clearance Rack was updated yesterday and the "Last Chance Products" will likely have some discounts in the future. Check out the online store for all that is available!
Stampin'Up! Online Store
Leave a comment or contact me directly if you want an "Everything is Rosy" kit ordered for you on May 1st!
Happy Stampin'!
Sarah
Independent Stampin'Up! Demonstrator!
Hey friends!
I've been a demonstrator with Stampin'Up! since 2011. I'm located in Bozeman, Montana, but have customers all over the country. I have a very fun and active downline called "Big Sky Stamper Stars" and we get together in person and online to share what we love. My blog posts feature what I'm up to recently and I try to share new product information, tips and tricks and creative inspiration. You can shop from this site or find out more information about our products and becoming a demonstrator! Thanks for stopping by!
Wednesday, April 24, 2019
Friday, April 19, 2019
The new 2019-2021 In Colors !!
Hey Stampin' Friends,
Today I have a really special post for you! I just got my box of preorder goodies from Stampin'Up! yesterday and I'm already hard at work trying out the most exciting part for me, the new In Colors! Every year, SU releases five new colors and retires five other colors that have been in the mix for two years. This is always exciting as the new colors are a closely guarded secret until OnStage. We didn't get to see much of the new In Colors in person, mostly just photos of them so boy was I happy to open my box and see them, touch them, play with them... you get the picture. I wanted to experiment with each color by themselves and included a new set stamp set as well.
Here they are, in no particular order!
PRETTY PEACOCK
SEASIDE SPRAY
ROCOCO ROSE
TERRACOTTA TILE
PURPLE POSY
Here's a quick look at all of them together!
And here's a sneak peek at the stamp/die bundle I used to create the cards above! I love it!
All these fabulous colors will be available June 4th for customers and May 2nd for demonstrators. You can get them early if you want to sign up as a demonstrator! Ask me how to do that and I'll be happy to help you!
Have a blessed Easter weekend!
Sarah
Thursday, April 18, 2019
Sneak Peek - Daisy Lane
Hi Stampers!
I have been looking forward to today for one BIG reason... my preorder out of the new catalog arrives today! I know my UPS driver personally and I'm so tempted to text her and ask if I can be first on her deliveries today, but I'll refrain and let her do her job the way she wants haha! I'm most excited to get my hands on the new In-Colors so stay tuned for a post devoted to them, probably later today!
In the meantime, I played with a set that we all got in our bags at OnStage. It's called Daisy Lane and features two different sizes of daisies with coordinating punches! The large one is a punch and stamp that we already had and the smaller one is brand new! I won't be able to get the smaller punch until June 4th so I had to be content with the stamp set and my older punch for now. Want to see what I came up with?
How gorgeous is the distressed, vintage look? It's always a perfect technique for any flowers and leaves and trees but this one was especially fun. I used some Tranquil Tide Designer Series Paper to stamp on and then ripped the corners and daubed them with Soft Suede ink. I stamped the first daisy right on the paper and then stamped a second one on another piece of DSP and punched it out. I used a dimensional to pop up the top daisy. Instead of a plain card for a background, I ran my card through the Big Shot with the Tin Tile embossing folder. Embossing gives added texture, dimension and interest automatically!
This card came about because I had a small piece of watercolor paper laying on my desk. I decided to stamp on it and then use an Aqua Painter to try and move the ink around a little and see if I could create a more watercolor effect. I like how it turned out. You might recognize the "Garden Impressions" Designer series paper and leaf ribbon, both in our current Annual Catalog.
The next stamp I really wanted to ink up was this big fern-like leaf. I love how rich the detail is, almost like it is gently swaying in a breeze! I decided to give some last minute love to two of my favorite, but retiring, In Colors which are Tranquil Tide and Fresh Fig. What a combo they have been for two years! They are almost always pictured together, but have done some really great solo work too and with other colors. I will miss them!
My last card was inspired by the stamps and my thoughts of what would they look like stamped in white craft ink on a dark background? I chose Night of Navy which always sets off anything white so beautifully. Because I used craft ink, it was still a little bit wet when I was done stamping so I sprinkled on some Iridescent Ice embossing powder and then used my heat tool to set it all. The sentiment is from a different stamp set I got, one that is arriving in the mail today! I felt I needed just a little something more and was really happy with the Washi tape borders I added. They are very subtle but just the right shade of blue.
I've been through our new catalog with highlighter and Post-It note flags in hand several times now. I keep moving my "must haves" around a little but am so excited about the whole thing. You will see more bundles of stamps and dies than ever and those of you who are avid stampers and crafters will be blown away by all the goodies for you. There are some lovely kits and all the great supplies that Stampin'Up! is known for. Our most unique feature is the color coordination between paper, ink and embellishments and you won't be disappointed with all the new products. I'll be able to order catalogs in May and start getting them out to customers shortly after I receive them. If you are not in the Gallatin Valley and would like a catalog, just leave a comment and I'll start a list of who to mail one to.
Meanwhile, I'll be watching out my window for Dusty, my favorite UPS employee!
Thanks,
Sarah
Wednesday, April 17, 2019
OnStage April 2019 recap and more!
Hi Stampin' Friends!
My first couple of days were jam-packed with classes, family stuff and sleep catch up from my recent trip to Salt Lake City for OnStage. I almost can't describe how much fun we had, but I'll try! Today was a day I was somewhat dreading as I had been selected for jury duty but the trial got canceled so I can be home and do some stuff I want to do!
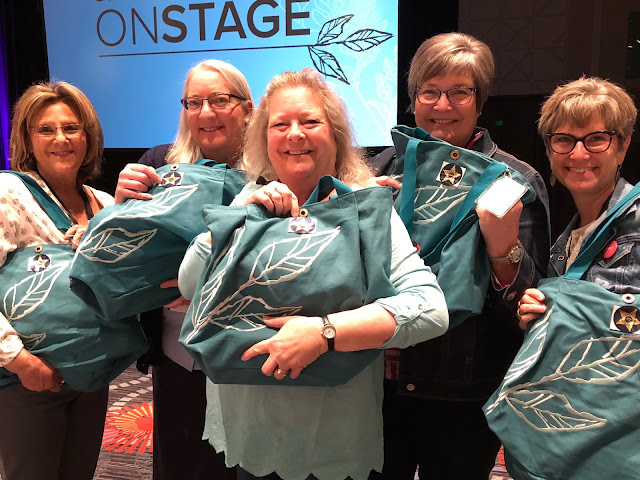
OnStage was a 1 day event for demonstrators which offers lots of training, stamping tips, new product reveals and of course, our own copy of the new catalog! That was the best part! We had such an amazing trip, along with an unexpected component within the first couple of hours!
My first time at Center Stage, a leadership event!
Very proud of our deputization prior to arriving in Salt Lake City!!!
Fun with Make-n-Takes!
Very memorable OnStage that we absolutely loved!
My first couple of days were jam-packed with classes, family stuff and sleep catch up from my recent trip to Salt Lake City for OnStage. I almost can't describe how much fun we had, but I'll try! Today was a day I was somewhat dreading as I had been selected for jury duty but the trial got canceled so I can be home and do some stuff I want to do!
OnStage was a 1 day event for demonstrators which offers lots of training, stamping tips, new product reveals and of course, our own copy of the new catalog! That was the best part! We had such an amazing trip, along with an unexpected component within the first couple of hours!
We drove to SLC from Bozeman, Montana, through Idaho. Around Island Park, ID, there are several one mile sections of the highway that are 45 mph and not 65 mph like the rest of the highway. It is also somewhat remote country and of course, we were looking for a bathroom for a pit stop. I pulled into one lot that looked like it might be a convenience store at the last minute and all of a sudden, there were flashing lights behind me. A female Idaho State Trooper came to the car and asked me if I realized I was speeding. Of course, I didn't and apparently was going 59 in a 45 mph zone. She asked who we were, where we were from, where we were going and for what purpose. We were trying not to laugh too hard but told her we were going to a rubber stamping convention (something to that effect), then she said you mean like "scrapbooking?" Yes... that's it! Anyway, she took my license, car registration, insurance card and headed back there to check everything out. She came back with a warning for me to remember those 45 mph zones around Island Park and then the funny part, gave us all "Idaho State Patrol Junior Trooper" stickers for our "scrapbooks! She was super sweet and when we got home, we sent her a thank you card and pictures of us at OnStage with the stickers on our bags. I can report we followed all traffic laws and did find a bathroom following that fun time!
OnStage was held at the Salt Palace in downtown SLC, which is a wonderful facility. We stayed right across the street at the Holiday Inn Express and the whole experience was wonderful. I thought rather than making you read a bunch of detail, I'll show you in pictures!
Somewhere in Idaho!!
My first time at Center Stage, a leadership event!
A sneak peek at the new In Colors!
Very proud of our deputization prior to arriving in Salt Lake City!!!
Fun with Make-n-Takes!
Prize Patrol wins!!!
Very memorable OnStage that we absolutely loved!
Celebratory dinner at P.F. Changs after all the stampin' fun!
If you are a demonstrator, you can go to OnStage too! The next opportunity will be November 16, 2019! More details will be released late summer. If you're not a demo, why not? You get a 20% discount on everything you buy and get to have all the early, inside news about what's coming up and you can go to fun events like this. Talk to me! I have a growing team but there's always room for more! It does not matter if you live in Montana... just the United States. The only thing I can't offer you is official status as an Idaho State Patrol Junior Trooper. We are hoping that is a once-in-a-lifetime event that won't be repeated!!
Woohoo!
Sarah
Monday, April 15, 2019
Last Chance Products!
Hi All!
Just a quick post today in case you haven't heard the news elsewhere... Stampin'Up! has released its Retiring Products Lists for the 2018-2019 Annual Catalog and 2019 Occasions Catalog. You can order all your favorites, still on your wish list, or stock up on your favorite retiring In-Color products! Supplies may be limited and once an item is sold out, it is gone!
Go here to see all the products that are leaving us! (Just a note... while some "bundles" are retiring, the individual stamp sets and coordinating dies are not. They are just being unbundled.)
Retiring Products!
The best way to get what you want before it runs out is to place an online order. Please use this Hostess code with your order and receive a free pack of Artisan Pearls from me if your order is $75 or over!
CGEM4MXU
Thanks and happy shopping!
Sarah
Friday, April 12, 2019
Revisiting "En Route"
Hi Stampers!
Well, my four friends and I are off to OnStage in Salt Lake City this morning! I'm really excited as always for these Stampin'Up! events. The event itself is quite fun with all kinds of new products and announcements but honestly, the best part is the girl time with some friends! We laugh, almost cry, chat and snort a lot! It gives us a chance to go to a big enough city to have an Ikea so that pretty much sums up how excited we get!
Of course, in all the excitement and with my packing done a few days ago, I have time on my hands and decided, what better stamp set to play with than "En Route"! It's a favorite of mine from the Annual Catalog because I love the travel theme in any creative project. I'm not exactly a seasoned traveler, but have traveled more in the last 12 months than usual, from Las Vegas, South Dakota, Minnesota, Norway, Wyoming, Orlando, Cincinnati, Oregon, Seattle and multiple trips around Montana. I'm getting better at packing light and really like the adventure part of travel.
Anyway, here's what happened in my stamp room today:
There is a coordinating set of Designer Series Paper with this stamp set that makes a great color scheme suggestion. I pretty much stuck with it except for one card below.
Do you have the Stitched Shapes Framelits? They sure come in handy when you need a little extra razzledazzle with a sentiment!
This is what traffic looks like on Google Maps in Seattle... craziness!
Here's my card that did not stick to the color scheme memo...
And here's another look at one I made last summer for a card class. It features the great state of Montana! "406" is our only area code and we are quite proud of that as an identifier of Montana!
Hope you enjoyed my creative musing today as I patiently wait for tomorrow to get here. I think I will read a book now... probably an entire book!
Thanks for stopping by and check my social media for updates from Salt Lake City!
See you next week!
Sarah
Well, my four friends and I are off to OnStage in Salt Lake City this morning! I'm really excited as always for these Stampin'Up! events. The event itself is quite fun with all kinds of new products and announcements but honestly, the best part is the girl time with some friends! We laugh, almost cry, chat and snort a lot! It gives us a chance to go to a big enough city to have an Ikea so that pretty much sums up how excited we get!
Of course, in all the excitement and with my packing done a few days ago, I have time on my hands and decided, what better stamp set to play with than "En Route"! It's a favorite of mine from the Annual Catalog because I love the travel theme in any creative project. I'm not exactly a seasoned traveler, but have traveled more in the last 12 months than usual, from Las Vegas, South Dakota, Minnesota, Norway, Wyoming, Orlando, Cincinnati, Oregon, Seattle and multiple trips around Montana. I'm getting better at packing light and really like the adventure part of travel.
Anyway, here's what happened in my stamp room today:
There is a coordinating set of Designer Series Paper with this stamp set that makes a great color scheme suggestion. I pretty much stuck with it except for one card below.
Do you have the Stitched Shapes Framelits? They sure come in handy when you need a little extra razzledazzle with a sentiment!
Here's my card that did not stick to the color scheme memo...
And here's another look at one I made last summer for a card class. It features the great state of Montana! "406" is our only area code and we are quite proud of that as an identifier of Montana!
Hope you enjoyed my creative musing today as I patiently wait for tomorrow to get here. I think I will read a book now... probably an entire book!
Thanks for stopping by and check my social media for updates from Salt Lake City!
See you next week!
Sarah
Thursday, April 11, 2019
Varied and Vibrant Vases
Hi Stampers!
Boy, I'm so excited to head to Salt Lake City tomorrow for OnStage! These events are so fun because they tell us and show us so many exciting new things. My favorite part of papercrafting is color (ink, paper, all of it) and every year, Stampin'Up! releases five new In-Colors. We've heard a tease about the names of the colors, but so far no pictures. I can't wait to see them in person! I hope I can fall asleep tonight, haha!
One of the amazing things about Stampin'Up! is the effort to coordinate products and make everything more versatile and useable. One such bundle is the Varied Vases and Vibrant Vases stamp sets which coordinate with the Vases Builder Punch. I purchased the original bundle out of the Annual Catalog and then in this year's Occasions catalog, they released another stamp set to match! I wanted to share several cards I've made with both sets, just to inspire you!
Aren't those fun? One of our top selling demonstrators, Mary Fish, helped design the stamps and punch and I think it's fabulous. There are several different decor styles represented in the vase stamps and lots of different foliage to create different looks. You will see I used a variety of framelits, Designer Series Paper and more to complement my designs. I'm going to limit my supply list today to just the stamps and punch as I have a busy day ahead of me and this would take significant time to list all my supplies. Please contact me if you have a question about which Designer Series Paper or other embellishment I used and I'll be happy to give you the scoop.
Hope you have a fun day and remember to keep an eye out for me on Social Media from Salt Lake City!
Happy Stampin',
Sarah
Wednesday, April 10, 2019
Fun with Fun Folds!
Hi Stampin' Friends,
Or should I say paper construction engineers? That's about what it takes to make a Fun Fold Card!. These are cards that have unusual or multiple folds, requiring precise measuring and cutting and some occasional "smooshing" when the corners don't meet perfectly! I held a Fun Folds Card class yesterday and want to share our projects. I'm going to give the minimum of details and trust that you will contact me if you want more information!
TWISTED GATE FOLD CARD
This card doesn't have a lot of moving parts, but ended up being one of the trickier one to do. The card base is 5-1/2" x 8". Score marks are made along the 5-1/2" side at 2-3/4" and 5-1/4". You will have three panels facing you. Then, you need to score diagonally from the right upper corner to the left lower corner on the first and third panel, leaving the middle panel alone. You then cut rectangular pieces of paper and cut them diagonally to decorate the panels. I think you can see the folds from the pictures. The main thing to remember is that these are not equilateral triangles so you cannot flip them and use them anywhere. As you cut your rectangles, it helps to lay them out as if they were still connected so you keep them in the right orientation.
DOUBLE Z FOLD CARD
I recently featured this card on a blog post and also a video so please refer to this for details:
Double Z fold card - Rooted in Nature
BACKWARDS DOUBLE GATE FOLD WITH CUT OUT SHAPE
I just made that name up! For this card, you need a piece of card stock that is 5-1/2" x 12". You score it at 2", 4", 8" and 10". You can see how you need to fold it above. I used washi tape to hold my card together in the folded position and then centered a large framelit (the retired Window Frames set) on the card and ran it through the Big Shot which cuts the entire card in a shape. I used the next size down framelits to cut the yellow card stock piece and the Designer Series Paper purple pieces, which I then cut in half and adhered all to the card. You can decorate this style card any way you want.
CRAZY FOLD AND CUT CARD
I have no idea what this card is called! I've had this pattern for years but it is the first time I've done it in a class. You need a 5-1/2" x 12" piece of card stock. Score at 2", 4", 8" and 10" . After scoring, you need to cut from the 2" score mark to the 10" score, 1-1/2" in from each edge. You are not scoring the whole length of the card, just from the 2" to 10" score marks. You can see how to fold it in the picture and of course, you can decorate it any way you want. The butterfly theme was a hit with my classes!
And here's a pic of one class working diligently to complete these cards!
These Fun Fold classes are not for newbies and can be quite a challenge for even experienced crafters if they aren't used to weird cuts and folds. It was super fun and I'm really proud of them for being brave enough to try it! My apologies to the evening class as I forgot to take a picture of them hard at work!
Can't wait to be inspired at OnStage in Salt Lake City, 48 hours from now! I will be sharing some pics and video on FB, my Big Sky Stampers group. If you're not a member, it's easy to request to be one and I'll approve you! I'm also using Instagram alot so check me out there at Big Sky Stampin' !
Happy Stampin'!
Sarah
Subscribe to:
Posts (Atom)