Tuesday, January 31, 2017

You Deserve a Happy Birthday!

Hi there!  It's snowing like crazy this morning but that's what it does in the winter in Montana, so no surprises here!  I'm always glad to get a fresh batch that covers up the old snow- sure is pretty!

Birthdays continue to be the #1 reason to send a card and this wonderful new set from the Occasions Catalog does not disappoint!  It's called Balloon Adventures:


There are framelits that coordinate with this stamp set as well and I used the bow framelit for my fancy bow.  What do you think of the balloons?  I used the two-step stamping technique with a lighter shade of yellow, blue and green and then went over the top with the stripes and polka dots in a darker shade of yellow, blue and green. I love how they turned out!  My paper choice on this card is from the Party Animal Designer Series Paper...  This is not a tricky card to design or make, but the end result catches your eye!  You can see my supplies below if you are interested in making a card with these stamps. It is also perfect for birthday party favors, a scrapbook page, Project Life, etc.

Hope you have some creative time today! Happy Stampin',
Sarah


Monday, January 30, 2017

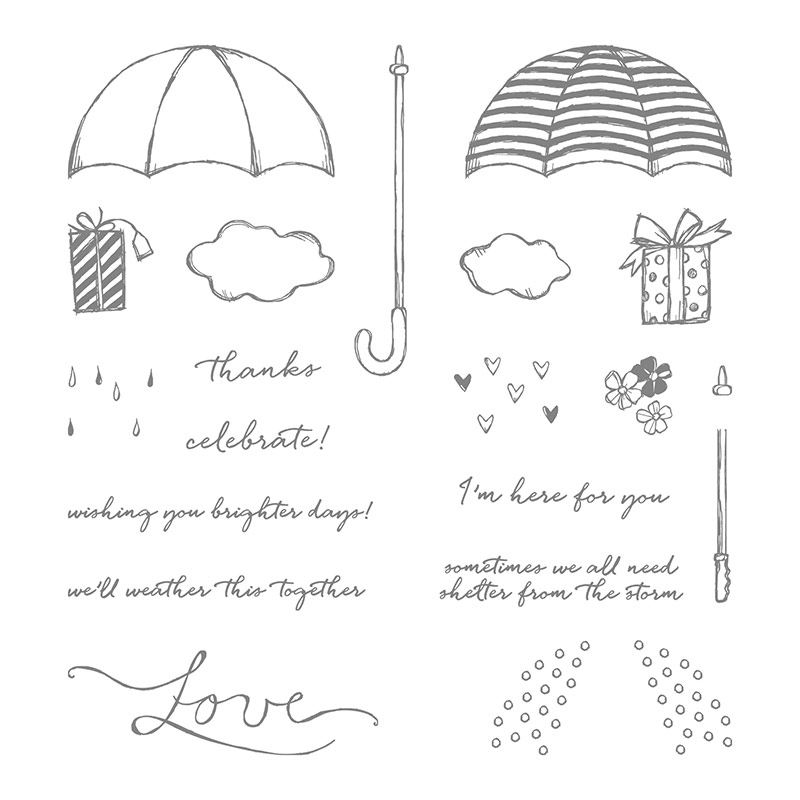
I'm Here for You - Weather Together

Hey stampin' friends,
And just like that, it's Monday!  I am looking forward to a great week and hope you are too. Sometimes, it is what you make of it....

Did you know you can earn free product with Stampin'Up!  There are several thresholds you can meet but the first one is with an order of $150 or more. You start earning 10% in free product off your order total (excluding shipping) and the percentage increases with larger orders. I have been able to get quite a few free stamps this way and the reason I'm even talking about this, is because today's card features a free set I chose. This set did not make my "gotta have" list but did make my "sooner or later, maybe" list - haha!  The set is "Weather Together" and as you can see, it is an umbrella theme!  Here's the card:


I went back to the Annual Catalog for some inspiration and chose some of the Blooms and Bliss Designer Series Paper.   I love the rich color of Island Indigo and the soft, peaceful color of Mint Macaron.  Together, they are fabulous!  This is a stamp and framelit bundle so cutting out the umbrellas was easy-peasy.  The one thing I would change if I did this card over is to cut my DSP differently so the design is vertical rather than horizontal. I think that would imitate rain a little better. I had a piece of DSP already cut that I was using and I'm too frugal to start over sometimes!  Did you notice the font?  I really like anything that looks handwritten. One last thing to draw your attention too is the umbrellas. If you look closely, you will see some sparkle. After I was done stamping, I brushed over the umbrellas with clear Wink of Stella (# 141897). Boy, I love that stuff!

Here's a look at the stamp set so you can see if up close:

\\


I love all the choices for sentiments and umbrellas and gifts. Lots of ideas there....

I hope you have a great start to your week. Let me know if you have any questions or need some ehlp or advice with your next project!

Happy Stampin', 
Sarah

Sunday, January 29, 2017

Dragonfly friendship

Hi Stampers!
It's another lovely day in Montana. The sunrise was especially sweet and lingering this morning, the perfect way to wake up.  I'm meeting one of my daughters to go to her church soon, but have time for a quick post.  If you are wondering where all this new found energy for stamping has come from, I recently lost my medical transcription job/work to outsourcing and automation. While I am trying to decide what I should do now (??), I'm immersing myself in my art as a way to not waste my days!  It's been fun in an unplanned sorta way.

Today I have some more new products to feature, including the wonderful Dragonfly stamps and framelits. Here's the card:


This card was a bit of an experiment, but I like how it turned out.  My color scheme comes from the Succulent Garden Designer Series Paper, seen on the left side of the card.  Using some of those colors, I watercolored with ink and an Aqua Painter on some watercolor paper, a piece big enough to cut out the dragonflies on. After the watercolor paper dried sufficiently, I die cut the dragonflies. This is an all-in-one framelit, even though there are several dragon flies all hooked together. I realized I needed a different background as the DSP paper was too busy behind the dragonflies. I grabbed some Gold Foil paper and embossed it with the new Falling Petals Embossing Folder. Foil paper is so fun to emboss and instantly looks so classy.  My sentiment is from the Dragonfly Dreams stamp set. I added some of our wonderful rouched ribbon and I was done!  I'm looking forward to trying this combo set some more... lots of possibilities!

Yesterday was a fun and gratifying day. I hosted some stamper friends and we got together to make cards to donate to charity. Our first charity choice was our local Humane Society which does such a good job with dogs and cats. We wanted to give them cards to use for clients, volunteers, staff, whatever. They requested Sympathy, Thank You and Thinking of You cards and that's what we did, all with a dog or cat theme. By the time we were done, we had 100 cards ready to go! Here's a glimps of the fun morning!


It's so fun to see what happens when you combine supplies and talent and work towards a common goal. We readily agreed we are going to try to do this every month or so and came up with a list of future charities to donate to.  The world needs more lovin' and a handmade card is a great way to provide that!

Happy Stampin' and I hope you have a blessed Sunday!
Sarah

Saturday, January 28, 2017

Hot Dog!!

Good Saturday morning!  Yay... it's the weekend!  I'm doing a charity card stamp this morning but otherwise have a pretty quiet weekend, which means what long neglected project around the house should I tackle first?  Well, I'll just think about that for awhile.

I'm pretty sure I've mentioned at least once that one of my favorite stamp sets from the Sale-A-Bration brochure is the Tasty Trucks set.  We have several food trucks on the streets in Bozeman, especially during the nicer weather, and as food options at local brewpubs.  They offer some great food that hits the spot!  I wanted to make another card featuring this wonderful set:


There are so many detailed stamps with this set, it is a little difficult to stamp just the truck and then cut it out. It lends itself better to being stamped right on the card or a layering piece. I decided to go with a fairly standard truck but make where it was going interesting with a ground cover of flowers from the Affectionately Yours Specially Designer Series Paper. I kept re-cutting the ground piece (by hand) and lining it up with the truck stamp to give the truck enough room. I had some space left over on the right side of the card and thought a tree would work just fine. I then remembered the tree builder punch which was quick and easy!  This card is whimsical, colorful and full of good-hearted cheer.

Wishing you had a Tasty Truck stamp set of your own?  It's easy to get one... simply spend at least $50 on any Stampin'Up! product and you can choose this stamp set for free from the SAB brochure!  This promotion continues through March 31st so there's lots of time to get an order together. You can place an order online or call/text/email me and we will get it to you in no time!

Thanks for stopping by! Hope you have a great Saturday!
Sarah

Friday, January 27, 2017

Congrats to the Bride-to-Be!

Hey Stampers!
I'm excited to share what I've been working on this week! I've had 2 pretty much uninterrupted days in my craft room and played with lots of ink, paper and stamps. I love to look at Pinterest and some other sites to see what others are up to, but when I'm in a creating mood, I surround myself with what I have on hand and let my imagination go wild.  The creative process is interesting, isn't it!  Sometimes it is the Designer Series Paper that inspires me. This ALWAYS dictates my color scheme if I happen to be using DSP as part of a design.  Sometimes it is a particular stamp set I want to mess around with and see what I can do with it. Sometimes it is a theme that gets me going in a particular direction. I think if you asked any artist how did you get started with a particular project, you would get many different answers. I can tell you for this card, I wanted to make something with the new T-shirt stamp and framelit bundle. I thought it was cute and unique as a design motif for cards or scrapbooks.  I then immediately thought of the Pop of Pink DSP which I recently ordered and hadn't used much yet. I wondered if there was a tiny scale design in the paper that would work for a T-shirt and there was.... an adorable micro polka dot Melon Mambo print!  There was my T-shirt and the design took off from there.  Here's the card:


I used some more of the Pop of Pink DSP for the background of the card and incorporated the Sunshine Wishes Thinlits also. I really loved this cute card when I was done and although it's not a common theme for a card, any bride-to-be would love this! Did you notice the silver ribbon at the bottom?  That's one of the Free SAB products you can choose with any $50 order! You can combine a couple of these products and reach $50 in a hurry! The black glimmer paper circle is a retired paper from a former Halloween suite. Moral of the story... keep everything!  Think outside the box! Repurpose always!

I usually don't post on weekends, but I have so much to show you, I just may... stay tuned!
Happy Stampin'!
Sarah


Thursday, January 26, 2017

TBT-Throw Back Thursday "Love"

Hi friends!
I'm so grateful that you stop by and see what I'm up to. I started this blog as a way to put some words to my creations with paper and ink and then it became a way to communicate with others about Stampin'Up! and then it just became fun!  It is becoming part of my morning routine and is a good way to start my day!

I'm co-opting the TBT theme that is often on Facebook today.  One of the things I love about Stampin'Up! is all the new products 3-4 times a year. One of the things that drives me crazy about Stampin'Up! is the retiring of products I love every year!  So sad to see some friends go off the stage, but they never really leave... They find a home in my craft room and resurface every now and then!  I have recently been making some more Valentine's and dug deep for some retired paper, ribbon and stamps.  I thought it would be fun to share these with you and inspire you to go look through your stash of goodies and see what you can bring back into the light of day and make something with!  I won't be sharing any supply lists today as most of what I used is no longer available anyway. This is just for your viewing pleasure!


That's a whole lot of love! Enjoy your day and don't forget about your stash o' stuff. It's there.. .waiting patiently for some attention and love!
Happy Stampin'!
Sarah

Wednesday, January 25, 2017

Happy, Happy, Happy

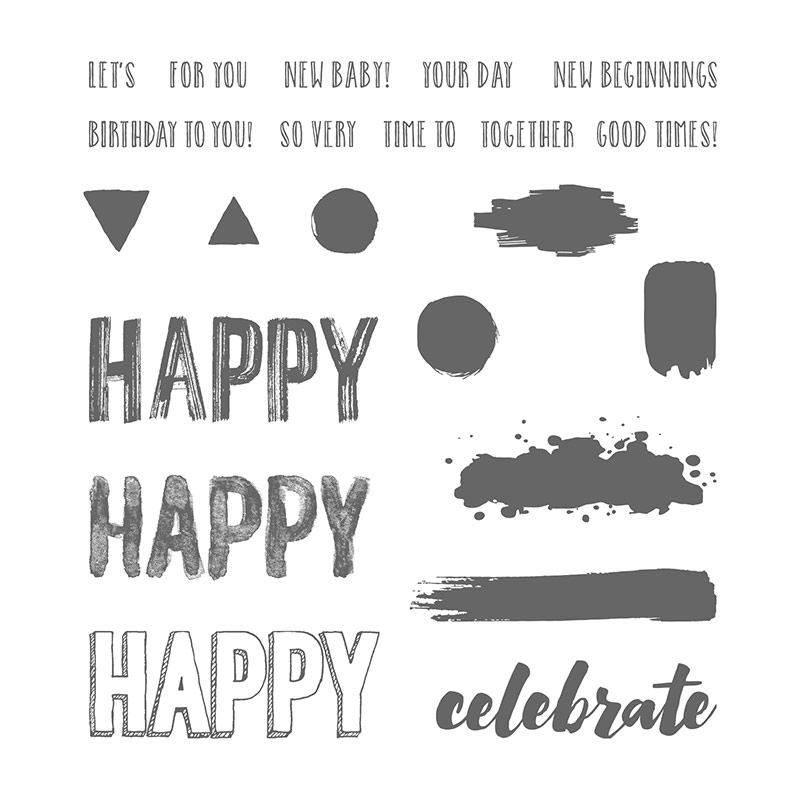
Hey stampers!  I don't know about you, but sometimes I need a card in a hurry... nothing too complicated or intricate, nothing too fancy or difficult to make. I just need a card!  I was inspired to make such a card when I saw the "Happy Celebrations" stamp set. This is a great artistic set with a swooshing paintbrush style that I am going to use over and over!  Here's my card:


I chose one of the paintbrush looking "happy" stamps and stamped it 3 times in different colors. I just eyeballed this and didn't try to be precise about where I was stamping. I also overlapped and overstamped but by choosing different colors, you can still see each "happy" fairly well. I then chose the outline "happy" and stamped that in black. There are several smaller outline words to add to the "happy", making this a very versatile stamp set. Then you have all the color splotches to make you really feel like an artist, in this stamp set but not used here. I topped it off with some Tasty Treats washi tape and I was done!  Here's a peek at the stamp set to clarify what I just described!


I think you could make 100 cards off of this set and they would all be different when you switch up colors and sentiments!  I also like that the font is BIG and bold!  

What are you trying out with the new catalog?  Have any favorites yet?  I'd love to hear what you think in the comment section below!

Tomorrow is Thursday and I'm going to be jumping on the TBT (Throw Back Thursday) bandwagon with some cards featuring products from previous catalogs, now retired. Check back then and see if you recognize anything!

Happy Stampin',
Sarah

Tuesday, January 24, 2017

Up and Away- For You!

Hi there stampin' friends!
One of my favorite activities are the monthly card classes I hold with some great, creative and fun ladies. We typically make three cards and I try to incorporate new products and new techniques as much as possible. There seems to be a never ending supply of both!

One of the eye-catching combos in the new Occasions Catalog is the Up and Away set with a hot air balloon theme. There are stamps, framelits and even some coordinating paper to drive home the message you want to send. We made this card in a recent class:


\\

This is a gate fold card with both sides opening. We glued the stamped/die cut piece on the right side of the card and used some dimensionals to pop it up a bit!  This also features a lovely Designer Series Paper component that created the color scheme. It's bold and beautiful!  We made this a birthday card with our inside sentiment but you could easily make this card for any occasion... how about graduation? Job promotion?  Recovery from an illness?  There are all kinds of reasons to celebrate and the hot air balloon theme automatically evokes success! I've listed the supplies below so you can replicate this card if you want to!

How is your Sale-A-Bration going so far?  Have you taken advantage of the free SAB products with every $50 spent on Stampin'Up! products?  I hope so. This promotion goes all the way to March 31st so there is lots of time. You can even space out some orders and take advantage of the promotion several times!

There are other ways to enjoy Sale-A-Bration too!  You can host a party and get an extra $25 in hostess rewards for an order over $250. Gather up some friends, pick a date and I'll come and present a fun party for everyone, plus they will go home with some cards they have made and a great introduction to how much fun stamping is.   

You can also join Stampin'Up! and reap the rewards of being a demonstrator!  Some people join to start a business and some start just to receive the discount and other benefits for themselves. Please let me know if you are interested or even just curious. It is set up to be a try it and see if you like it venture with only a $99 investment up front (gets you $125 worth of product and 2 free stamp sets during SAB) and a $300 quarterly purchase requirement to stay active. The $300 can be your purchases, friends, family, coworkers, etc. There is never any cost or penalty for quitting but once you try it, I think you will like it!  My team, the Big Sky Stampers, are alot of fun and always looking for more stampers to join us!

I'm spending the day in my room today- can't wait!  I just got a box full of new stuff over the weekend and it's time to dive in and see what happens!
Happy Stampin',
Sarah

Monday, January 23, 2017

Just for You - Happy Anniversary!

Good Monday Morning!
I'm staring out my window at some "thick as pea soup" fog... in other words, I can only see about 50 yards!  It looks like some kind of weird blizzard but there's no snow.  I can't complain however, I'm warm, comfortable and ready to roll on another week of stamping fun!

I have some fun new products to share today, from the Occasions Catalog (supply list below). The card I want to share features a style of photography or art called Bokeh.  Here's a link of some examples of Bokeh photography if you are interested:

Bokeh photography

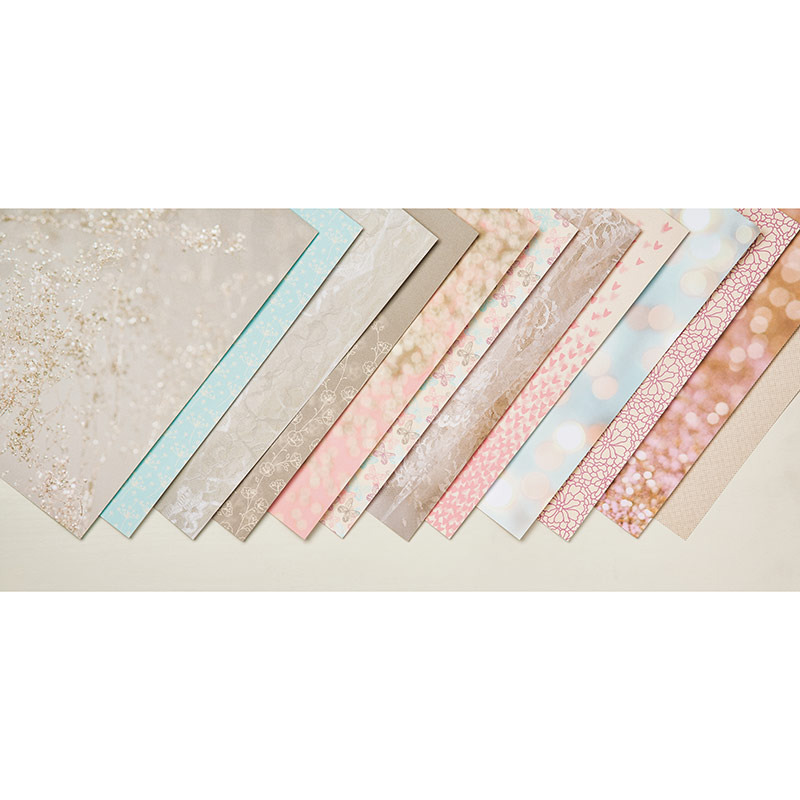
This is an out-of-focus, blurry style that is usually in the background while the foreground image is focused and clear.  We have an amazing Designer Series Paper stack  called "Falling In Love", with several Bokeh style images and that is what I made my card from:


I combined this wonderful paper with the "So In Love" stamp set and framelit bundle for an elegant anniversary card that screams classy and beautiful!  I used Soft Suede ink so my sentiments would show up but not dominate the card. What do you think?  I would love to hear some comments!

Here's a peek at the whole paper stack so you can see more of the lovely designs.


While this set is designed with love, weddings and anniversaries in mind, wouldn't it make gorgeous baby cards as well?  Such a soft, subtle palette of colors in pinks and blues would be perfect!

I hope I've inspired you today!  I also have an event announcement!  I'm hosting a Charity Stamping Event this Saturday. We will gather and make as many dog and cat themed cards as possible and donate our handiwork to the local Human Society for their use.  Contact me for details if you would like to participate. You can also participate from long distance!  Make some thank you, sympathy, or thinking of you cards with a dog or cat theme and send them to me or donate them to your local shelter!  Handmade cards are such a treat and how sweet is it for a charity to have some cards to spread some love and appreciation!

Thanks for stopping by!
Sarah

Friday, January 20, 2017

Hey Chick!

Wow, it's Friday already!  We are into our second week of Sale-A-Bration already! I wanted to feature a card today with an adorable free set from the SAB brochure.  You can't buy this set... you can only earn it by making a purchase of any and all Stampin'Up! products that add up to $50.01!  This stamp set will be sure to put a smile on your face and one on the recipient's face as well! Here's the card:


That's a lot of chickens right there!  I'm not a farm girl but I'm pretty sure these are not exact replicas. They are meant to be funny, whimsical and charming. I decided to design a card that features them all, in kind of a "Bremen Town Musicians" sort of way. If you don't get that reference, you've forgotten your childhood and feel free to Google it to remind you!

This card is a #9 size, which is 8-1/2" x 3-1/2". It requires a special envelope as it is not the standard A2 size we usually see.   I stamped the chickens in Archival Black ink and then colored them with various colors and blender pens, picking up the ink off the lid of the stamp pad and not the pad itself. I am pretty sure chickens are never blue but I thought I would go with the craziness of the chickens and Bermuda Bay is what happened.

See this and more in the Occasions Catalog and Sale-A-Bration brochure (links to the right!)
I hope you have a wonderful weekend and see you Monday!
Happy Stampin'm
Sarah


Thursday, January 19, 2017

Beautiful You- My #1 pick from the Occasions Catalog!

Hey stampin' friends!
Way back in December, I gave you some sneak peeks on some new products in the Occasions Catalog, but since it hadn't launched yet, I was unable to share many details. Now I can!  I have a favorite set from the Occasions Catalog and when I look at Pinterest, I see that I am not alone!  There is a wonderful, trendy, versatile set that can be used for any occasion, for any woman. It's called "Beautiful You" and I just love it.  Here are the three cards I made with it:


All three of these cards are very similar in style but I wanted to feature different stamps, different sentiments and different framelits.   The background paper is from our Designer Series Paper Stacks which offer some paper in all the Stampin'Up! colors. The words written on this background paper fit with the theme of the card so it was a natural choice to use and easy to grab all the colors I needed. The ladies are the three woman stamps from the Beautiful You Stamp set.  The brush of color on their dresses are also from that stamp set and specifically designed to look like artistic brush strokes. The sentiments are all from the same stamp set and I used our wonderful Stitched Shapes Framelits to cut them out, featuring the ovals, the squares and the circles.

Three cards, three slightly different themes and looks but all so similar. The first card is my top attention getter on Pinterest!  I imagine this will spark a few more pins!

Check out the supply list below and you can get your own set of "Beautiful You" and be creative in your designs of these wonderful stamps!  If you purchase the stamps and the framelits, you reach the $50 threshold and can choose a free Sale-A-Bration item... win/win!

Happy Stampin'!
Sarah

Wednesday, January 18, 2017

Love You Lots!

Greetings on this fine day!  We are enjoying lots of snow on the ground  and lots of sun the past couple of days and it seems to put almost everyone in a good mood around here!  If it's winter, it might as well be winter, right?!

I have one more card to show you as a Valentine's Day option. The Valentine's suite in the Occasions catalog sure offers alot of choices, which is great. It's fun to send a Valentine to all sorts of people, not just your "true love"!  Here's my card:


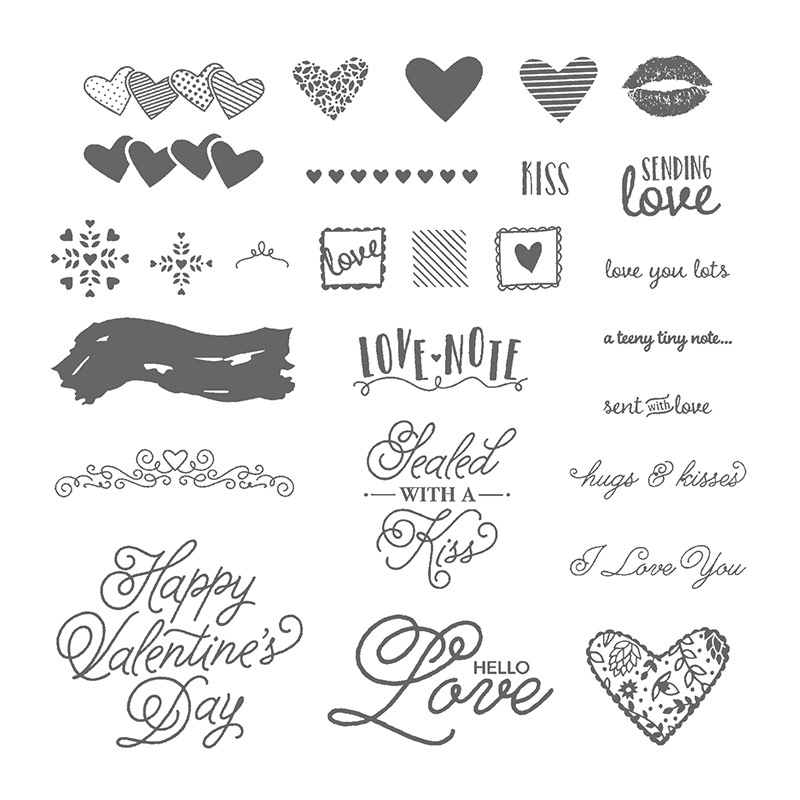
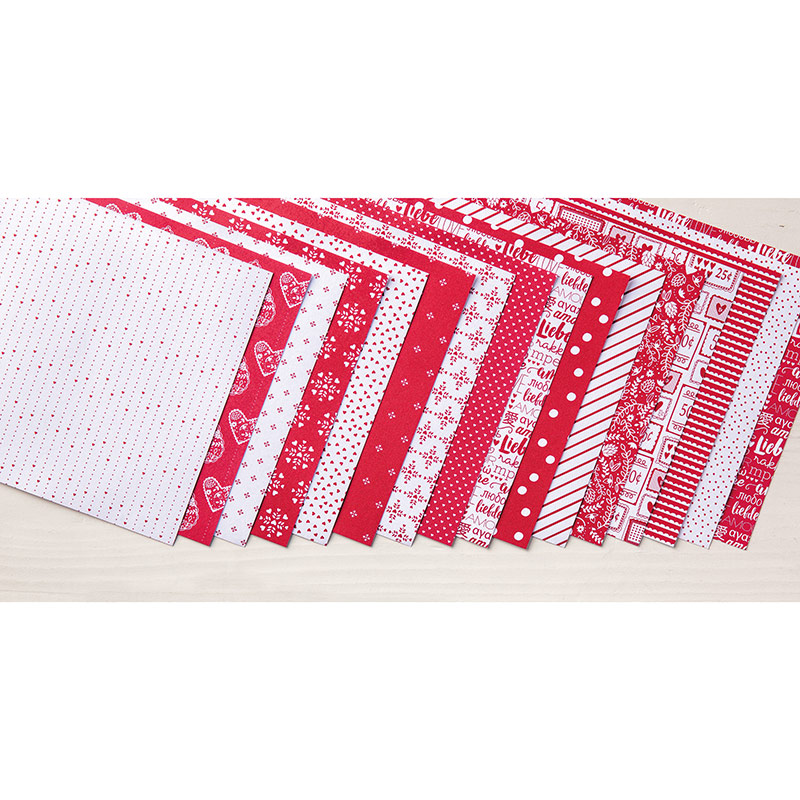
For this card, I really took advantage of everything the Valentine bundle has to offer.  There is a super cute Designer Series Paper pad that has all sorts of red and white designed paper. The framelit set has the great pop up heart border, two little envelopes to make and several inserts (hard to see but I cut out a heart and a little love note). The stamp set is chock full of stamps for every style.   Here are the products up close so you can see them better.


I think you could make all the Valentines you would ever need and still have leftover ideas!  It's not to late to order your supplies and get going!  You can shop right now in the online store link to the right. 

I hope you are surrounded by people who love and appreciate you. That's what Valentine's Day is all about!

Happy Stampin',
Sarah

Tuesday, January 17, 2017

Happy Valentine's Day!

Hey friends!
Today I wanted to share another card using this year's Valentine suite from Stampin'Up!  One of the design perks of this suite is that it sticks to just Real Red and white, so you can add any other colors or leave it alone. As you'll see in my card, I added a little crumb cake to try and go with the wooden embellishments that are also part of this suite. Here's my card:


I used another piece of the Sending Love Designer Series Paper with this one featuring the word "love" in several different languages. The main feature are the wooden embellishments on the card, hearts and flowers of different sizes!  This is a good value as you get 36 shapes when you order them and obviously, you wouldn't have to use as many as I did on my sample, per card.  My supplies are listed below to create this special card for Valentine's Day!

Don't forget about Sale-A-Bration!  With every $50 you spend on any Stampin'Up! product, you can earn a free SAB item. The catalog and SAB brochure are linked to the right. It doesn't take too much imagination to come up with $50 worth of product, right?!!

I'm off to a class at a friend's house today. She and some friends meet once a month to make cards. I come to present the cards and off they go. Would you like a catered card making party at your house with your friends?  I'm available!  Just contact me and we will start working out some details!

Happy Stampin'!
Sarah


Monday, January 16, 2017

Valentine Love

Hey Stampers!
I know that Valentine's Day is a month away, but in the make-it-yourself world, that's not too early, is it?  I wanted to share  the especially fabulous Valentine/Love suite that Stampin'Up! is offering this year!  There are stamps, ribbon, framelits, paper, embellishments, all of which will make a valentine just perfect for your special people.  Here's the first card I made using this suite:


This is very much to the point and features something else that is particularly good news.  The Stitched Shapes Framelits which were available and then sold out are available again!  Don't you love the effect of those framelits around my sentiment!  I also incorporated some of the Love Notes Framelit dies and Sending Love paper.  My supplies are listed below!

I'll be back tomorrow with more from this fabulous suite. By the way, I'm hosting a Valentine Card Buffet on Friday from 9 a.m. to 2 p.m. and have several designs for you to choose from... plenty to make the Valentines you need.

Happy Monday!
Sarah

Friday, January 13, 2017

Dragonfly Watercolor Technique #6

Here's the final card we made in my Watercolor pencil techniques class today!  I thought this up as I was contemplating the whole overarching topic of water added to color on paper. It seems pretty obvious when you put it like that. Color watercolor paper with watercolor pencils, then spritz with water and see what happens!  Here's the card:


This technique will give a unique effect every time because of the placement and amount of coloring (density) and the amount of water spritzed on and how long it's allowed to stay there... all the way until it dries or dabbed off with a paper towel.  I chose 4 complimenting color pencils and colored the entire surface of my water color paper. I then spritzed it with water, as lightly as possible and watched it bleed a little, then dabbed with a paper towel. I wanted to not let the colors run into each other too much. When this paper was dry, I stamped the dragonflies and sentiments on...It's really a pretty card and makes you feel like you actually made your own paper!

I hope you will give some of these techniques a try and purchase your own set of watercolor pencils for your coloring fun and imagination.

That's it for this week!  I'll be back next week and the subject will be LOVE... i.e. Valentines!
Have a great weekend!
Sarah

Baby Card - Watercolor pencils Technique #5

I hope you are enjoying the different ideas I have presented with watercolor pencils. Here's another fun one that requires Stampin'Up! Irresistably Floral Designer Series paper and a blender pen with your watercolor pencils.


The white paper is a little hard to see, but it is an embossed paper designed to be daubed, sponged, or whatever. I had a brainstorm and grabbed it for the watercolor pencil techniques. For this technique, you color fairly firmly on some scratch paper. I like to use the Stampin'Up! grid paper under all my projects. Then, you take a blender pen and pick up color from your scribbled blot of color on the scratch paper and color on the white Irresistably Yours DSP.  I chose the diamond pattern and cut the size down to 3 x 3. This is a bit time consuming so I would recommend a smaller piece as an accent and not the whole back of a card, unless you want to. The rest of the card is pretty self explanatory. Because I'm right handed, all my color strokes go from SW to NE on a compass. I would anticipate if you were left handed, it would be the opposite! Here's a peek at my scratch sheet!


(By the way, I used up some retired ribbon that coordinated with my color scheme so I can't offer those in the supply list below.) I have my watercolor pencil class in an hour so I have to scoot!  Come back later today for Technique #6-- it's another one I came up with on my own and you don't want to miss it!

Yay! It's Friday!
Sarah

Thursday, January 12, 2017

Thank You Card - #4 Watercolor Pencil techniques-UPDATED WITH SUPPLY LIST!

Hey stampers!
I woke up this morning from a weird dream where I met a veterinarian that had a jewelry making hobby on the side and she read my blog... oh, and I had a really tiny dog that I was taking to that vet. Ah, the things we dream... so probably none of that was based in reality other than I made a call to our vet's office yesterday for my dog Cody.

Anyway, the cobwebs of the night have cleared and I'm ready to make sense in my head and out loud. When I first decided to do a series with watercolor pencil techniques, I came up with 4 on my own and then used YouTube for some other ideas.  One idea I really liked was from Colleen Rein. I switched out the stamp that was used, but the technique is the same.  Here's my card:


There are several ideas here. One is to create an "ombre" effect by coloring part of the circles darker than the others. There is also a bold design featuring the Sale-A-Bration Thank You stamp set. By the way, other than birthday cards, I think thank you's are the second most popular!

Here are the details for the watercolor technique. I first took a scrap piece of card stock (doesn't matter what color because it isn't used for the card) and then using my Layering Circle Framelits, I ran the card stock through the Big Shot with 3 different circle sizes on it. It also doesn't matter where you put them on the card stock because you move the mask around to color. Once I had my mask, I cut a piece of Shimmer White card stock for my background piece. I placed the mask randomly in 3 different places on the Shimmer White CS and colored with 3 different colors, going darker and heavier to lighter for the ombre effect. I went back over it a couple of times to try to get the dark to light effect. I then took a Wink of Stella pen (while the mask is still in place) and blended the color from the pencil. Because the Wink of Stella pen is liquid, it blended the pencil color and had the added bonus of adding some sparkle!  I then moved the mask, chose another size circle, colored and blended with Wink of Stella, and so on. You could repeat this process as much as you wanted, use any shapes or mask ideas.   The Wink of Stella sparkle on the Shimmer White paper is really pretty and isn't easily captured in a picture.  Once I was done with the background, I stamped my sentiment with Archival Black ink, mounted it on Designer Series Paper and card stock. I loved making this! I've listed the supplies I used below so you can try it yourself!

Hope your week is going well.... Coloring is a great past time when you are looking out at a world of white winter wonderland!

Happy Stampin'!
Sarah

Wednesday, January 11, 2017

Fiesta Time - Watercolor Pencils #3

Hey stampin' friends!
I'm back with #3 in my series of techniques for the watercolor pencils. This technique still features watercolor paper but uses the Aqua Painter to deliver the color to the paper!  Here's my card:


Pretty cute, huh?  It's very hard to resist smiling at a llama!  I used the Birthday Fiesta bundle which is in our Annual Catalog for this card. For the llama, I stamped on watercolor paper first. I then colored with the gray and Melon Mambo watercolor pencils and used an Aqua Painter to cover my coloring and create a watercolor effect. I then die cut out the birthday swag in watercolor paper and colored each section with different watercolor pencils, trying to match my little strip of Designer Series Paper at the bottom of the card. After coloring, I used the Aqua Painter to move the color around. The cacti are stamped directly on the card.  I had not used the birthday swag before and one happy surprise is that there is a polka dot imprint on each section (little hard to see in this picture) but it gives some texture to it which was delightful!

I was attracted to this bundle because of the llama, but I also have some relatives in AZ so who knows, they may see something like this in their mailbox for real!

It's snowing alot here... perhaps I should experiment with snow as a water deliver system haha!

Have a great Wednesday!
Sarah.

Tuesday, January 10, 2017

Walking in the Rain - Watercolor Pencil #2

Hey Stampin' Friends!
Today is the second in my series of watercolor pencil techniques!  The overall concept is using the new Watercolor pencils from Stampin'Up for the color and some kind of delivery system, generally water-based, to put the color on paper.  Once I had that concept in mind, I kept changing up the type of paper and the type of delivery system! I hope that makes some sense.

For my second card, I stamped the image I wanted to use ( with black archival ink), colored with the water color pencils and then used a blender pen to blend the color.  My paper choice was watercolor paper. Here was the result:


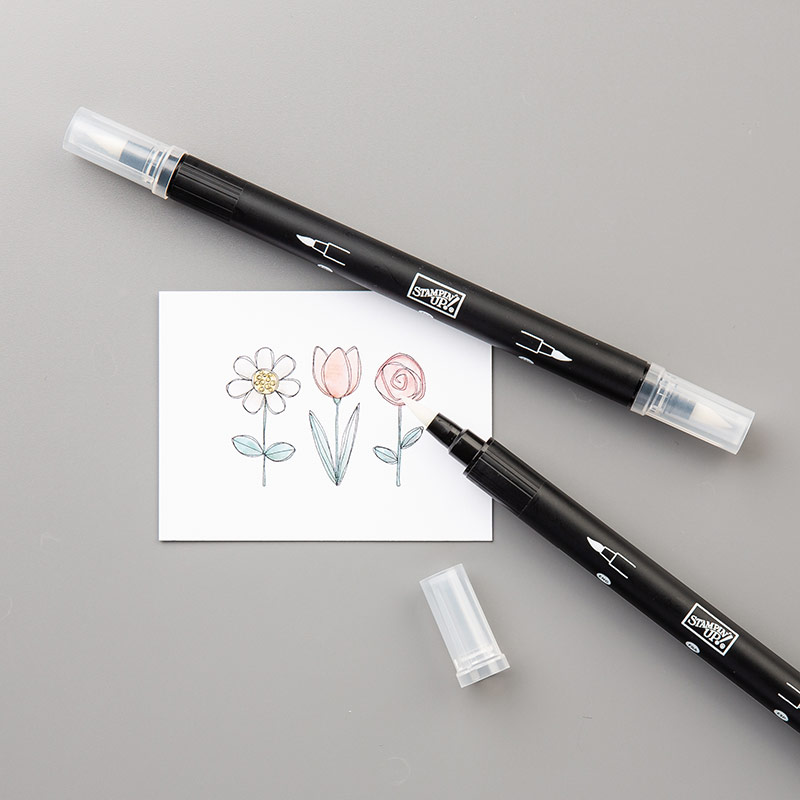
As you can see, I used a fairly light touch with my coloring.  I used Real Red for the Umbrella and Daffodil Delight for the dress.  The rain is a little more interesting. I colored all around her with Bermuda Bay, then put in some streaks of Marina Mist, a darker blue. Using a blender pen over the top of the areas I colored blended my coloring strokes into a watercolor effect. You have to be sure to run you blender pen across some scratch paper in between color changes so you are starting with a clean tip. Blender pens are amazing and such a great value. You can get a set of three for only $10 and they last for a long time!. Here's what they look like:

Add a set of these to your next order and you'll be so glad you did!  You can also use them to pick up color from the lid of a stamp pad (when closed, gently squish your stamp pad with your fingers so some ink goes onto the lid. Use the blender pen like a paint brush and pick up color from the inside lid and not the stamp pad.)  

Check out the supply list for the rest of the products for this card. Can you guess where I found the background paper?  The lacy floral die?  The woman/umbrella image?  In my opinion, the "Beautiful You " stamp set is the must have set from the new Occasions Catalog! It's amazing:


See you tomorrow for my 3rd technique with the Watercolor Pencils!
Happy Stampin'!
Sarah

Monday, January 9, 2017

Watercolor Carousel Horse

Hi stampers!
Yesterday, I had a brilliant idea yesterday ... I wanted to try as many different techniques as I could with the new Stampin'Up! watercolor pencils and design a class around it!  I had so much fun!  I used YouTube for a few tips and figured out a few on my own. I experimented with different paper and different ways to deliver the water to the paper, getting my color from the watercolor pencils.  I want to feature my results on my blog this week! Hopefully I can explain it all well enough that with the right tools, you can be off to your own creativity journey with watercoloring.

Let's start at the most basic level, just plain coloring.  Here's my card:


I chose the Carousel Birthday stamp set for my first project.  It has a detailed carousel horse that I thought would be fun to color.  I also used the Cupcakes and Carousels DSP paper stack and found the pencils that best match those colors.  Note, there are only 12 pencils so you have to adjust what colors you might want. Hint:  You can also combine colors to get a third color. Remember your days in elementary school art class when you first discovered that yellow + blue makes green and red + blue makes purple?  Same principle still stands all these years later!  I colored the horse with fairly sharp pencil tips because of the details.  I then die cut it out using the Stitched Shapes Framelits (currently not available but scheduled to come back next week!!)  To my card base, I added some DSP paper and then re-stamped the carousel horse on the card. I popped up the one I colored with dimensionals.  I added a Birthday greeting, pulling out the Bermuda Bay color and boom... card done!

I've listed the supplies below to make this card. Be sure to come back each day this week for more examples of using the fabulous watercolor pencils. Once you spend a few minutes with them, you will want a set of your own!

Don't forget that with every $50 you purchase of any Stampin'Up! product, you can pick a free thing from the Sale-A-Bration brochure!  Best time of the year!

Happy Stampin',
Sarah

Friday, January 6, 2017

Cool Treats Suite!

I have been so excited to start sharing my cards with you!  I have about 2 dozen already made from our new products in the 2017 Occasions Catalog and hardly know where to start!  Ice cream sounds like a good place, right?  Here's my card today:


This was a fun layout and the color scheme was handed to my by the Designer Series Paper!  It looks yummy and refreshing, even though it is very cold outside!  I combined framelits, stamps, paper, embossing folder and washi tape to get my design. All the supplies are listed below and this is a perfect way to celebrate a special birthday!

Don't forget that Sale-A-Bration is going on!  By buying the Cool treats bundle (stamps and framelits) and one more item from the suite, you qualify for a free SAB product from the SAB brochure!  This is a great first purchase from the new catalog and so handy to have for any card giving occasion!

Happy Stampin'!
Sarah

Thursday, January 5, 2017

Taco Truck!

Good day Stampers!  
I was so happy to fire up my computer and not see that Stampin'Up! was having any issues this morning!  I'm fine tuning my order for what I want from the Occasions Catalog and also picking out some Sale-A-Bration goodies!

Here are the details:
1)    For every $50 you spend with Stampin'Up!, you can choose a free item from the SAB brochure. The PDF link to the brochure is to the right on this very blog  ====>>
2)    There is no limit to the free stuff!  You can even order the same thing if you want, i.e. a sweet stamp set you just have to have for yourself but also want to gift to a friend!
3)    The promotion lasts thru March 31st so you can submit multiple orders over three months to get some free goodies!  This is great for budgeting. For instance, if your "craft allowance" is around $50 a month, you could place 3 orders over January, February and March and end up with 3 free choices! If your "craft allowance" is around $100 a month, you could still submit 3 orders and end up with 6 free things and so on! If you placed one huge order, say just over $300, you could pick 6 things!
4)    This is not inferior product or old items Stampin'Up! is wishing to move out of inventory. This is all new stuff, especially designed for SAB,
5)     None of these products may be purchased! They can only be earned for free, as explained above.
6)    A 3 month prepaid Paper Pumpkin subscription will earn you 1 free SAB product right off the bat. More About Paper Pumpkin in another post!

I think that's enough talking and now it's time to show and tell!  My favorite product from the SAB catalog is the food truck stamp set!  How trendy is that?  Here's my card:


How cute is that!  Here in Bozeman, we see food/clothing/ice cream trucks all over the place, mostly in the summer!  I think this is a fun way to customize a card for you special purposes.  Here's a look at the stamp set so you can see all your options!


Stampin'Up! has created several of these "build your own scene" stamps in the past couple of years and I love them. If a food truck isn't quite your thing, you see "Glamper Greetings", all about a classic travel camper!

I hope you are inspired to check out the new Occasions Catalog and SAB brochure!  The fun is waiting for you to jump in!

On another note, did you know I have a Facebook page also featuring my work, announcements, promotions and fun?  Here it is:

Big Sky Stampin'

I posted the following picture yesterday and my page almost blew up!  Over 515 people took a peek! I am in complete awe!  Check it out!


Happy Stampin'
Sarah