Wednesday, September 30, 2020

Warm and Toasty - All the Cute Animals!

 Hi Stampers!

I'm back today with one of my favorite subjects - animals! I have to admit I don't like non-furry animals generally, like alligators or snacks or even birds that much but I theoretically like the ones you can pet and cuddle! In real life animals aren't always cuddly, but sometimes a sketch artist takes some artistic liberty and makes them appear to be very lovable and huggable.  I think that's what happened with a fun stamp set in the Aug-Dec Mini Catalog called "Warm and Toasty"! I have several ideas for you today featuring these adorable animals, all ready for the holiday season! Let's take a look!


I'm just going to suspend reality while I talk about these projects, okay?!! First of all, music is certainly a big part of Christmas and those rabbits are all tuned up and ready to go with three-part harmony! They must be singing their favorite Christmas carol, right?! The mice are joining in with a cute dance and obviously you can tell by the smiles on their faces, they are as joyful as can be! I used some paper from the "Tis the Season" 6" x 6" Designer Series Pack (on sale tomorrow!) and colored my stamped images with Stampin' Blends alcohol markers. If you haven't tried them yet, why not? They are the best coloring tool out there!


I am sure one of a polar bear's favorite past times is ice skating and this guy is just about ready to launch a double spin move of some kind! Blue seemed to be a good theme so I used some paper from the "Snowflake Splendor" DSP (on sale tomorrow!) and again, some alcohol markers for coloring. I made a pop up frame from the DSP by cutting out an oval shape with my new Stampin' Cut & Emboss machine. I raised it up using dimensionals, creating a shadow box effect. 


This cute reindeer seems to be so happy that he's mellow! This card was designed for a class featuring many of the new Specialty Papers in the Aug-Dec mini catalog, including Balmy Blue Glimmer paper and the flocked Vellum paper.  This card ended up on my "Make a Card Wednesday" video today and you can see how I did it here:


I thought I was done playing with this set but then felt bad that the cutest little polar bear didn't get any attention. Almost at the same time, I looked up at another stamp set on my desk and thought this sentiment would be perfect for the little guy. It's from the "Heartwarming Hugs" suite and called "Wrapped in Christmas". The whole stamp set is full of beautiful sentiments to add to any project. I went back to the "Tis the Season" DSP for my background paper!

I hope you've got a smile on your face and some joy in your heart after checking out these cute critters and how I incorporated them into some card ideas. It isn't always easy to get from the stamp to the card process but it's very fun and rewarding. I would love to help you partake of some stamping therapy when you need some "down" time or "me" time! Let me know how I can help you dive into the fun world of stamping. It doesn't have to be overwhelming or expensive and I'll help you navigate until you are good to go! You can leave a comment if you'd like to hear more or visit my website for more information. Here's a link to that:

Big Sky Stampin' website

Thanks so much for stopping by! My supplies are listed below and clicking on any of them will direct you to the online store for an easy shopping experience. I'll be back tomorrow with all the details of the Designer Series Paper sale, starting Oct 1st and lasting all month!


Until then, Happy Stampin'!

Sarah


Tuesday, September 29, 2020

Whale of a Time Suite

 Hi Stampin' Friends!

Are you a big fan of Designer Series Paper like I am? I have been with Stampin'Up! for 10 years now and one of the things I quickly noticed is the superior quality of their paper. The card stock is the best for making cards and other projects and the Designer Series Paper is without equal in the papercrafting world. I can confidently say that because I've bought and tried a lot of different papers over the years! Our DSP is double sided and a perfect weight. The colors are vivid and gorgeous and perfectly matched to our ink and card stock colors. Each pack includes a color list so you don't have to guess what colors are needed to match.  What's even better? How about a sale of DSP!  It's coming in 2 days and I'll have more to say about that at the end of my post!

One of my favorite DSP packs in the Annual Catalog this year is the "Whale of a Time" DSP. It is gorgeously sketched with bright, oceanic colors that really catch my eye since I've lived in the mountains my whole life and never by the ocean.  I recently played with this suite and was so drawn to the paper. Have a look:


Included in this suite is a fun 3D embossing folder which I used on watercolor paper and then hand painted with an Aqua Painter. Normally I don't consider myself a painter but this was pretty easy and I loved the effect. The suite also has a whale punch that is so cute! A couple of the DSP selections are on this card as well. 


For this card, I decided to stamp much of it, featuring as many stamps as I could. I chose a little more muted blue to go with my green and coral colors, using Seaside Spray, Smokey Slate, Mossy Meadow and Calypso Coral. 


I love this school of fish! To give the paper some dimension, I embossed it with the 3D Seabed embossing folder. 

I must really like that embossing folder because you see it again here! This card featured lots of whales, both in the DSP and the hand stamped/punched one.

This is such a cute set to have fun with. I want to give you a close up view of the paper now:


The colors are just about what you would expect for an ocean theme and they are gorgeous. This paper is part of the upcoming DSP sale, beginning on October 1st and lasting for the whole month. The papers in the sale, including many from the Annual Catalog and the Aug-Dec Mini Catalog will be 15% off which is a wonderful bargain. I can't wait to stock up!

I've listed all my supplies making these cards in the list below and a click on any of them takes you to the SU online store where you can easily start a wish list, load up a shopping cart and place an order. Please let me know if you have any questions! I love to help people find their creative niche and stamping may be yours!

Thanks for stopping by! I hope you have a Whale of a Time with whatever your plans for today are!
Happy Stampin'!
Sarah


Wednesday, September 23, 2020

Falling in Love with Autumn!

 Hey Stampin' Friends!

I held a class yesterday with the title of "Falling in Love with Autumn". It was a lot of fun and I've discovered that almost everyone loves the fall. I think it's the leaves, the pumpkins, the colors, the smells and so much more. There are always some fun new products to help us celebrate this change of season and it was the perfect theme for a class. I wanted to share what we made with you today!


This first card shows some of the dramatic colors that can be used for fall projects, all the deep reds, purples and golds. I used Blackberry Bliss, Cherry Cobbler and Mango Melody with the "Love of Leaves" bundle and the "Plaid Tidings" paper. These dies are super fun to play with and the stitching on the leaves gives you even more reason to love this bundle!

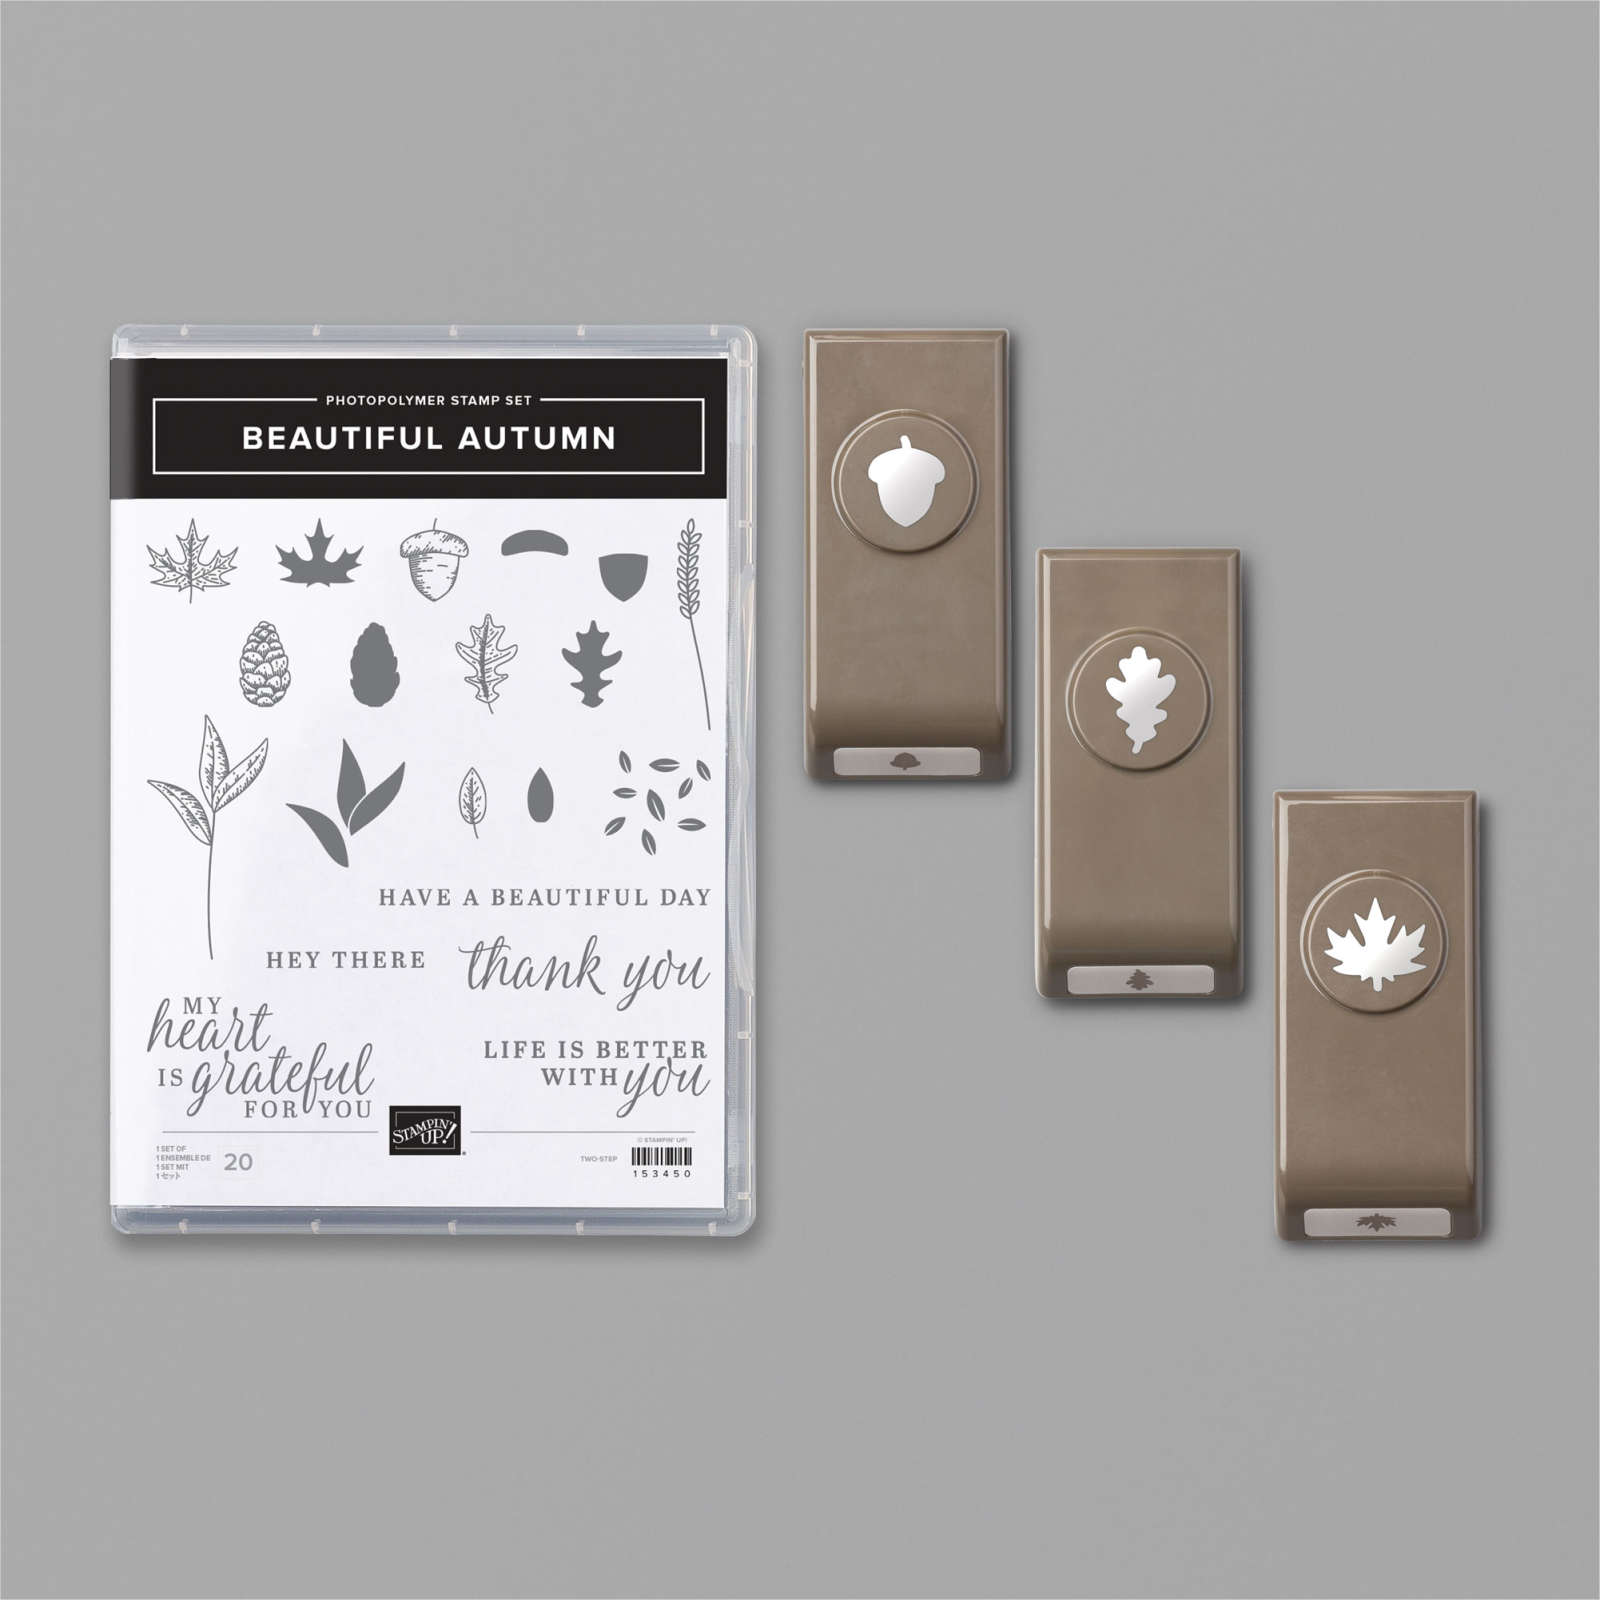
No Autumn card class would be complete without some cards featuring the "Gilded Autumn" Designer Series Paper. It is a gorgeous paper with metallic accents that blends into anyone's idea of fall colors. We used the "Beautiful Autumn" bundle for this card which includes the stamp set and three coordinating punches. As part of the "Gilded Autumn" suite, we also have 3 new brushed metallic foil papers and you can see two of them here on this card. 


We continued with the "Gilded Autumn" DSP and brushed metallic foil paper for this card, using the "Autumn Goodness" bundle. The wheelbarrow die is perfect, even including the wood grain pattern on it!
We colored our flowers with Stampin' Blends alcohol markers and finished the card off with some ribbons from the "Gilded Autumn" bundle. I used the 3D Hammered Metal embossing folder to create a stone path.


Sometimes non-holiday sets get overlooked in a "holiday" catalog but I would hate for you to miss this great stamp set called "Life is Beautiful". It features a striking, large tree and several options for leaves, sentiments and more. This card was CASE'd from the designer of the set with a little tweaking here and there by me. If you're wondering how we got our oval background, I simply cut an oval out of a piece of white tag board that comes inside all of our DSP packs and then used that as a mask with sponge daubers using Bermuda Bay ink and Pumpkin Pie ink. 


Lastly, I had some small 3"x 3" cards and envelopes from last spring's product line that I wanted to use up. Each person made two cards by stamping a quick sentiment and then punching the Plaid Tidings paper with the "Beautiful Autumn" punches. The yellow and peach color splashes were already on these cards.  I love when I can figure out a way to use up something that's retired in a fresh way.

I hope you were inspired as you looked at these cards. I'm trying to offer at least one class a week, often with a particular theme in mind.  My next one will be next Tuesday, the 29th, featuring all the Specialty Papers in the new Aug-Dec Mini Catalog. Let me know if you're interested in attending!

Thanks for stopping by! I should remind you that if you're reading this on Wednesday, Sept 23rd, it is the day of our 24 hour Stamp Sale! Don't miss it! Click on the "shop now" link and then follow the trail to "Specials and Promotions" and "Stamp Sale". There are some great stamps included in the sale and you'll save money to boot, all day today!

Until next time, Happy Stampin'!
Sarah


Monday, September 21, 2020

Stamp Flash Sale combined with a Starter Kit= Amazing savings!


 WooHoo! It's time for a 24 hour Stamp sale brought to you by Stampin'Up!  It's on Wednesday, Sept 23rd and lasts from midnight to 11:59 p.m. - 24 hours of rare savings on exclusive stamp sets. 

And, guess what would make it even better? Combine this promotion with the current "Get and Go Promotion running through September!!  Here's what I'm thinking:

1) Sign up to be a demonstrator on Wednesday, Sept 23rd, earlier in the day if possible to have time to process your sign up. 

2) Normally, you receive $125 worth of SU product for $99 however, if you chose to load your Starter kit with stamp sets from the 24 hour Stamp sale, you would actually get closer to $145 worth of product for $99! There are so many stamp sets to choose from and if you're already a stamper, that's what you mostly want more of! 

3) Because of the "Get and Go" promotion, you will also receive two more stamps for free plus paper to make 16 cards.  The stamp sets for this promotion are "Queen Anne's Lace" and "So Much Love"

Signing up is as easy as purchasing a Starter Kit and I'm here to help. I can coach you every step of the way on the phone or in person if you're local. Once you've signed up you'll enjoy all the benefits of being a demonstrator (discount on product, advanced access to new catalogs, promotions and specials) as well as continue to enjoy all the customer benefits (Hostess Rewards, Sale-A-Bration, etc.) 

I have an active demonstrator team based out of Bozeman but covering multiple states in the country. You can join from anywhere in the US and still be part of our group which includes group activities like charity stamping, swaps, challenges and more as well as team meetings in person when we can and Zoom when we can't. You do not need to be a seasoned stamper or a computer whiz to join. I will help you every step of the way and it's okay to sign up just to get the discount and be your own best customer! If you want to have a side line business, doing something you love, well, this is perfect too! Let me know how I can best help you with your creative efforts and time!

I'll be back early Wednesday with the links and more excitement! Here's the list of what will be included in the 24 hour stamp sale!


Sorry for the small font... I'm working on trying to make it bigger and will substitute that when I figure it out!

Can't wait to hear from you about making a great decision to join Stampin'Up!

Happy Stampin'!

Sarah


Saturday, September 19, 2020

Tags Kit and Christmas Card kit 2020 Style!

 Hi Stampers!

I hope you're already enjoying a pleasant weekend, possibly away from your Monday-Friday life. Since I quit my medical transcription career a couple of years ago, I have to be honest and say my week days are almost as nice as my weekends! It's finally raining here in SW Montana and we have great hopes that will chase the smoke out of our skies. It has been dismal and reminders of fire's great destruction, even close to home this year. 28 homes were burned in a recent fire in our area, very close to town, and it is heartbreaking to think of what is ahead of them to rebuild their homes and lives. 

Because of the unhealthy air and now rain, we are staying home this weekend and so I plan on spending some time prepping for some upcoming classes and doing another clean of the stamp room. It's always about a day away from total disaster so it needs some organization AGAIN. Do you feel my pain?!!

I wanted to share one of our kits in the Aug-Dec Mini Catalog with you today. It's an adorable kit that makes big and vibrant tags for all your Christmas gift giving packaging, whether it's presents, food and snack gifts or even gift cards. The kit is called Tag Buffet and comes with a gorgeous gift box filled with all your paper supplies for 30 tags for only $30.  In addition, you can buy the companion stamp set called "Tag Buffet" and also a red and green stamp pad for your inking needs.  Here are some close up pics of the tags:


There are six unique tags in all, five of each, included in the kit. I made up these three as samples to show people during an open house I held for the new holiday catalog. These are pretty large in size, measuring about 3-1/4" x 4-1/4" in size. There is plenty of room to write on the back and make such a cute decoration for any package, bag or gift etc.   The colors used for the samples are Real Red, Garden Green and Shaded Spruce. Here's a pic of the entire kit contents and the pretty box they come in:


For those of you who like to dress up any occasion, tags are the perfect accompaniment to a gift, an ornament, a calendar, a place card, etc. There are so many ways you could use these fun tags.  To order yours and check out the rest of our Christmas products and more, click on this link:


Are you thinking of making your Christmas cards this year? Here's a unique kit that allows you to stamp and craft and also incorporate a family photo, which is pretty much all the rage!  It's called "Joy of Sharing" and you can see it here:

Joy of Sharing card kit


It's never too soon to get started on some holiday craft projects and you know Christmas will be here before you're ready for it, as always. I encourage you to check out the ideas and possibilities and get started! I'm always here to be your creative coach if you need a gentle push haha!

I hope you have a great weekend with plenty of rest, relaxation, stamping and fun!

Until next time,

Sarah


Thursday, September 17, 2020

Poinsettia Place Suite ideas

 Hi Stampers!

Did you notice how many fabulous and eye-catching suites are in the new Aug-Dec Mini Catalog this year? I continue to be amazed at Stampin'Up!'s innovation and fresh ideas. It is hard to choose what to get isn't it?  How many of you love poinsettias at Christmas? They are so festive and I love that they last for a couple months or more with some minimal watering. We always featured several in our house, one on every other stair going up into the living area. They always looked beautiful except for when the dog knocked them over with his tail wagging!

You've probably guessed I'm going to share something from the Poinsettia Place suite today. It's such a huge suite that there are several directions to go. There are stamps, dies, paper and embellishments to give your project that perfect holiday flair.  One of the secondary themes in this suite is pinecones and some holly berry sprigs so don't overlook those.  Here are some of my first ideas:


If you've had a glimpse of this bundle, you'll see there are lots of options for flowers and leaves and more! It's a little overwhelming at first so I thought I would start easy and just stamp some leaves and a flower on Real Red and Old Olive card stock with Black Momento ink. I then ran them through my new Stampin' Cut & Emboss with the cutting die and nesting embossing die which creates some texture on the card stock, "veins" if you will. I really liked how this turned out. I added a small strip of Designer Series Paper from the Plaid set and embossed my background with the Brick and Mortar 3D embossing folder. 


This card uses the same technique as above for the flowers and leaves. I added some "Tis' the Season" DSP and Black Glimmer paper, part of our Halloween offering. This seemed a little more formal style than the first card. 


I tried a different technique with this card. I stamped my flowers and leaves with our regular Classic Ink in Cherry Cobbler and Garden Green. I then colored them with my Stampin' Blends alcohol markers Real Red and Old Olive.  I used a dark Mango Melody Stampin' Blend for the center of the flowers. You can also see some of the Poinsettia Place DSP on this card. 


For my last card, I skipped the poinsettia theme and went to the holly berry branches motif. I really like this because I think it can be used for all winter. I added a little bit of the "All Wired Up" background stamp so it wasn't quite so bland on the background!

If you look at the samples in the catalog, my ideas are quite different so that just shows you how much versatility this suite has. You can get the whole suite or just the products that you want. Check out my  supplies below and a click on any one of them will take you to the store!

I love sharing my ideas with you and appreciate you stopping by and seeing what I'm up to! Let me know if you have questions or need clarification on anything - I'd be glad to help!

Happy Stampin'!
Sarah


Wednesday, September 16, 2020

Love of Leaves bundle of fun!

Hey folks!

I hope you are enjoying the return of fall so far. We are having cooler temps and leaves changing in the midst of horribly smoky skies so that isn't so great. It's bad enough air quality that you don't even want to be outside most of the time.  Oh well, great opportunity to stamp more!

It's Wednesday so I did another "Make A Card" FB Live this morning and want to share it here with you. It was a fun  way to make two cards via one process. I stamped some leaves, die cut them out and used the negative die cut left over on a second card. Let me show you!

First, I grabbed a piece of Very Vanilla card stock, cut it to 5-1/4" by 4" and then stamped one each of all the leaf stamps in this bundle using Just Jade, Crushed Curry, Cinnamon Cider, Terracotta Tile and Cajun Craze inks.  I spaced them out so I would be able to cut several at a time with the accompanying dies. 


Here you see the stamped piece on my die cutting machine with some of the dies. The outer die of each leaf cuts the perimeter of the leaf and the inner die placed some "stitched line" impressions on the leaf. 


Here's a picture of the completed card with the cut leaves and you can easily see the stitch impressions on each leaf, especially the Crushed Curry leaf. I added some ribbon and twine and also embossed my background layer with another die that comes in this bundle. I love this set!


After I had cut all the leaves out of my original stamped piece, I realized I had something I could use and the leaves had a nicely stitched impression from the dies around each of them. I applied some dimensionals to this piece and then placed it on top of a piece of "Gilded Autumn" Designer Series Paper. I cut some more leaves out of card stock, without stamping first, and made yet another card! This is such a fun technique and it yielded two cards in a jiffy. 

Here's a look at the FB Live I did this morning demonstrating this video!


If you need something "leaf" themed for the fall or any time of year, I highly recommend this bundle as a fun and versatile way to go. All my product information is listed below and a click on any of them gets you to the store!

I think I would rather stamp and die cut leaves than rake them, how about you??!!

Happy Stampin'!
Sarah


Thursday, September 10, 2020

Tree Angle with Right Angles!

 Hi Stampin' Friends!

I'm back today with some more Christmas Cheer and good will. It's never too early to start with our Christmas projects and in fact, the earlier you start, the less stressed you get, so that's good!  It's a little hard to wrap your head around snow and cold weather right now but one trip through the Stampin'Up! Mini Catalog will change your mind and get you so inspired for all the upcoming holidays!

One of the fun bundles in our Annual Catalog is called "The Right Triangle" and it is a collection of triangle stamps, different sizes and types (I don't remember geometry well enough to name them all) and fabulous stitched dies that frame the triangles. Stampin'Up! is so smart because they created a companion stamp set with a Christmas theme!  I decided to play with that as well as some of the "Heartwarming Hugs" Designer Series Paper recently. It's fun to cut out a bunch of triangles and then play with them on a background to try to come up with a great design. Here are some of my attempts:


For this first card, I cut several different triangles with the stitched dies out of pieces of Heartwarming Hugs DSP. It wasn't too hard to figure out how to lay them out. I wanted a special background so I used the embossing folder from the Snowflake Splendor suite.  The silver glitter star ornament added another festive touch to this card. My sentiment is from the featured stamp set, "Tree Angle". 


I like the tall and skinny triangles and they are perfect for a vertical landscape card. I used our new "Stacked Stone" background stamp with some Gray Granite ink for the background on this one.  Have you played with any of our triple punch label punches yet?  That's what I used for my sentiment! Some skinny Early Espresso scraps made the perfect tree trunks and I added some red rhinestones in the corner for some bling. 


For my last card, I actually used the triangle stamps in the stamp set and then cut them out. There's even a tree trunk stamp which I love. The Dainty Diamonds 3D embossing folder has become a quick favorite as well.  These were really fun to make and I'll come back to them some more I'm sure. 

Be sure to check out these products in the store and more. We have so many wonderful ways to help you create the perfect holiday project, whether it's Halloween, Christmas, winter or fall. Our products are high quality, meant to last for years. I'm also available to help with any questions or creative coaching!  I offer in person classes in the Bozeman, Montana area and also some online options as well. Check out my schedule on the calendar link to the right. Click on that and then scroll down to see the complete calendar!

Hope you are enjoying your week so far and getting in some stamping time!  Keep it up!
Sarah


Wednesday, September 9, 2020

Make a Card Wednesday #2 - Pine Cone Christmas Card

Hi Friends!
I've been out and about and not stamping as much the past week so I had to pick something relatively easy for my Make A Card Wednesday project today. I made this card a while back and loved how simple and classic it was, all the things I love about stamping including stamping, a little embossing, some gorgeous Designer Series Paper and a little ribbon. Here it is:


It's refreshing to stay clean and simple sometimes, isn't it?  The sentiment is beautiful and comes in the "Tag Buffet" stamp set. The pine cone paper is part of the Poinsettia Place Designer Series Paper pack and having lived around pine trees my whole life, this paper really speaks to me! What steps this card up is having an embossed layer with Early Espresso card stock. I used the "Greenery" embossing folder which is one of our new 3-1/2" folders.

I'm happy to be able to share the short video I did demonstrating how I made this card. As I said last week, I'm starting somewhat at the beginning of the card making process so people who haven't done this can get an idea of where to start, what you need, how easy it is, etc. I would love to share stamping with the whole world but will settle for my world right now!

Here's the video:


I hope to get back to my blog this week but also have company coming today and for the rest of the week... we are trying to squeeze in some more summer fun although we've already had our first snow fall up high this past weekend! Thanks for stopping by and taking a peek! Check out the online store via the supply list below. Click on any product and you'll be directed to the store for browsing and shopping!

See you next time!
Sarah

Thursday, September 3, 2020

Lazy, hazy days of late summer and early fall with the Beautiful Autumn bundle

Hi Stampers,

Well, it's the end of the summer officially as we head into Labor Day weekend! We are hoping to go camping in the Beartooth mountain area if the smoke holds off. It's no fun to see the sights in smokey skies, that's for sure. I hope you have some fun days ahead of you.

I've been wanting to play with the "Beautiful Autumn" bundle some more since I first got it about a month ago. I had the inspiration to combine it with the Designer Series Papers from the "Flowers for Every Season" pack because I wanted to not use the autumn themed paper and challenge myself to try some different color schemes and moods. I love what happened and want to share it with you!


I have loved shades of blues and browns together for at least 40 years! I remember a lot of the gifts we got for our wedding were things we had registered for and there was quite a bit of blue and brown! Even though I know leaves and acorns aren't blue in real life, I thought this still worked for a softer, muted autumn card.  The punches that come in the "Beautiful Autumn" bundle are fabulous and perfect scale for cards of this size or even smaller.  I used the coordinating stamps to make my leaves and acorns.


All the new In-Colors are featured in this DSP collection and Bumblebee has a prominent role. I used a couple of the papers for this card and added some Crumb Cake and Cajun Craze. You'll see some other leaf and "weed" stamps featured on this card as well. By the way, have you purchased the "Tasteful Labels" dies yet? I am using them practically on every other card these days, they are fabulous!


We also have some great Memory and More memory keeping cards that are part of the "Flowers for Every Season" collection. I used a fall-inspired card for this card and then stamped some leaves and acorns directly on card stock and punched them out.

Here's a look at the bundle so you can see all that comes with it!

BEAUTIFUL AUTUMN BUNDLE (ENGLISH)

Aren't those great! My only regret is that there isn't a pine cone punch too! It's not too hard to cut those out by hand though....

I love the onset of fall and am eagerly anticipating all the cooler days ahead of us. I hope it's a favorite time of year for you as well!  Be sure to incorporate some stamping therapy into your life as we continue under the uncertainty of the Covid situation. It's important to find some positivity and beauty and be part of that and stamping is guaranteed to help with that. I'd love to get you started with an affordable and easy project. Contact me today and we'll see what works for you!

Don't forget some great promos going on the month of September!
1). The new Stampin' Cut & Emboss is available for purchase! You need this machine if yours is broken down or you never have had one!
2). We have a fabulous Starter Kit promotion called "Get and Go". You can get all the details at the online store link.
3. The Clearance Rack has been updated and is full of retired goodies of all price points! Check it out to see if there's something you need!

Have a great day and keep spreading cheer with stampin'!
Sarah

Wednesday, September 2, 2020

Make a Card Wednesday, #1 - Back to Basics!

Hi Friends,
As part of my effort to "up my game" a bit as a Stampin'Up! demonstrator, I would love to show more people how easy and fun stamping is. I think all too often we are intimidated by a new hobby or activity because it seems complicated and the gear you have to have is overwhelming. I think it's safe to say that with anything, there's a starting point that is simple and basic and that is certainly true of stamping.

I'm going to attempt to do a Facebook Live Video on my "Big Sky Stampin' " FB page every Wednesday that I can, beginning today, at 10 a.m., mountain time. My goals are to keep the videos short, definitely less than 30 minute but hopefully more like about 15 and share my love of stamping, starting with the basics. This will be unscripted, raw video in an effort to show you what it's really like to make a card or other project and not a professional, edited, perfect version. I'm hoping that will attract some new stampers when they see it's pretty fun, fairly easy and not too overwhelming!

My first one was today and it featured this card:


I used the " Tasteful Touches" stamp set and also some coordinating Designer Series Paper from the
"In Good Taste" suite.  This card is basic in supplies and technique but still completely lovely and 100% handmade.


Here's what it looked like when we started, raw materials and all.  I'd love for you to watch the video and give me your thoughts. Was it helpful? Was it too long? Was it information and encouraging as far as the hobby of stamping goes?  Take a look:


I'm already looking forward to next Wednesday! Let me know if there is something you would love to see demonstrated in the way of products or techniques and I'll try to incorporate it!

Thanks for stamping by and check the supply list below for a direct link to the online store, featuring all of these products! See you next Wednesday if not before!

Happy Stampin'!
Sarah

Tuesday, September 1, 2020

The All new Stampin' Cut & Emboss machine is here!

Hi Stampin' Friends!

I'm so excited to share the news with you that the new die cutting and embossing machine from Stampin'Up! is here and available worldwide! That means if you live anywhere in the US, you can order one from me and have it on your doorstep in no time!
Today I want to share some of the features and why I think you will love this answer to your die cutting and embossing dreams.  First some pictures, because they say a thousand words, right?!!

SHAREABLE_BIG_MINI_DIE_MACHINES
Some of the features include:
  • Durable machines with high-quality results. The solid steel construction frame and rubber feet that securely grip the work surface produce crisp, clean, precise cutting and beautifully detailed embossing.
  • Easy to use. The machines and tools are designed for an intuitive die-cutting and embossing experience. For example, all plates are labeled with a number and are color coded for easy reference and use when building your sandwich. And just like the name suggests, our Magnetic Cutting Plates have fully-magnetic surfaces to make it easy to securely position your dies and keep them in place.
  • Simple to store. The platforms on the machines fold for space-saving storage and they look pretty too–the sleek, clean design suits any crafting space.
  • Portable. You can use the machines at home or on the go with their folding platforms and ergonomic carrying handles. It’s convenient for those of you who like to attend crops or other crafting get togethers. You can also take it with you when you go to the cabin, camping, vacationing!
I recently shared a video showing in person how to use this machine including some demonstrations! Take a look:


If you don't have a die cutting/embossing tool, I would highly recommend this one! You can order it beginning today from the online store. Here is a direct link to the machine and the accessory plates and magnetic plate:

Online store - Stampin' Cut & Emboss machine

As a thank you to all who order one, you'll receive a free pack of 81/2" x 11" card stock from me so you can start your die cutting and embossing off right away with some of our superior quality card stock! Please let me know if you have any questions and if you are local to the Bozeman area and would like to try it before you buy it, contact me and we will set up an appointment for you to come and try mine! I think you'll be glad you did! A die cutting/embossing machine is the single greatest tool you can purchase to enhance your papercrafting efforts. It is a game changer, I promise!

Let me know if you have questions - I'm so excited this wonderful tool is finally here!
Happy Stampin', die cutting and embossing!
Sarah