Friday, August 28, 2020

Trimming the Town Suite - Making a Difference!

Hi Stampin' Friends!
I can't believe it's the end of August, can you?!! We packed quite a bit in this summer so it's already full of fun memories with friends and family, new adventures and some time away in our beloved Montana mountains. I've been keeping up with stamping as well as I make my way through the new Aug-Dec Mini Catalog. It's a treasure trove of fun products for the upcoming holidays like Halloween, Thanksgiving and Christmas.

I don't know if you realize it but Stampin'Up! is an extremely philanthropically-minded company. They love to give back to people and communities that make life better for all of us. This year is no exception as they have earmarked a stamp set as their "Make a Difference" stamp set. For every set that is sold, they will donate $3 toward charities that support adoption, infertility and foster care efforts. I so appreciate that about them and wish it were possible for me to buy 100 of these stamp sets!  This year's stamp set is the one I'm featuring today called "Coming Home". It is part of the Trimming the Town suite and even the name of the set honors the charities they seek to draw attention to.The stamp set itself is several images of houses, trees and even a Volkswagen bug to create a home or a whole neighborhood. I'm eager to share some of my ideas with you!


There are many things to love about this fun suite, including the "Trimming the Town" Designer Series Paper. It has awesome scenes of neighborhoods and houses, mountains, trees, people and more. I really love the color palette as well. Some of the houses and trees coordinate with the dies in the bundle and so can be cut directly to make a design, like what I did above. I also love the snow/tree landscape dies that I used with some Shimmery White card stock paper. Don't forget to use dimensionals as you craft! They help lift up your elements and create dimension!


Another awesome feature of the stamps is that they are simply line drawings so you can color them to your heart's content.  I colored the trees and house in this card with my Stampin' Blends alcohol markers, using different shades to blend in different colors. I also wanted to make a card that was not Christmas! This saying is from the "Lovely You" stamp set which I have already used many times.
If you look closely, you'll see a hint of the "Old World Paper" 3D embossing folder as well!


One of the most eye-catching papers in the DSP pack includes a colorful array of Christmas greetings in several languages. The colors really pop and by using my Stampin' Blends markers, I was able to make my house really come to life. The wreath is a die cut from the DSP as well. I used a hole punch to cut out the center of it, making it look more realistic! I used a new "Wrapped In Texture" embossing folder and some fun Real Red braided trim on this card as well.


This last one ended up being a real favorite. I wanted to use the "For Unto Us" stamp set as much as possible this season and decided to pair it with this paper, specifically the church. I was able to cut the paper in a way that featured the church as well as three people who appear to be singing! It ended being a fun and heartfelt way to celebrate the season and the color scheme really added to the magic. Anything with Seaside Spray is a hit for me! Another new product this year are the Glitter Star Ornaments that fit nicely on this card and added some sparkle.

Isn't this a fabulous stamp set and suite?  I hope you put it on your list and purchase it soon, especially if the charities that are being supported by the sales of it mean something to you, as they do to me. I love that we can use our hobby for good in our world.

All my supplies are listed below and a click on any of them will get you directly to the online store for an easy shopping experience. Please reach out if you have any questions or need more explanations about these designs and ideas. My work is all original and my inspiration comes from the products themselves as I stare at them and think "what can I do with this...."  I'm grateful you stopped by for a peek today and encourage you to start your own journey of stamping fun. It's easy to start and doesn't have to be expensive or overwhelming. Ask me how!

I'm participating in Stampin'Up! 's Leaders Summit today and tomorrow. We were treated to some special crystal goblets from Tiffany's for our welcome celebration toast yesterday and today and tomorrow are jam-packed with networking, training, stamping and more, all virtual this year. It's not the same as being in person, but kudos to SU for persevering and wanting to give us a great event given our circumstances. I thought I'd share some fun pics of my gift and experience so far!


My participation is made possible because of the amazing customers and demonstrators that are part of my Stampin'Up! world ;) None of this would be possible without you and I'm so grateful for the past ten years of SU fun I've had. I can't wait for the next 10!!

Happy Stampin'!
Sarah

Tuesday, August 25, 2020

Autumn Goodness Bundle Glory!

Hi Stampers!
Wow - have you done any shopping recently? Autumn is in full force! It's my favorite season except the other three (haha) and there's almost nothing to not like about it. The colors, smells and cozy-factor are in full force. We are suffering through a late arrival of forest fire smoke that just about shuts down all recreational activity that we love so much like hiking, camping, 4-wheeling, boating, etc. The air is awful and we are all praying for big blue skies back in Montana before the snow flies.

Enough of the weather report, right? I want to share some fun from the "Autumn Goodness" bundle that is in the 2020 Aug-Dec mini catalog. This bundle is one you might overlook as there are so many others that leap out at you but you should give it another look, if only for two things, A) the wheelbarrow and B) the picket fence!  I can't believe how cute they are and useable for every season, not just fall. I had so much fun playing with this bundle. I'd love to know what you think so comment below!


The star of this card is the wheelbarrow. I die cut it with the darkest of the new Brushed Foil papers, also in the Mini Catalog. I stamped, colored and cut the florals and the used our Hammered Metal 3D embossing folder to create the look of a stone pavement. The background paper and ribbons are from the "Gilded Autumn" Suite, such a love mix of metallics and soft autumn colors!


I showed this card to a class recently and it was the overall winner for "ooohhh and aaahhh" 's! I used a couple of pieces from the Gilded Autumn Specialty Designer Series Paper and a sentiment from the "Autumn Goodness" bundle. I used the Tasteful Labels dies to cut out my sentiment and added some gold thread for fun. This card is proof that sometimes stunning is simple!


My last card we actually did for a class recently and it features many of the products from the "Autumn Goodness" bundle including stamps, the fence die and a wonderful sentiment.  Have you discovered the "Dainty Diamonds" 3D embossing folder yet? Boy is it a lifesaver when you need something but not much! These stamped images would also be great to color, I just chose to stamp them on colored cardstock in a class situation to save time. 

I can't wait to make some more fun projects with this bundle. I think I like it so much because the sentiments are unique and relatable.  We are in such a confusing time right now with COVID, politics, etc that we can run the risk of sounding clueless with some of our sentiments on our cards. I'm thinking twice about what I want to say these days.  If you think you could use some "Autumn Goodness" in your life, hop on over to my online store by clicking on the icon on the right margin of the blog OR clicking on any of the products below. You will be there in a jiffy and can start loading your cart with the things you need as well as the things you want!

Don't forget that any Bonus Days coupons you earned in July will expire August 31st! Be sure to cash in and redeem them on an order in August!  As always, I'm more than happy to answer any questions, dispense advice and inspire creativity! Just give me a holler via email, text or phone ;)

Happy Stampin'!
Sarah

Friday, August 21, 2020

Celebrating Christmas with Specialty Papers!

Hi Stampin' Friends!
I am back today with more ways to express your creativity this holiday season! While all the stamps and dies get most of the attention in a new catalog, often flying under the radar are the Specialty Papers, in this case, the foils, felt and velvet!  I wanted to focus on different ideas using these special papers as a way to step up an otherwise simple design. Embossing folders were a big help in showcasing these special papers and that really made a difference!  Here are some examples:


The first card I made ended up being a favorite! It is based on the red foil paper and the Magnolia 3D embossing folder. I thought the magnolia blossom could possibly be taken for a poinsettia bloom and was really happy with this!  I used one of the dove stamps as well as a branch die from the "Dove of Hope" bundle and my sentiment is from "Itty Bitty Christmas". To make this even more classy, I heat embossed the dove stamp with gold embossing powder.


Another specialty paper in the 2020 Aug-Dec Mini Catalog is red velvet!  I was curious if it would emboss well and it did! I used the Parisian Flourish 3D embossing folder and was so pleased that it didn't cut through the paper, just embossed. I've been using my "Tasteful Labels" dies for many of my sentiment pieces since early June and this is no exception. The stamp is a bright and bold sentiment from the "Tag Buffet" set.


There are several new foil papers featured on this card! We have a new green foil that is closest in color to Shaded Spruce. We also have three different brushed metallic shades that are debuted with the "Gilded Autumn" suite but I've used them here for my globe and stand from the "Beautiful World" dies.  The "Peace on Earth" sentiment is from the "Dove of Hope" set. I embossed the green foil with the Evergreen Forest 3D folder which was almost a little too much for the paper to handle but it worked okay. Sometimes heavy duty embossing can actually "tear" thru a paper and make little cuts where the embossing creases are. I handled it carefully and adhered it to my card right away!


Here are a couple more examples of red foil paper which I've embossed and  also some green foil below. The non 3D folders emboss the foil paper really well! I stuck with "Tag Buffet" for my sentiments in both of these cards.


I also wanted to show you an example of how easily the foil papers die cut. Here I used the green foil paper with a die from the "Itty Bitty Christmas" bundle.  It cut like a breeze and is such an attractive feature to a card.


How many of you remember the flocked Christmas trees that were popular in the 70's?  I know we had a few at my house and they certainly added a festive touch to the lights and ornaments. The mini catalog has some flocked paper that will really intrigue you! It's a velum base with white flocking in three different patterns, a poinsettia, an evergreen and overall scroll design. I cut a piece for my background with this card and attached it with glue dots and then continued on my way with the "Peaceful Boughs" dies and the "For Unto Us" stamp set. This is a card you can't resist touching!


Last, I wanted to show you the felt!  We have felt sheets in four different colors, Real Red, Just Jade, Early Espresso and White. I used the stitched triangle dies on some red felt for my corners of this card. You can actually see the stitching marks in the edges, which I was really happy with!. It's so fun to try different things and see what works.

I'll admit that sometimes you have to hunt in a new catalog for some of these specialty papers but it's worth the search. A specialty paper can add dimension, texture and color to your card in a new way that steps it up from the ordinary.  I've listed the specialty papers I featured today as well as many of the stamps and bundles in my list below so be sure to check them out in the online store by clicking on any one of them for more information or to start an order. Please reach out if you have any questions or need help.

We are winding down summer so it's a great time to start some holiday stamping projects! There are loads of ideas on the Stampin'Up! website as well as in my blog and on Pinterest. Take some moments to check them out and let the visions inspire you!

Have a great weekend and keep on stampin'!
Sarah

Wednesday, August 19, 2020

Press On!

Hi Stampin' Friends,
Here we are in mid August and normally we would all be anticipating that "back to school" routine that we have done for years. It's "back to school" alright but everything feels different this year. There is so much uncertainty and tentativeness to our days. In our county alone, several different school districts have made different decisions about how to proceed forward and who knows what the best ideas are. It's so confusing, isn't it? I've been vicariously stressed a bit because I have kids that are teachers and in listening to them, it's overwhelming! We definitely need some encouragement and motivation to do the best we can each day and carry on.

The stamp set I want to share today is called "Press On" and while I'm considering it in the context of hanging in there, no matter the circumstances, it actually is a stamp set with a coffee theme! The double meaning of "pressing on" works for me!  I passed by this set in the new Aug-Dec Mini Catalog at first (pg 68) because I was too zeroed in on the holiday themes. Also, I am not a coffee drinker but I am related to several!  After seeing some ideas on Pinterest and looking at it more closely, I decided I really liked it and wanted to add it to my stamping stash. I played with it the other day and have some ideas to share with you!


Stamp sets like this are so fun because you can go in any direction with color scheme, theme, embellishments or tools used. The embossed background on this first card was a leftover from a recent video I made on the new Stampin' Cut and Emboss machine (Go here! ). I have a hard time throwing away scraps and this one worked perfectly! I combined it with some colorful Ornate Garden Designer Series Paper. You'll notice my stamped piece has a layer of Early Espresso card stock peaking out on 3 sides. This was another scrap and although it wasn't big enough to cover the entire area, I liked the 3 sided look which I've definitely never done before. I used my Stampin' Blend alcohol markers to color the beans and coffee cup.


My second idea was to use a piece of the Plaid Designer Series Paper, also available in the Aug-Dec Mini catalog.  This is an autumn color palette (Pretty Peacock, Cajun Craze and Crushed Curry)  but not in an obvious way - no pumpkins in sight! I also repurposed some Pretty Peacock ribbon by cutting it up the middle and making it more narrow. It frayed a little but I just snipped off the extra threads.


My last card is either Christmas, Valentine's Day or just because I love the color red! I grabbed some "Poinsettia Place" Designer Series Paper and added some die cut hearts using the "Stitched Be Mine" heart dies. I thought this was a cute sentiment too - again, double meanings!

I hope you'll give this stamp set a second look, especially if coffee is part of the way you "Press On" in light of all the circumstances we are navigating. Maybe I will take up coffee drinking!

Thanks for taking a peek at what I'm up to! My supplies are below as always. If you've never shopped in our online store, it's very easy to set up a customer profile and shop or even shop as a guest. You do need to select a demonstrator to order anything from Stampin'Up! and if you live in the United States, I hope you will pick me if you don't already have one. I offer great customer service and am readily available for questions or help with your stamping experience.

Happy Stampin'!
Sarah

Monday, August 17, 2020

No matter the season, "Arrange a Wreath" !!

Hey Stampers!
It's another hot Monday out there and I'm back with some more fun from the Annual Catalog. I keep flipping between our two latest catalogs and almost get out of breath with all the new things to try and play with!  Today's bundle is perfect for those of you who don't have an unlimited budget (most of us?) and like to stretch your stamps over the whole year of seasons and holidays. This one does it all, including just "Best Wishes" for the heck of it. 

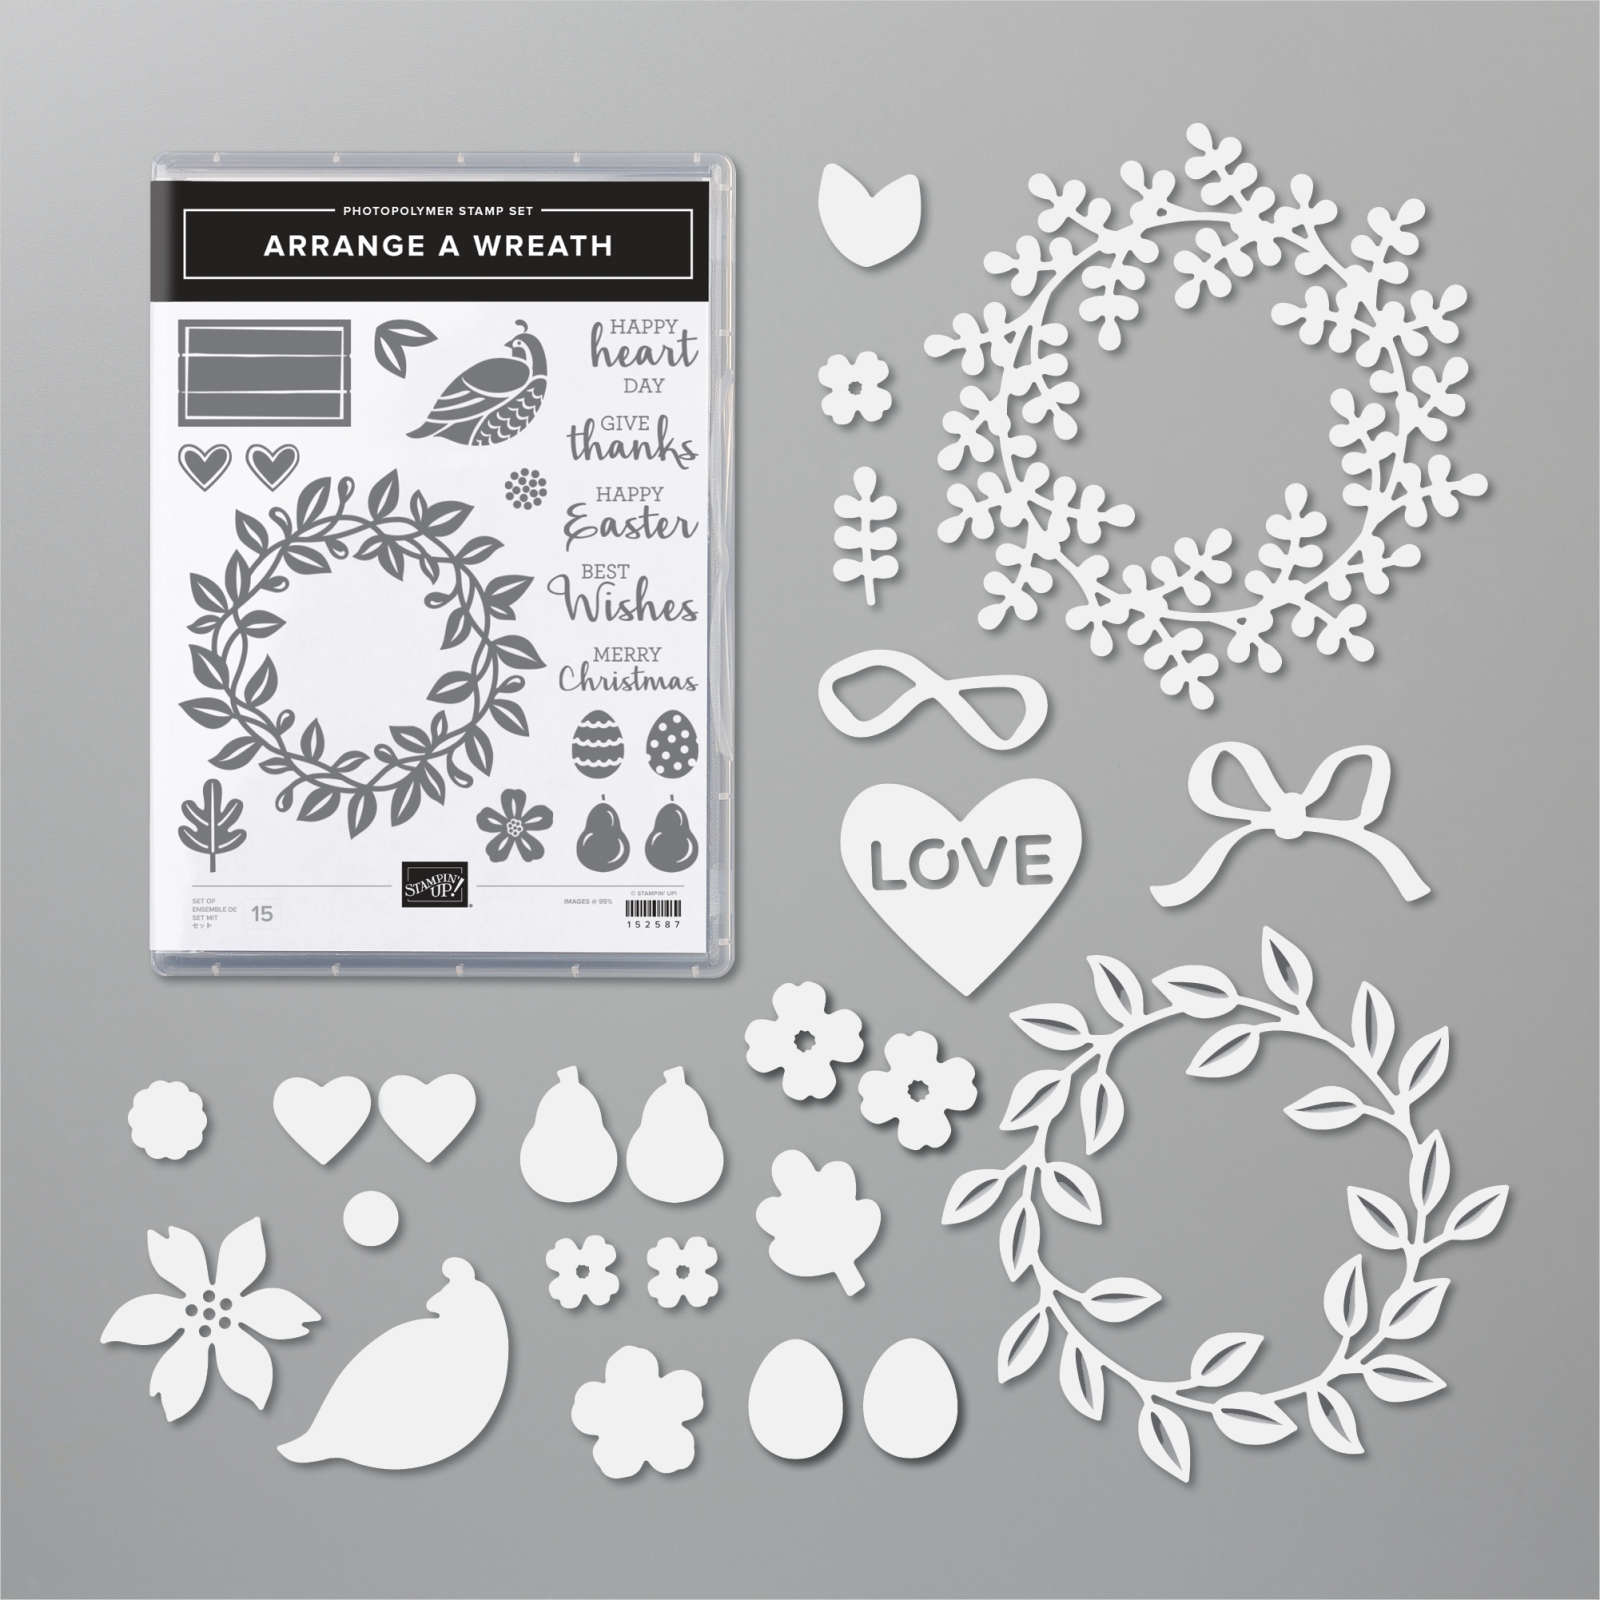
The bundle is called Arrange a Wreath and it comes loaded with extras besides 3 beautiful wreaths, one stamped and two die cut. Here's some ideas I came up with this afternoon while playing with this fun set!


I started out with a pretty fall theme featuring the more detailed wreath die cut in Early Espresso and colorful oak leaves in Cajun Craze, Crushed Curry and Cinnamon Cider.  What really makes this card is the embossed background using the Parisian Flourish 3D folder. It's a dramatic statement on any card!

Of course, the main time we think of wreaths are at Christmas so I have a couple of Christmas cards for you as well. This first one uses the simple wreath die cut, again in Early Espresso. I wanted it to look a little bit wood and grape vine-y so that is why it isn't green.  The red wreath piece is a hand cut portion off the detailed wreath die cut, like in the above card. There is a flower die that makes a perfect poinsettia. I used some ribbon to create the illusion that my wreath was actually hanging.


This is a fun theme! Remember the song "Twelve Days of Christmas"?? Well, here you have the partridge and a pear tree so to speak! This is an example of the stamped wreath that comes in this bundle. It is bold and beautiful.  The die cut bow, pears and partridge are all part of the die set and the greeting is from the stamp set!


And then fast forward to Easter!  I used some of the Artistic Blooms Designer Series Paper as my background, stamped the wreath with Misty Moonlight and then also die cut a wreath in Whisper White card stock.  Some ribbon, the postage stamp punch and some eggs finished off this card.  For some reason, the spring season is a hard creating theme for me. I suspect it is the color palette that trips me up (softer shades rather than bolder shades) but who knows! I do like this card though.

Here's a peak at the entire bundle with tons of extras!

ARRANGE A WREATH BUNDLE (EN)

As you can see, you get quite a bit for your crafting dollar! I've listed my supplies below and a click on any of them directs you to the fabulous new online store. It has some amazing search and filter features that will help you browse through all the products or narrow in on exactly what you want! Please let me know if you have any questions!

Thanks for spending the time reading this and checking out my work! I appreciate it and feel free to share my blog in your social media! I would love to see more people stop by!

Happy Stampin'!
Sarah

Thursday, August 13, 2020

New Stamps with Old Paper!

Hi Stampers!
So a funny thing happened while I was cleaning off my stamping desk. I uncovered a couple of new stamp sets I hadn't inked up yet and in another stack, found some scraps of paper from Sale-A-Bration earlier this year. I made cursory search for the rest of the lily pad Designer Series Paper and after not being able to locate it quickly, decided I might as well make these scraps into cards haha! Does that ever happen to you? I feel like there could be a legitimate diagnosis for stamping ADD. I am trying to do something then get distracted by something else and pretty soon I have a card idea screaming inside my head, trying to get out.

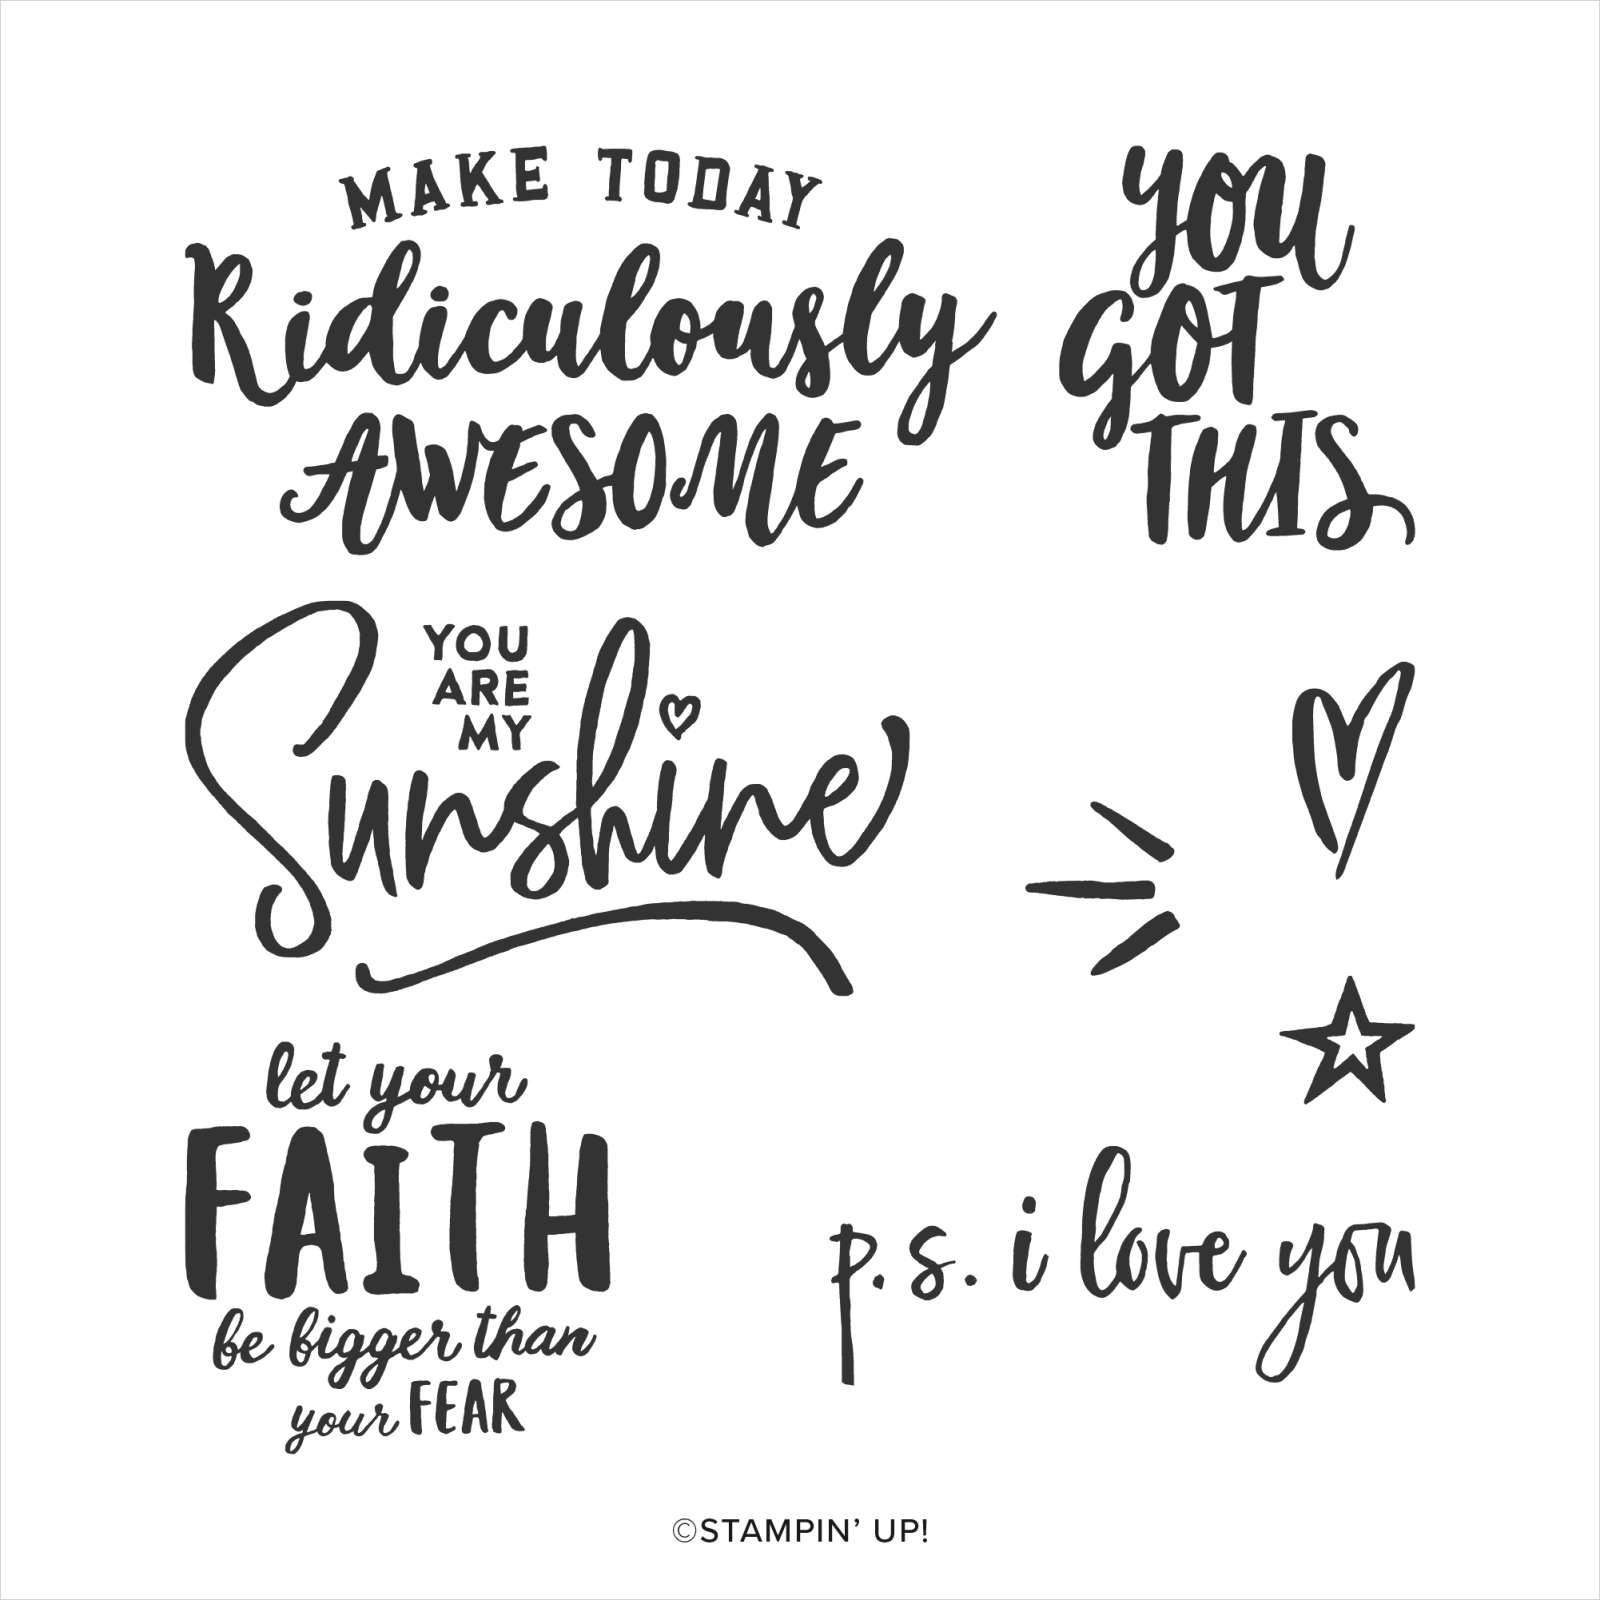
All that's a long explanation of how these cards came about. I used a fabulous new set called "Ridiculously Awesome" by Ronda Wade, a million dollar sales SU demo and another set called "Happiest of Birthdays". They are both fun to use on a colorful background because the fonts are big, bold and can handle some busy-ness.  I'm excited to share them with you today:


For the first two cards, I embellished them with some retired Mint Macaron ribbon and used Blackberry Bliss with the small bloom punch and Mint Macaron with the leaf punch. The sentiment was cut with one of the "In Good Taste" dies. The top card features a Petal Pink and Pretty Peacock color scheme.


I stuck with the identical color schemes but changed up the stamp set. For the birthday cards, I punched some balloons out with the balloon punch and some retired Designer Series Paper.  There isn't anything ground-breaking with either of these cards but I was so happy when I was done with them! I cleaned off a little bit on my desk, played with some new stamps and made several pretty cards that I already know who I'm going to send them to. It was a great day!

I highly recommend both of these stamp sets for their versatility and perfect sentiments!  Here they are:

RIDICULOUSLY AWESOME CLING STAMP SET

HAPPIEST OF BIRTHDAYS CLING STAMP SET

Supply information is listed below! Click on anything to get to the Online store and have your own adventures with these fun stamps that can go any direction with different themes or color schemes.

If you're a fan of my blog, I would love to have you "follow" me! You'll be notified when I post and be the first to know of upcoming promotions and specials.  My blog is the heart and soul of my Stampin'Up! business as that is where I can share the most about who I am and what I love to create.

Well, back to the stamp room. I should probably clean off my desk again and see where that leads me! Hope you are having a lovely day....

Happy Stampin',
Sarah

Wednesday, August 12, 2020

Something I love to study - Campology!!

Hey Stampin' Friends!
How's your summer going? Getting outside to enjoy your surroundings? Taking in all that nature has to offer? We are!  Summer's are short in Montana so you have to pack a lot into a small window. One of our favorite activities is camping! I didn't grow up camping but am so glad I married into it. It's taken various forms over 40 years but I still enjoy it just as much if not more, the older I get.

I'm not sure I even knew there was a field of study called "Campology" but there must be since Stampin'Up! created a stamp set to celebrate it! I had this set on my "must have" list right at the top. Since I got it, it has been a challenge to design with for one big reason - the scale of the images are different from each other. That does weird tricks with your eyes so you have to figure out a clever way to work around things that are smaller than they should be compared to other things that are bigger.  For instance, the tent in this stamp set is one of the smallest images and the lantern is one of the biggest. If you camp at all, you know that makes no sense. So, the challenge becomes how to design a project where the scale is compatible given what you are working with. I enjoyed the challenge and came up with a few ideas:


This card uses many of the "Campology" stamps as well as the "Mountain Air" mountains in the background. I purposely offset the coffee pot and cup in a circle "window" so it's featured front and center but doesn't need to be the same scale as the rest of the card images. This card was pretty good after all my stamping but really sparked when I hand drew in the trail with a Stampin'Write marker. To get extra depth in the mountains, do a technique I call "shadow stamping". That involves inking up your stamp once, really well, then stamp, lift up, move slightly up or down and to the right or left and stamp again, WITHOUT reinking the stamp. The second image will create a shadow of the first one and give you some depth.


This was actually the first card I made and I used the same window circle idea for the coffee pot and cup but in this example, I used my Stampin' Blends markers to color the tent and coffee pot. The subtle background grid stamp comes from the "Comfort and Hope" set.   After I was all done stamping, I embossed the entire piece in the 3D Tasteful Textile embossing folder. I love adding that slight bit of texture to my work but it needs to be done after your stamping is complete, otherwise it is too bumpy to stamp on!


Finally I decided to try a slimline card. The measurements of the card base are 8-1/2" x 7" with a score line at 3-1/2". These are fun to make as it is a different sized background to try and design on. I knew I needed a "trail" so I used a stamp from the "Playing with Patterns set! I love Pear Pizzaz with our new In Color Cinnamon Cider!

I want to spend some more time with this set just like I want to spend some more time camping before summer wraps up. It's fun to challenge yourself and figure out a solution when you realize that of course the binoculars are not as big as the trees in real life!  I try not to get frustrated and instead look at it as an opportunity to push myself and learn something which is always good!

I've listed my supplies below and hope you'll put this fun stamp set on your wish list. We are overwhelmed with new products right now with the Annual Catalog and the Aug-Dec Mini catalog coming out! I have a pretty big stack of new products that I haven't touched so that's my goal the rest of August... create, stamp, dream, and repeat. What a fun way to spend at least part of my life!

If you have questions, need help with an order or want to purchase Stampin'Up! product, I'd be honored to be your demonstrator (if you live in the United States). Contact me and we'll get you going on your next favorite past time!

Happy Stampin'!
Sarah

More from the "Nothing's Better Than" bundle ;)

Hey friends,
I have a quick post this afternoon with another one coming later this evening! I've been busy and so inspired with all the new products Stampin'Up! is putting out there!

I featured the "Nothing's Better Than" bundle in a July post but since then have made a few more cards, all of them for a specific purpose or person. I love this set!  Here they are:


This card uses the fabulous "In Good Taste" Designer Series Paper. There are so many textures and popular, trendy home decorating surfaces photographed in this paper. I love it!  I'm not a drinker so I had to guess at appropriate cocktail colors, but these looked fruity and happy, perfect for a hot summer day.


My favorite new card is a tribute to our Montana huckleberry season, which is currently almost over. We have picked tons (back breaking work by the way) and love them so much. In most any store, you'll see a huckleberry display and chocolates are a frequent favorite! The background DSP used for this card is from the "Playing with Patterns" set which is a little out of the box for me in color theme and style but I love how it forces me to think thru the creative process! In another first, I cut out the word "chocolate using the foam adhesive sheets which are new this year. It worked well and only required a tiny bit of extra patience!


My last idea was using a card from the July Paper Pumpkin Add On kit of card bases. It seemed to be a perfect tropical sunset and so I combined this bundle with the "In the Tropics" bundle, also in the Annual Catalog.  As I've said already, this "Nothing's Better Than" bundle is a winner!

I've listed some products below and invite you to check out the online store so you can start stamping all about your favorite vices - Cocktails? Cookies? Chocolate? Coffee?  You choose!

Thanks for stopping by!
Sarah


Monday, August 10, 2020

This might be my #1 Favorite Holiday bundle - Peace and Joy Bundle!!

Hi Stampin' Friends!
I hope you had a wonderful weekend. We are winding down summer with the arrival of August and it's a good August in Montana because we aren't suffering with any forest fires here or the smoke of forest fires elsewhere. I can't tell you how many Augusts have been ruined by smoke, not to mention the destruction of the trees and property.

Anyway, I've been playing with some new Christmas bundles and while the one I want to feature today wasn't the first thing I bought, it probably should have been!  What a fun bundle!  The concept is brilliant - three words in four different formats including 1 stamp and 3 dies for each word. The words are "Peace", "Joy" and "Bright" and there are some companion words and phrases to help them make sense on a card or other project.  The dies are nesting in that there are three layers of dies for each word. It's a little hard to explain but easy to see!


The card I want to feature today is using the word "Bright". I had so much fun creating my own background with the stamps in the set and various shades of including Shaded Spruce, Just Jade and Mint Macaron. They all compliment each other so well as they have the same tone of color, just different shades. I paired the green colors with Sahara Sand  and Real Red to complete my holiday look.  I thought you might be curious about how I stamped the background, specifically, how I knew where to stamp and here's a tip that I thought of. It's a short video that makes positioning of your stamping a breeze!


I hope I remember that easy tip for centering my sentiment and then stamping around it!  Here's a look at the complete bundle. You'll see a little better why I'm excited about the dies!

PEACE & JOY BUNDLE

I hope you'll add this set to your wish list as you continue to look through the Aug-Dec Mini Catalog! It's a winner!  My supplies, as always, are listed below and you can easily reach the online store by clicking on one of the products in that list or clicking on the "shop now" link on the right. If  you want to see more of what's in the catalog, or our Annual Catalog, click on those PDF links on the right sidebar of the blog as well.

Until next time....
Happy Stampin'!
Sarah

Unveiling of the new Stampin' Cut and Emboss machine!

Hi folks!
I did a quick video showing off the new Stampin' Cut and Emboss machine, available on September 1st!  You will love it!  Please let me know if you have any questions or would like to be reminded when they are available!  I love it already!


Wednesday, August 5, 2020

Evergreen Forest Fun with four different inking techniques!

Hi Stampers!
I'm so glad we are off and running with the new 2020 Aug-Dec Mini Catalog! I've been playing with a lot of these products and have had to keep a lid on my enthusiasm for a few weeks now. It's no fun for you if I go on and on about something I'm excited about and then have to say, oh, sorry, you can't purchase all this fun stuff yet. That seems kinda mean, right?!  One thing my parents always drilled into me was "don't be mean" !

So anyway, who's ready for some fun? I'm calling this a "tool and technique" post because I use a fabulous new tool with four different techniques!  The tool is the new Evergreen Forest 3D Embossing Folder and the techniques are inking techniques, all kinds. Let me show you! By the way, at the end of the post, there's a Youtube video demonstrating how I did the inking. It will help you see for yourself how easy it is!

The first thing I did was emboss 3 different pieces of Very Vanilla card stock and one piece of watercolor paper for my background layers. The Evergreen Forest 3D folder is amazing as it gives you a more sculpted look than a normal embossing folder.


My first card features Just Jade ink sponged on the embossed background with a foam brayer. I love this technique as you can use a heavy or a light hand and get more or less color, your choice! The bells are die cuts from the "Cherish the Season" bundle and the sentiment is from the "Banner Year" stamp set.


My second card might be my favorite, though it's very hard to decide. This one has the most dimension to it, making the paper look almost like an expensive parchment. I inked up the raised side of the embossing folder with Shaded Spruce ink BEFORE I embossed the Very Vanilla card stock. I love the definition and detail this technique created!  The rest of the card features the "Wishes and Wonder" bundle.


For this card, I actually embossed some watercolor paper. This is tricky as you have to fiddle with your layering before you emboss. I discovered the "blue" plate was too thick, one clear plate was too thin, so I used one clear plate and some paper shims to finally get a good layer.  The watercolor paper is so thick, but the embossing still showed through.  To color these trees, I used my water painter and some Mint Macaron ink. I actually embossed a 4" x 6" piece of watercolor paper and then when I was done with my inking, I cut the piece in half and layered them on top of each other. It's just a way to feature more of your artistic efforts on a standard A2 card size.  After the ink/water dried, I used some Wink of Stella to make the trees shimmer and shine a bit. The sentiment and other features are from the "Toile Christmas" bundle, a set featured in the Annual Catalog.


For my final card, I used a dauber to sponge, top to bottom, Pear Pizzaz, Old Olive and Mossy Meadow ink on the trees. You can get some detail by using the side edge of the dauber rather than the whole flat surface. Now that I look at it, I think this might be my favorite! Ugh... nice problem to have, right?

Here's a quick video demonstrating the inking techniques so you can try them for yourself. 


This is almost a no brainer purchase. Get the embossing folder and then combine it with some of your favorite inking techniques and Christmas bundles. If you are new to stamping, then pick one or two of the bundles I used and go for it! I'd love to help you if you have any questions.  For me, the best part of stamping is the "ah ha" moments you have when you try something new and then LOVE it! What are you waiting for? Jump in!  A list of the products I used is at the end of the post for your shopping convenience. A click on any one of them takes you to the new online store, upgraded and enhanced for an even better customer experience!

Thanks for stopping by and seeing what I'm up to! I love sharing my excitement and you are good listeners!

Happy Stampin'!
Sarah

Tuesday, August 4, 2020

It's Here! A new online store and a new Holiday Catalog!

Hi Friends!

I'll keep my post short today and just get right to the good stuff!

You'll see I've added a PDF link to the new 2020 Aug-Dec Mini Catalog (formerly known as the Holiday catalog) on the right sidebar of the blog. You can click on it to view the catalog as well as download it to your device for your continued viewing and shopping pleasure. As with any new catalog launch, some things go "viral" and tend to sell out briefly before SU can restock. If there is anything you "must have", I would suggest getting it soonish!

TH_AD_CATALOG_IMAGES


Today also launches the new online store! You'll notice some differences and many improvements! Here's a link to the new online store. I expect that it will work just fine for you however, you may have to reset a bookmark for it as your device will not remember it because it is a brand new platform, even though the link looks the same. If you have trouble remembering your password to re-log in this first time, just click on "Forgot password" and follow the directions. Again, I'm here to help if you need it.

Big Sky Stampin' SU Online Store

As I spend some time navigating it, I will be sharing the features I think you'll really enjoy. If you live in the United States, you can shop under me and I would so appreciate your orders. You also have the option to shop as a guest and enter minimal contact information. I will honor your wishes either way!

I'll be back and post some more after I spend some time checking out the new online store! See you there!

Happy Stampin'!
Sarah

Monday, August 3, 2020

Holiday Mini Catalog Countdown - only a few hours away!

Hi Stampin' Friends!
I've tried to whet your appetite for all things "holiday" with a few blog posts offering some Sneak Peeks of new products coming your way, tomorrow! It is difficult to think about snow, reindeer, Santa and the birth of Jesus when it's about 96 degrees out in Montana!  Hello.... this is not Arizona, cut it out! I've watched my "cranky" radar go off the charts this past week so I'm hunkered near the air conditioner and thinking about Christmas in an effort to literally and figuratively "chill out"!!


So, what are you hoping for in the new Aug-Dec mini Catalog?  Are you a Halloween fan? You will go bat-crazy for the stamps and tools and Designer Series Paper this year!  Does the lure of colorful fall leaves make you get in a car and drive around all day, looking at trees? You will love the Gilded Autumn suite and all it entails! What about snowflakes? Sleigh bells? Gnomes? Ok, that last one is a stretch but SU even has a Christmas Gnome set this year! I'm really excited to launch it all tomorrow at 7 a.m. MT. 

You'll notice a few changes in the Online Store, revamped to be more customer friendly! I'll have more details tomorrow and links so you can check it out for yourself.  I'll also have a link to a PDF of the new Mini Catalog so you can check out all 83 glorious pages for yourself.  I thought I would share of list of my favorite things, in no particular order:

1. Pg 49  Love of Leaves Bundle
2. Pg 45  Gilded Autumn DSP
3. Pg 25  Trimming the Town Suite, all of it!
4. Pg 18  Peace and Joy bundle
5. Pg 66  Festive Corners stamp set
6. Pg 63. Red Velvet Paper 
7. Pg 53  Magic In This Night DSP
8. Pg 37  Snowflake Splendor Suite, all of it!
9. Pg 35  For Unto Us stamp set
10. Pg 35. Evergreen Forest 3D Embossing Folder 

I'm excited to see what you order! Until then, hope your dreams are full of visions of sugarplums, hot cocoa, frosted branches and sparkling fresh snow!

See you back here tomorrow!!
Sarah


Saturday, August 1, 2020

Alternate ideas for July Paper Pumpkin - Summer Nights!

Hi Friends, I had so much fun yesterday with June's PP that I decided to bust open July's kit! I squeaked it in just under the wire as it was still July 31st!  Here are some alternate ideas as well as the kit cards, all using bits and pieces of the July kit as well as random supplies from my stash of goodies! In addition, I used the "Festive Corners" and "Jar of Flowers" sets which are in the Mini Catalog and the Annual Catalog.


And these are two of the suggested card designs! Love the lanterns....


Now, we only have a couple of weeks to wait for August's kit! I wonder what I'll do with that??!!

If you're curious about Paper Pumpkin, here's the link for all the info:

Paper Pumpkin link

Join the fun with me! Happy Stampin'!
Sarah