Friday, July 28, 2017

Every Day is an Adventure !

Hi stampers!
I'm back today with more travel/camping/adventured themes!  I can never get enough of these. I'm not really a seasoned traveler and tend to stick to about a 5 state region, but I do love to get away and regard any road trip as an adventure, even if it's to the town 25 miles east for a really good pizza burger (Mark's In and Out in Livingston, BTW) !!

I was really impressed with the July Paper Pumpkin kit and as I put my cards together, I realized I could easily recreate the same look with some of my supplies. I used some retired corrugated paper for my mountains and the rest is history!  Here's my card:


It may be obvious, but it's one of those things that bears mentioning. You need to cut your panorama circles 1/4" (at least) larger than your circle in your card front!  I used dimensionals to adhere the layers, to give a fully dimension effect.  As for the stamp set, I have featured this delightful hostess stamp before on my blog. It is "Dare to Dream" and is available with a $150 or more order. Stampin'Up! loves to spoil those who put in big orders, or host a party of several smaller orders and give you a chance to purchase some special stamps at a big discount, that are not otherwise available. My color palette for this card was Soft Sky, Lemon Lime Twist, Tranquil Tide and Soft Suede - all great colors and very full of nature!

I don't have classes scheduled next week so plan on creating as many new projects and samples as I can to inspire you, heading into the Holiday Catalog time period!  Demonstrators get to order starting August 1st and customers will be able to order when the catalog goes live on September first. That's another good reason to consider becoming a demonstrator- much quicker gratification with new products, haha! Ask me the details and I'll happily share the scoop.

Have a great weekend!  It's the last week of July, still more summer fun to be had!
Happy Stampin'!
Sarah

Thursday, July 27, 2017

Glossy Paper Experiment!

Hi Stampers!
When I first discovered the art/hobby of rubber stamping, I was introduced to glossy paper and techniques with ink for it. I tried some things back then, but glossy paper was retired from the Stampin'Up! line up several years ago and I forgot what I had tried. Fast forward to now and glossy paper is back in the annual catalog!  I knew I wanted to give it a go again, but wasn't sure where to start. No secret, I checked out Pinterest where so many of us go for help and ideas. I decided to try something easy first, that anyone could do with a reinker bottle and water spritzer. Here's my card:


The glossy paper piece is the part that looks somewhat tie-dyed.  I used three different reinkers, Peekaboo Peach, Berry Burst and Lemon Lime Twist. I placed a drop of the ink in several different spots on the glossy paper, actually touching the reinker to the paper. I added about 4 drops of each of the three colors. Leaving the glossy paper where it was, I held a water spritzer right above it and began to spritz the whole area. The more water, the more running of the ink. I let it set briefly and then used a paper towel to gently blot off the excess water and ink. This will turn out different every time you try it but it was really fun and dried remarkably fast.   When it came time to stamp on it, I used Stazon permanent ink, which I highly recommend. Make sure the glossy paper is completely dry before you try to stamp. You can set it aside to dry while you construct your other card elements.  I used the Celebration Thinlits to make my tag decoration, adding some ribbon and bling for fun.

A few friends got to make this card and try this technique in a recent class. Are you curious about this whole papercrafting thing?  I offer many classes throughout the month which are great introductions to the hobby and definitely not for experts only.  Contact me and I'll direct you to a class that will be fun, friendly and creative, no matter what your experience is! My August schedule is starting to fill up and you can check it out by clicking on the SU Website link on the right side bar. Scroll down to see my calendar after you've gotten to the website.

If you're rubber stamping is in a rut, try some glossy paper!  It's a lot of fun!
Happy Stampin'!
Sarah


Wednesday, July 26, 2017

Heck YES!

Hi Stampers!
I'm a little later in the day with my post today... I had a class to prep for, some errands to run and a visit to my dad that all took more time than I planned. There are always days like that, right?

I hosted a class last night with just a small group and we had a lot of fun creating and chatting and then chatting some more. I love the social opportunities that arise when a group of people get together to stamp and make something. As the years go by, we are getting to know each other better, follow each other's lives, encourage each other and laugh. Boy, do we laugh!  Here's one of the fun cards we made last night:


I had a couple of goals in mind with this creation. I really wanted to revisit the Birthday Memories Suite and primarily use the baker image. I also wanted to make a gender neutral card. My customers tell me that they can never get enough ideas for cards for guys!  That thought dictated my color palette and I also wanted to show off the fun die cuts that can be made on the Designer Series Paper that goes with this suite.  The placement of the baker was tricky as his "frosting gun" was covering up too much of the sentiment. I had to keep moving the sentiment closer to the top of the card until it was at the very top!  The sentiment is from a great new set that has bold, big lettering... perfect for guy cards, right?  This was a fun project that showcased the coordination of Stampin'Up! products between Designer Series Paper, framelits and stamps!

There are just a few more days to take advantage of the Bonus Days coupons and/or sign up as a demonstrator and get a fabulous package of extras with your sign up!  I have all the details and you can also see them on the SU website, link on the right!  I have one gal joining tomorrow and would love to welcome some more to our fabulous team of creative, talented, fun and friendly gals - the Big Sky Stampers!  You don't have to live in Montana to join our group, you just have to want to be part of a fun group !

Happy Stampin'!
Sarah

Tuesday, July 25, 2017

Sunflower Season

Hi Stampin' Friends!
We are approaching that time of year when the sunflowers will be blooming in full force!  They are such a pretty reminder of the transition between seasons and I love how they grow facing the sun. They are sun worshipers for sure!  I have a card today with a beautiful sunflower, made from the Eastern Palace suite of products!  Here it is:


For the flower, I cut 2 of the same framelit, one on Crushed Curry cardstock and one on So Saffron Cardstock. I sponged the edges with Crushed curry for a more vintage look. These particular framelits are designed to cut the image in a background piece so I gently cut them away from the cardstock at the base of each petal. It was easy and then you have free-standing flowers.  For my flower center, I rescued a piece from my scrap pile of Early Espresso . You could use any circle, but this was the center from the largest circle in the Swirly Scribbles thinlits!  My stem is the branch from the Colorful Seasons dies and my background is our brick embossing folder!  The sentiment is made from our new Pretty Label punch bundle set.  This card is a great example of combing many different products by looking at your stash and pulling together what seems to work. I really like it when that works; it makes me feel very resourceful!

Thanks for stopping by! If you have any questions, would like to order any of these products or others, please let me know. It's super easy to order online and your order will come directly to your house which gets you going that much quicker! Maybe you are in a season of life where you have too much extra time and are looking for something to do.  This hobby is so versatile. It's creative and rewarding personally, but can be used to bless the lives of others as well when you make projects to share. Maybe you are afraid you don't know where to start or will need a huge investment to get going?  That's not true either!  I can help you get started for as little as $19;95 a month with our Paper Pumpkin monthly kit subscription. I can also help you start a supply of essentials and get going right away with a combination of kits and supplies for less than $100.  If you were to ask most papercrafters, they would tell you it has taken years to accumulate all these rubber stamps and stacks of paper!  It's like any hobby, i.e. quilting or knitting, etc.  You can buy what you need to get started on a specific project, then gradually add to your stash with more that you like for other projects and ideas. I've helped lots of people get going, especially those with a strict budget. You don't have to live in Montana either!  With the wonderful access of the Internet, we can talk and communicate in multiple different ways to accomplish your goals.  Check out my Stampin'Up! website for more details about me, the company, shopping our products or signing up as a demonstrator!  There's a link on the right sidebar, near the top!

Hope you have a great day!
Sarah

Monday, July 24, 2017

Scribbles!

Happy Monday!
It's the start of another week for all of us!  Anyone else feel like it's going to be a crunch to get the rest of the summer in?  Why does it have to go so fast?!!  There's still so much to do....

I have a fun and easy card for you today!  I was inspired by a wonderful, creative stamp set celebrating the art of crafting - all kinds!  Here's my card:


We live in a wonderfully abundant crafting time. You can do many traditional things like quilting, sewing, knitting, cross stitch, painting, etc but you can also color, do DIY projects, create with mixed media and of course, STAMP!  I would even include writing as a form of art with all the new platforms of blogging, social media, email, texting, and snail mail!  My card above celebrates the written word, with pens!  Here's the stamp set I used, which I just love:


What a fun way to celebrate our love of making things with our hands and our imagination!  This set is called "Crafting Forever" and is available in wood mount or clear mount styles.  My sentiment, "A Note for You" is from the Wood Words set, in case you were curious about that. My background Designer Series Paper is from the Coffee Cafe set of DSP.

I've just loaded up my August calendar with lots of events as we look forward to the launch of the Holiday Catalog for 2017!  Take a look at it (click on SU Website) and see if there are some classes you can attend. I'm also available for a party at your house with you being the hostess! Let's celebrate the art of crafting by having a stamping party!

Hope you are off to a good start on this Monday!
Happy Stampin'!
Sarah

Friday, July 21, 2017

Every Day is an Adventure!

Happy Friday Stampers!
It's been a long week as I adjusted to getting back from vacation, hosting several classes and keeping up with things around the house, etc.  Some weeks are just like that. I wish every day could be a vacation, but my card today points out that every day can be an adventure. They aren't always they type of adventures we would choose, but our attitude goes a long way, right?

I usually don't spend a lot of time on Hostess sets in the catalog, but I am today. Hostess sets are special because they are only available to choose on an order of $150 or more. For many people, that's a bit of a stretch. I suspect Stampin'Up! secretly saves some of its best ideas for Hostess sets to try and entice sales - good marketing, huh?  I really like this one, "Dare to Dream" and here's a card I made recently with it. 


This card definitely qualifies for CAS, Clean and Simple. I used some Designer Series Paper from the Naturally Eclectic set for the background and then relied on stamping. I added a bit of the new copper trim the separate the two papers.  Hot air balloons are a fun motif for adventure and I like the simplicity of these stamps as well. One of my favorite techniques is stamping directly on the Designer Series Paper when the color scheme allows for it. Lots of papers are too busy or too darkly colored to take stamping but this Soft Sky design was perfect.

The weekend is here! I hope you have some adventures planned! I'll be back next week with more ideas, inspiration and tips! Thanks so much for taking a peek at what I'm up to today!

Happy Stampin'!
Sarah

Thursday, July 20, 2017

A door needs a house, right?

Good morning!
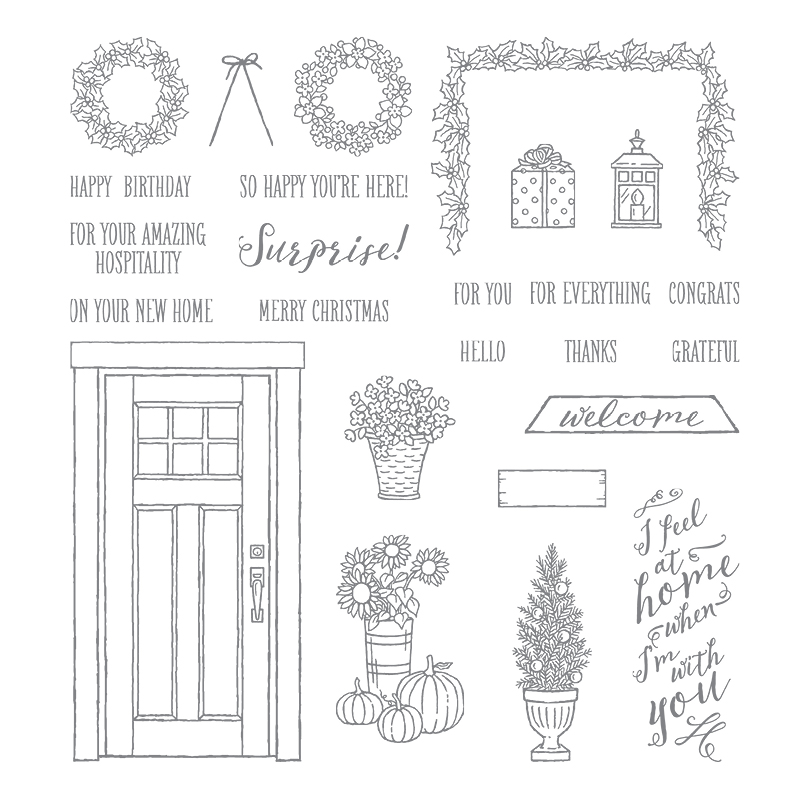
Today I have a fun project that was inspired by the "At Home With You" set. I was thinking the door motif in that bundle would be really handy for all sorts of cards. It was one of the first bundles I ordered from the new annual catalog and I couldn't wait to start playing. I have had a few miscues (see below) but I am convinced that is how you become better as an artist, especially with color combinations, design elements and style. The more ideas you try, the more great ones you stumble on to, "happy accidents", shall we say!

This card evolved because it was a door in need of a house. I had the idea of putting a "peak" on the flap that closes down and when opened, you have a house. Here are some pictures to help explain what I mean:


As you can see, even the door opens to reveal the sentiment of this card!  It was a fun project. The trick was finding framelits to create windows that were the right scale to the size of the house, doors, bushes, etc. I used some retired tag framelits and hand cut some cross bar sections to further emphasize they were windows. Another feature is using the Hardwood background stamp on my card base to create some siding for my house. A quick tip about the bushes... I actually stamped them twice, once on Crumb Cake and once on Tranquil Tide. I cut the pot off the Tranquil Tide piece and glued the bush part to the Crumb Cake piece. I wanted them to look more realistic so used card stock to delineate between the bush and the pot, rather than just ink. My other tip is to use the Wood Textures Designer Series Paper for the door. It has a wood image on both sides, which a real door would so it works just perfectly!

Now, here's a "misstep" so to speak. Sometimes my attempt to work with a specific color fall very short. This is probably one of the ugliest cards I have ever made:


There are so many things wrong with this card but lets just say no one would ever paint their house Lemon Lime Twist. The rest of it is a train wreck as well, but I did learn some things. I learned I didn't like the bushes simply stamped on white paper. I also learned it is best to stamp the door before you cut it out and not after. We all need to try again when we have a train wreck, right?

There are some fun seasonal elements to this stamp set that will allow for creating a special "scene" at just the right time of the year. What a welcoming motif to share on a card with a friend, a beautiful front door which welcomes them into your home and your life.


The coordinating framelits really make this stamp set come alive and you don't have to cut all those detailed edges!

I hope you liked what I shared today and will come back for more ideas, inspiration and tips. It's still a little early, but we are coming up on the best creative time of the year... Autumn, Thanksgiving and Christmas! I think I'll be coming back to this set again and again!

Happy Stampin'!
Sarah

Wednesday, July 19, 2017

Wedding Bouquet


Hi friends,
I'm back this week with some more fun ideas for you!  It's a little harder to want to craft when there are so many fun things to do outside in the summer, however, when the summer heat gets to being too much, I retreat to the basement where my craft room is and enjoy the cooler air.

As I work my way through the new Annual Catalog, I am trying to prioritize what I purchase, based on what I need, what I like, what is different from anything I already have, etc. One of my favorite purchases continues to be background stamps!  They are subtle in appearance most of the time but sorely missed when you take them away.  One of my favorite new background stamps is "Burlap". I especially loved the frayed edges. Here's a card I recently designed using this stamp:


This is a great example of the background stamp adding some additional interest to this card. It would have had alot of "white space" without it, which is fine if that's what you want, but I love the subtle background. I stamped using Crumb Cake, very lightly.  The rest of the card features  the Beautiful Bouquet set and a small piece of Designer Series Paper from the Delightful Daisy set. I think this design could easily be adapted for an anniversary card or even birthday card by changing the sentiment.  Be sure to check out all the background stamps on pages 164-165 of the annual catalog. Here's my hint/tip for using background stamp. I generally spend the extra money and get a wood mounted stamp because of their size. A clear mount one requires a really large acrylic block to mount and in my experience, they tend to curl a little when not on a block. For stamping, I place the wood block stamp with the wood side down on my table and the rubber side facing up. I ink up the stamp by holding the ink pad in my hand and gently tapping it on the rubber. I then lay my paper on top of the rubber surface and either rub it with my hand or use a brayer to apply some pressure to the paper. It works every time and I haven't accidentally dropped the big wood stamp anywhere because I wasn't able to hold on to it. Hope that helps you with your background stamping!

Now is a great time to purchase some goodies that you've had your eye on. Through July, you will receive a $5 coupon redeemable in August for every $50 you spend. You can submit an order online or get it to me via email or phone and the coupon will be emailed to you directly. Three background stamps alone will get you over the $50 threshold! Take advantage of this special offer before it's gone!

Happy Stampin'!
Sarah

Friday, July 14, 2017

Happiness is a cup of coffee!

Happy Friday Stampin' friends!
I'm going back to a favorite new suite in the new Annual Catalog, the Coffee Cafe suite. I love the stamps and framelits and especially love the Designer Series Paper. This set is specially designed so the framelits can actually cut out the Designer Series paper as well as stamped images!  Here's what I did:


All of the products used are from the suite except the embossed background, which is a new Dynamic Texture Embossing folder that is very fun to use. I'm not much of a coffee drinker, but I love love love the color scheme and images in this suite!

This suite alone would allow you to get some Bonus Days coupons of $5 for every $50 you spend in July, to be redeemed in August!  Check it out in the store (use the "shop now" link on the right) or contact me for more information!  I know there are a lot of coffee lovers out there! Now's your chance to create something that speaks straight to your heart!

Happy Stampin' and weekend!
Sarah

Thursday, July 13, 2017

TBT- Lots of Cards and Ideas!

Hi Stampers!
Today I'm going to limit my commentary and let you feast on some ideas!  Quite often, I want to mess around either with a technique, a tool, a color, old paper, old stamps etc.  It really inspires me to reach back into my retired product stash and combine the retired with the new and see what happens. I have some fun cards today that do just that. I won't post the supply details because alot of it is retired, but you can recreate my ideas with what you have. Have fun looking them over!

This one is using an Aqua Painter with ink picked up from the lid of the ink pad:


This one is color smudging with a dauber and also uses the Wink of Stella in the center of the flowers:


This one is more sponging and daubing with a silhouette stamp on top:


This is sponging, smearing, daubing on pre-embossed paper from Stampin'Up, with some Aqua Painter smooshing after the fact!


This one uses putting ink on Designer Series paper with a brayer for my background, misting some pre-embossed  paper with a blend of ink and alcohol in a mister  and stamping over the top:


This one involves smudging on some ink, then squirting it with water and further spreading it around, all on pre-embossed paper:


This one shows ink sponged on Designer Series Paper for my background and then stamping and framelits for the feathers.


I hope you have time to play. Sometimes our ideas are destined for the trash can but many times you will stumble on something that you like! It's all good as long as you're having fun, learning something and remembering to "just breathe"!!

Don't forget about Bonus Days going on the month of July!  For every $50 you spend in July, you will receive a coupon via email good for $5 off a purchase in August!  You can't beat that!!  Please use my Hostess Code 3M2GHZW3 and have fun shopping!  The link to the store is just to the right under "shop now".

Happy Stampin'!
Sarah

Wednesday, July 12, 2017

Live Your Dream

Hi Stampers!
Sometimes life boils down to "this is how we roll", right?  We have been in the midst of a super busy month and a half with tons of fun, company, events, celebrations, travels and craziness. I'm no longer sure what day it is and where I need to be. I have trouble crossing things off my lists because I can't find the lists or remember the things. Do you ever feel that way? WHEW.....

At some point, I realized this is just the reality of the day right now and to quit stressing the stuff that I can't control, don't know about, wasn't planning on and didn't work out the way I thought. My solution for a crazy busy life is often "go camping". Things get real simple in our camper including meals, what book to read, where to sit, etc. There just aren't many choices and sometimes that is good.

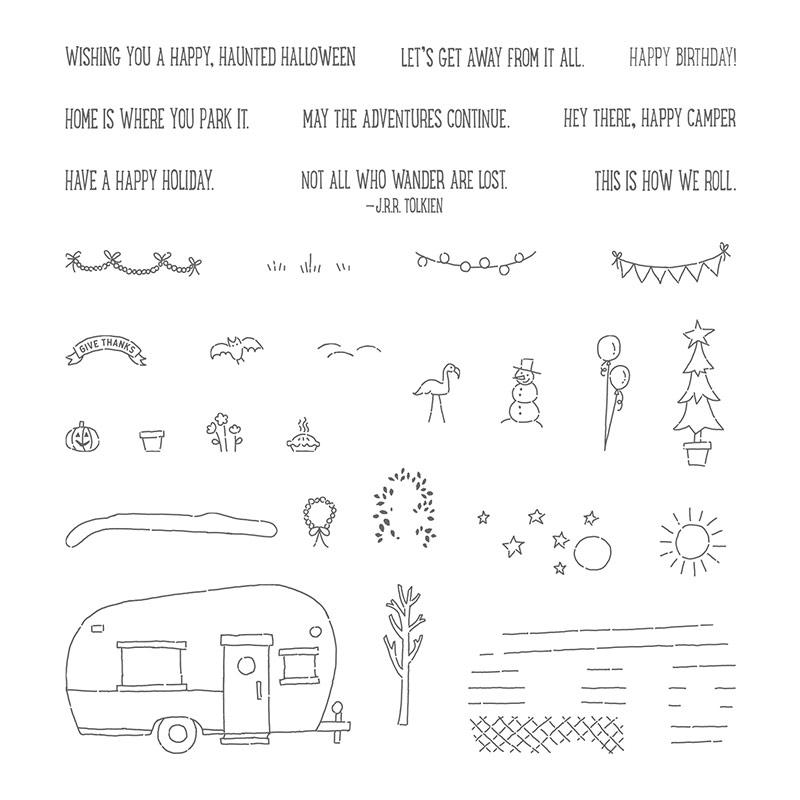
I have a fun card today celebrating the camper life!  Many of you enjoy it as much as I do and will understand what I am talking about!  I combined a great stamp set in the Annual Catalog called "Glamper Greetings" with a new Hostess set (available with a $150 order or more) called "Dare to Dream".  I think they work together really well and express just what I love about camping!


The Glamper Greetings set has all kinds of details you could add to make it a  seasonal card, but I just kept it simple this time.  If you love to camp, you'll want to take advantage of this marvelous stamp set. Here's a closer look at it:


There are a lot of fun things to dress up your camper and express your philosophy!

I hope you are able to decompress in the way that suits you best and maybe I'll even see you in a campground some day!

Happy Stampin'!
Sarah

Tuesday, July 11, 2017

Christmas in July!

Happy Tuesday Stamper friends!
It has become a popular thing to host Christmas card making classes in July. Why, you ask?  I guess because since it isn't Christmas, we have way more time to do some things like homemade cards. I wanted to share a fun idea today with you. Have you been thinking about trying some rubber stamping or paper crafting and you are overwhelmed, not really knowing where to start?  My best advice is to start with a specific project and get what you need for just that project, try it, see how you like it and then go from there!  I've got the perfect idea.. Christmas cards! Here's a sample:


Obviously, there are a kazillion choices out there for stamps, themes, etc. I decided to go with one stamp set, one background stamp,  3 colors of ink and paper and a little ribbon to dress it up. This card is small on supplies required and big on impact!  I just love it as it especially speaks to my "mountain-dwelling" soul. It incorporates a technique that is easy to do and gives a layered look and that is stamping over another stamp. I used the Sheet Music background stamp in a light Crumb Cake ink. I then stamped everything else on the top of it. I also shadow stamped my trees by inking up the stamp, stamping once, then shifting my hand slightly to the right and up and stamping again without reinking - another favorite technique!

We have a whole section in our Annual Catalog devoted to Christmas, pages 112-123 and our Holiday catalog with much, much more is coming out in September. I'll let you in on a little secret. While the end product in papercrafting is your ultimate goal, the process is the fun part!  It is so fun to stamp, create, design, arrange, etc. as you work your way to the end, whatever that may result in. It is great therapy to be doing something productive with your hands and stamping requires no pre-existing skills. You can learn to stamp from scratch with a very short learning curve and quickly be on your way to creating beauty that allowed you to relax, think, slow down in the process.  Think about a project for yourself... Maybe Christmas cards this year. Let me know if you want to get started and I'll help you with what you need to be on your way. It's a great adventure!

Meanwhile, it's July and it's hot!  Stay cool out there!
Sarah

Monday, July 10, 2017

If it weren't for poodles, you wouldn't have doodles!

Hi stampers!
I'm here today to celebrate a much maligned breed of dog, the POODLE!  They have taken more than their fair share of guff over the years, but with the recent "doodle" craze, all of a sudden, they are worth their weight in gold!  In fact, I know several of you who owe your current state of happiness and nightly cuddles to a poodle!

So, here's a card to recognize the valuable contribution poodles are making to our quality of life. The Birthday Memories Designer Series Paper has some fun poodle images and there is also a stamp and framelit in the suite. In fact, I used the framelit to cut this poodle out of the DSP! Here's my card:


I know poodles can be a little prissy and snooty, but how cute is this!  The balloons are even part of the Birthday Memories Suite. You just need this wonderful suite of products!

In a recent post, I mentioned my childhood dog, Gus, a silver/black poodle and here's a pic of me with him - a true friend and buddy indeed!

Image may contain: 1 person

He's one of several dogs in my life, but he was the first!

Hope you have a great, furry day!
Sarah

Friday, July 7, 2017

A Birthday Parade!

Hi Stampers!
As promised, I am back today with more from the Birthday Memories suite! I love the nostalgic feelings this suite evokes and yet it feels new and fresh too. That's a win-win!  Here's my card today, an animal parade of sorts:


I used a popular side step card design and cut out the animals, placing them on different panels to get a dimensional effect. There is a framelit for the fox and I hand cut out the raccoon and bunny, which wasn't difficult at all. One of my favorite pieces of this set is the pennant!  There are stamps, Designer Series Paper and a framelit to use with this design and I'm finding myself grab it for all sorts of cards and themes. For my birthday cake, I used markers to ink up the stamp. That's an easy way to get different colors on a stamp and then stamp it all at once. The trickiest part of this card is taking a good picture!  There are too many shadows!

I'll come back tomorrow for a special Saturday post with one more Birthday Memories suite card!
Happy Friday!
Sarah

Thursday, July 6, 2017

Forever Young

Hey Stampers!
Now that all the 4th of July shenanigans are past, I'm back to my stamp room and trying to create some fun and joy. I want to draw your attention to a fun suite called Birthday Memories. It's complete with stamps, framelits, amazing Designer Series Paper, embellishments and more. I've made several cards featuring these products and will blog about them the rest of the week. Here's the first:


The suite has an old-fashioned feel to it, like 1950-60's. I'm pretty sure I had a dress like the one the little girl is wearing and I know I wore anklets and shoes like that!  It's so appealing to go back there because it's nostalgic, feels simpler and somewhat not quite so tainted, in my opinion. I'm not really commenting on our culture as it is today, but kind of ;)

I stamped my images with gray archival ink and then used the watercolor pencils for coloring. You could also add some blender pen work to spread the color around a little better.  I hope you notice the background! It's a lovely new dynamic texture embossing folder creating ruffles or waves. I was careful in how I place the paper in the embossing folder so I could stamp on it as well.  I like this card a lot for its simplicity, color scheme and sweetness.

Here's a great look at the whole suite!  Come back the rest of this week for more of my projects!

Birthday Memories

I can't wait to play with the poodle.  Growing up, our family dog was a silver small standard poodle called "Gus". He was the best!

Don't forget about the Bonus Days offer!  For every $50 you spend in July, you will receive a coupon/code good for $5 to spend in August!. See yesterday's post for all the details!  Use Hostess Code 3M2GHZW3 for online shopping!

Happy Stampin'!

Sarah

Wednesday, July 5, 2017

Bonus Days and more with Stampin'Up!

Hey Stampin' Friends!
I love it when Stampin'Up! repeats a good thing and this month, they are repeating their "Bonus Days" promotion that we had last year.

Demo-Header-US
Here's how it works:
~~ For every $50 you spend in July, you will receive an email with a code/coupon good for $5 which is redeemable in August!
~~ There is no limit to this promotion so you could spend over $500 and receive 10 codes to use in August.
~~ All of Stampin'Up! merchandise counts, including the new annual catalog (click on the right if you want to peruse that awesome thing!) and the Clearance Rack.
~~ You could even sign up for a 3 month prepaid Paper Pumpkin subscription and get a $5 code/coupon!
~~ It's super easy to order online!  Click on "shop now" to the right ====>>>> and you will be directed to the store. Set up an online profile and shop away. Your order will be shipped directly to you, which couldn't be more convenient, right?
~~ If you do place an online order, please use my Hostess Code 3M2GHZW3.  If your order is over $150, don't use the code and you'll be able to receive some Stampin' Rewards in the form of extra free product yourself!

Header_Recruiting_Demo_Jul2017_NA
Next, there is a really sweet deal for those who would be interested in joining Stampin'Up! as a demo. At the risk of making this sound too good to be true, let me tell you how great this is!
~~  For $99, you can sign up as a Stampin'Up! demonstrator. There is no further cost or obligation and you truly can try it and see if you like it.
~~ For $99, you will get to choose $125 worth of product to start you off. You get to pick what you want so if you mostly need stamps or ink or paper or a little bit of it all, you can choose exactly what you want.
~~ IN ADDITION, for the month of July, you will get several free items from Stampin'Up! that are essentials to papercrafting including:
   
ITEM NUMBERDESCRIPTION
118485
D Block (X2)
130148
Grid Paper
103579
Paper Snips
104332
SNAIL Adhesive
102300
Bone Folder

As if that isn't already a pretty nice welcome to SU gift, you will also receive a free stamp set from the new Holiday Catalog which premiers in September for customers and August for demonstrators!


Wow!  That's alot of incentive to see if Stampin'Up! is a great fit for you.  You can join just for the discount (20% off all orders), take advantage of special offers and early peeks/releases of new product, be inspired by the weekly email of ideas  or the quarterly Stampin'Success magazine that goes out to all demonstrators. You can also take this on as a potential source of income and host classes or parties for your friends and family. It's completely up to you what you want to do as a Stampin'Up! demonstrator. Other than the original investment of $99, there is no further cost to up front.  In order to stay "active" as a demonstrator, you do need to meet quarterly minimums of $300 in sales/purchases. Anything you buy and anything anyone else buys from you will be counted towards the $300 minimum. If you split this out, it comes to about $100 a month.  As you progress with Stampin'Up! there are all kinds of levels of benefits and rewards but it is a perfectly okay option to just keep it small and take advantage of the discount on product. It's up to you!  I love the flexibility that Stampin'Up! offers me and also the opportunities I've had to go to the On Stage Conventions and socialize  as often as weekly with fellow friends and stampers in my classes and workshops.   I have a team of demonstrators under me, called "Big Sky Stampers" and we meet frequently via a private Facebook group and in person several times a year to encourage, inspire, enjoy each other. We are in SW Montana for the most part, but one of us is in Nevada and we're hoping for more across this great country! I love to coach new demos with the ins and outs of Stampin'Up!, how to best take advantage of the compensation plan, ways to use Social Media for optimal reward, etc. and new techniques and tricks with stamping, ink, Big Shot tools, etc. The Stampin'Up! demo website is loaded with training and tips on products, business topics, leadership, recruiting, etc. You won't have to reinvent the wheel... you just have to jump on the wagon!  I would love to talk to you if you're interested and July is the best time so far this year to join!

I hope you'll consider this great offer and contact me soon!  Your own journey with Stampin'Up! could start today!

Happy Stampin'!
Sarah


Tuesday, July 4, 2017

It's the 4th of July - Let's Celebrate!!!

Happy Independence Day, Stampers!
What a fantastic holiday at just the right time of year. It's a day for sun, fun, water, BBQs, friends, family and fireworks!  It's also a very memorable way to spend the day in labor and have a baby!  That happened 30 years ago and we still marvel at the timing and miracle of the birth of Jenny Cade!

Shhhhhhh.... don't tell her, but here's a peak at the card I made for her for today!  We are having a celebration with a lot of her friends and I wanted to make something special for her:


I can't tell you how hard it is to not go all out red, white and blue with a kid that has a birthday on the 4th. She had it all when she was young... clothes, sunglasses, flip flops, barrettes, jewelry, nail polish... you name it!  She then went for several years with red, white and blue being banned from her wardrobe. It is slowly sneaking it's way back in now, haha!

For the card, I used a star mask and some embossing paste on Night of Navy card stock. I used water color paper and my Aqua painter with some red ink for the stripes.  The rest is easy to figure out!

Hope you all have a terrific 4th!  I'll be back tomorrow with lots of news and surprise promotions from Stampin'Up!

Happy Birthday America!
Sarah