Friday, September 30, 2016

Glad Tidings

Last day of September! Where has this month gone?  It is getting so pretty around here with the colors of the fall leaves and beautiful sunrises and sunsets. I never get tired of where I live. I think that's a human trait for most people... we like being home!  The card and products I have to show you today caught my eye in the Holiday Catalog because of the deer and pine trees.. duh!  Anything that reminds me of home will catch my eye!  I put a huge twist on this set of stamps and framelits by doing a very nontraditional color scheme.  Here's my card:


You are probably wondering why I would go with some version of pink for Christmas!  There are some fun glitter ribbons in the catalog that I wanted to use, as well as bling like rhinestones and silver foil paper. The color is Sweet Sugarplum, one of our new In-Colors this year. This card also incorporated some sponging with our new brayer type sponges and we sponged on the gorgeous embossed paper in the Holiday catalog. it is a pack of 12 sheets, 6 different embossed designs, all white so you can sponge away and make them any color you like.   All my products are listed below and there are alot of them!  This card would be just as striking if you substituted the silver foil for gold or copper and substituted the Sugarplum for navy, dark red, rich green, purple, black, etc.

If you are attempting to use framelits such as these, be sure to get our die cut brush with sponge to help you get the paper released from the framelit after cutting. It is a must have if you do alot of detailed cutting. My other secret is the Precision Base Plate which helps get a good cut without so many passes through the Big Shot. These have become standard equipment for me and I use them everyday!

I'll be back with more after the weekend!  Have a great one!
Sarah

Thursday, September 29, 2016

Gumdrop goodness!

I think I've mentioned at least a couple of times how crazy I am about Stampin'Up!'s Designer Series Paper.  If I had to point to one thing that inspires me and only one, it would be the paper. This is largely because it gives me a color scheme and a design theme. Once I have those, the ideas literally pop into my head within minutes. Usually there is more than one idea so I have lots to work with. The Candy Cane Lane paper is no exception.  I got so excited about all of the designs in the pack but swooned over the gumdrops... okay, slight exaggeration!  Here's my card:


If you are a baker, especially at Christmas, you will love the frosted sugar cookies, gingerbread men, candy canes, peppermints and gumdrops!  This is an easy card design that really showcases the paper. Yummmm!

Happy Stampin'!
Sarah  
Wednesday, September 28, 2016

Santa's Coming... sooner or later!

I'm discovering that people have somewhat of a love/hate relationship with Christmas cards. They love to receive them, lots of them. They also like the idea of sending them, not as many of them. They stress about getting them in the mail and stress even more if they are trying to make them!  I've been offering some classes to help my stamping friends get a head start with their Christmas cards and I want to feature some of these on my blog for the next few posts so keep coming back for more!

Here's the first:


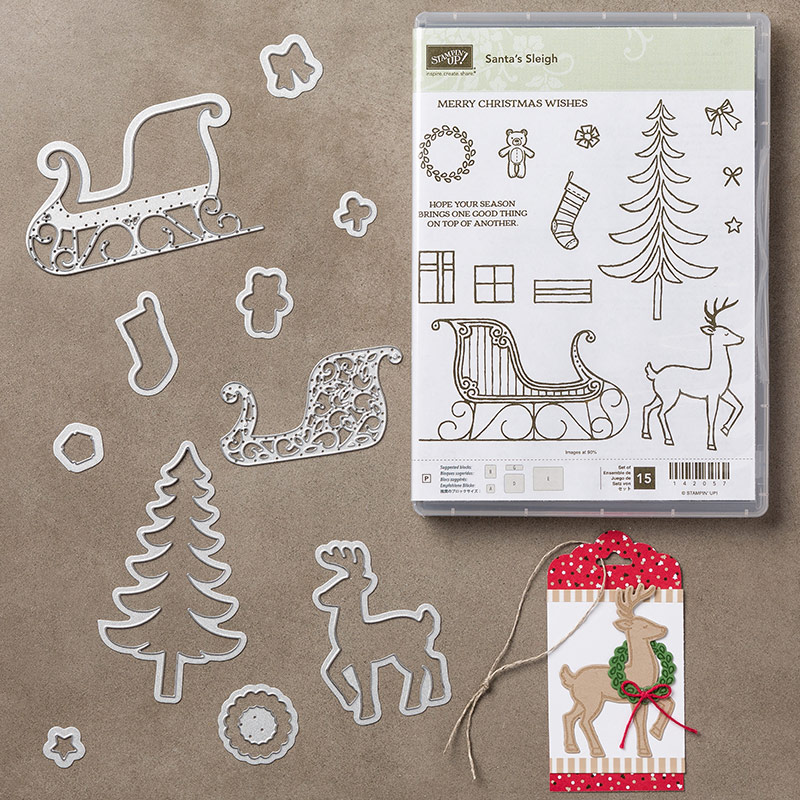
I used several of my favorite products on this card!  The color scheme is very traditional and features two of our richest colors, Cherry Cobbler and Emerald Envy.  The ornamental piece on the sleigh is also the new copper foil paper. Boy is that gorgeous on just about anything! The sentiment was easy to cut out using the new layering ovals featured in the Annual Catalog. The sleigh is cut using framelits as well and though I didn't use it in this card, there is a coordinating stamp set. I will be coming back to this set with more card ideas!  Here's a look at the set itself:


As you can see, lots of possibilities!  I would even use the tree and deer for non-Christmas cards... maybe a hunting themed-birthday card for a guy!

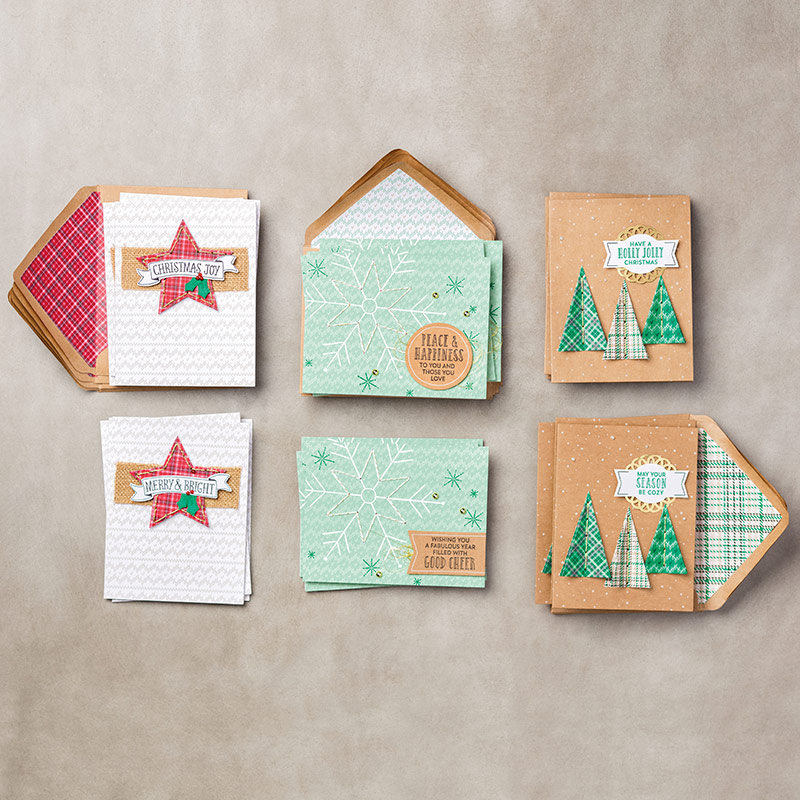
Do you need to jump start some Christmas cards this year?  I have lots of ideas and Stampin'Up! even has a kit if you want to get on the fast track. Check this out:


This fun kit combines some gorgeous stamping and papers with minimal stitching for a very quaint, homemade look!  It's called "Stitched with Cheer" project kit (#142012) and comes with supplies to make 18 cards. You will also need the coordinating stamp set "Stitched with Cheer" (#142182).  All of these supplies are listed below and I would love to get your started if you need some ideas!
Meanwhile, happy stampin!
Sarah
\

Tuesday, September 27, 2016

Some Halloween Fun!

I almost feel like I am late to the party regarding Halloween when I walk through the big box stores and see all their costumes, decorations and CANDY!  Halloween isn't typically a big card-sending event, but there may be some little ghost or goblin you would like to create a special treat for!  Stampin'Up! has lots of options with our Halloween products for cards, scrapbooking, table and party decor and oodles of treat bag/box options. Our Holiday Catalog is loaded-- check it out!

I decided to see what I could do with some of the stamps and paper. I chose the Cookie Cutter Halloween set because I already had the Cookie Cutter Christmas set and punch. Here's my card:


The Halloween paper is fun to play with as well. While there are lots of Halloween related art on one side of the paper, the other side can be used for anything. This gray brick pattern is wonderful!

Here's another card I did, using the Halloween art as is:


I'm not that crazy about Halloween personally, but I do know some people who are and it's their favorite holiday!  I'm glad Stampin'Up! is a company that is versatile and wide-ranging in its design process so all of us are happy! My favorite part of Halloween is the candy, speaking of which, we are wondering if we will have alot of trick-or-treaters in our new neighborhood. Our last one was pretty minimal at best most years.  Think I'll ask around the neighborhood before I stock up on too much candy as you know who will eat it all if I over-buy!
Happy Stampin'!
Sarah

Friday, September 23, 2016

Thankful and Blessed featuring the new metallic-Copper!

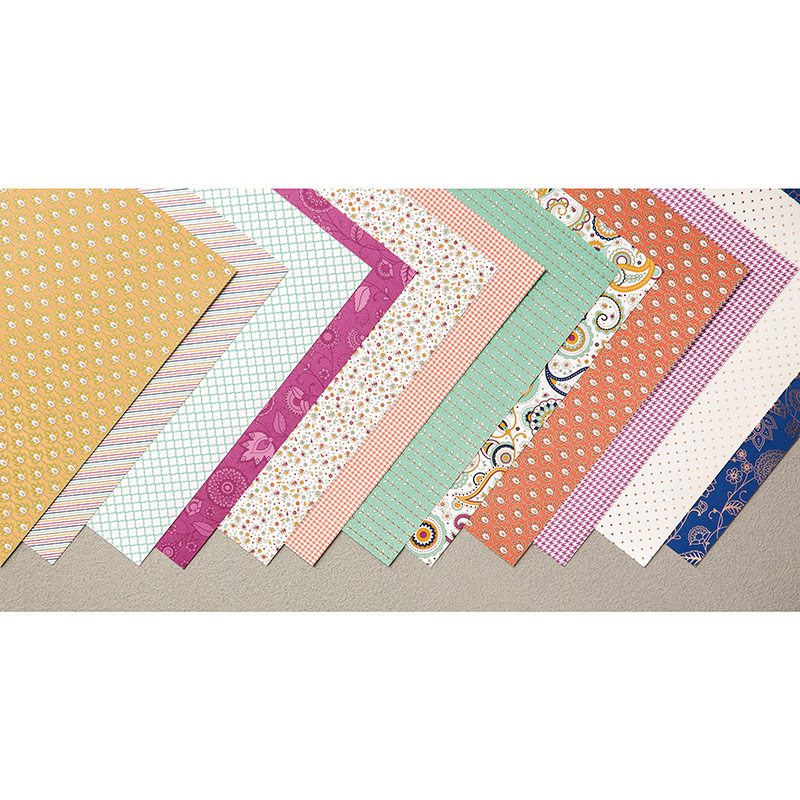
I've learned something about myself in the last couple of years. I've always known I'm not a super "blingy" person and that comes across in my creative endeavors. However, a touch of silver, gold or copper go a long way to perk up a design that is otherwise a little flat and needing some attention!  Stampin'Up! has carried silver and gold papers, inks, embossing powders, threads and buttons for some time, but now SU carries copper! I'm having fun experimenting and one of the best ways is to use some copper-accented Designer Series Paper such as "Petals and Paisleys". Here's a card we made using two of the papers in this pack this week:


There's alot going on here!  We embossed a piece of copper foil paper with the Pretty Paisleys folder. We cut out some navy and copper accent pieces with the Paisley Framelit dies and added some copper metallic thread. This card was a little hard to photograph with my lighting, but I hope you can see all the metallic elements and know that they are copper and not gold!  Here's the inside of the card, using the Paisleys and Posies stamp set:


Quick tip and trick.... when you have photopolymer stamps, you can mount multiple stamps on a single acrylic block and stamp the images all at once... Works great and that's what we did here.

Here's a better look at the paper in this DSP pack:


I can't wait to experiment with some of the other papers!  I have a card buffet coming up next Tuesday if you are interested in making some cards and playing with paper and ink. Contact me for details!

Have a great weekend and GO CATS!!
Sarah
Thursday, September 22, 2016

Basket of Wishes with a surprise!

I have always loved to decorate for the seasons and nothing beats fall, except maybe Christmas!  I also like baskets full of stuff.... flowers, yarn, bread, Easter eggs, ornaments, etc. No wonder that the "Basket of Wishes" stamp set in the Holiday Catalog caught my eye!  I designed a fun card to make in a class this week, using this set.   Here's my card:


It looks like a pretty simple concept actually, just a basket and flowers stamped with Archival Black ink on white cardstock and mounted on some pretty orange Designer Series Paper. BUT, it's not as simple as it looks!  Look again!


It's actually a matchbox type design where the top of the card lifts up to reveal a message for the lucky recipient!  The little blingy flower is actually a way to tuck the flap in and keep it down, to be opened by the recipient!  To make this fun card, You have to stamp your basket with the flap closed with the basket part on the base of the white card stock and the handles of the basket on the flap. The flowers are stamped on the flap!  We used straight-up markers to color, framed the white card stock piece in Rich Razzleberry,  mounted it on Pumpkin Pie DSP from the Halloween paper pack and wrapped some coordinating ribbon around the whole thing.  The inside of the card includes the wishes for a "Happy Day, Happy Year, Happy Life"!

My favorite part of this hobby is designing a card and my favorite part of that is coming up with something that I haven't thought of before, in this case, a new mechanical aspect to a card. I hope you are inspired!  I offer classes often and you are welcome to check them out, just contact me for details!

Happy stampin!
Sarah
Wednesday, September 21, 2016

Anything cuter than a puppy tied to a balloon?

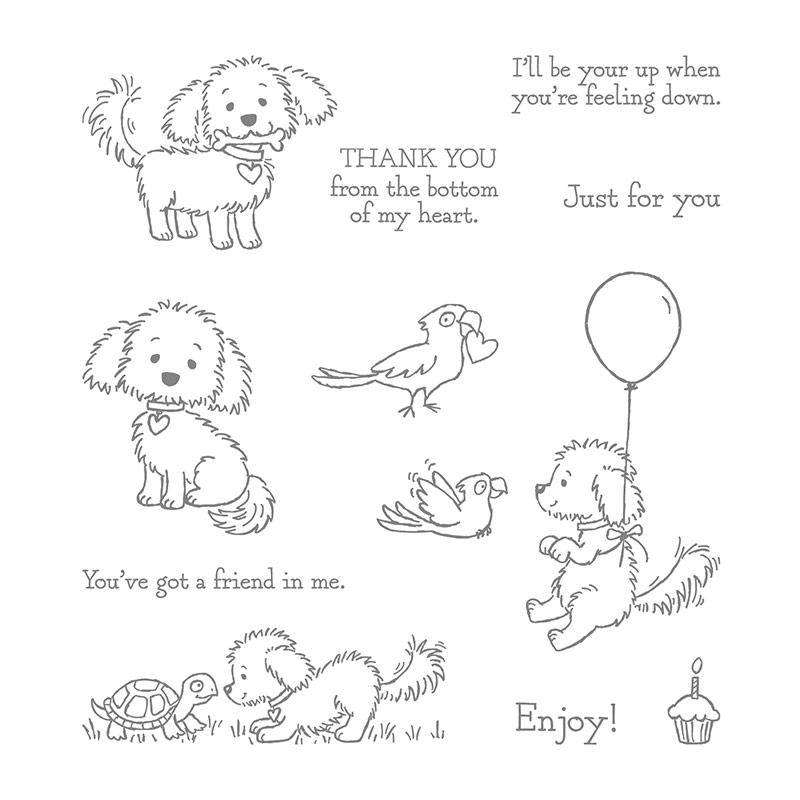
I have a card to show you today that we made in a recent class featuring the "Bella and Friends" stamp set. I love this stamp set of dog images!  The ones we have had in the past were too breed-specific and if you didn't have/like that breed, you weren't that interested in using the stamp. This set is just adorable generic puppy! Don't worry cat lovers, there's a set for you too that I'll mention down below!  Here's my card:


I love our Designer Series Paper and am constantly looking for ways to get it in a card. It inspires me and gives me my launching pad for my color scheme. The striped paper here is from the "By the Shore" set.  On one side, all the designs are ocean related. On the other, they are random patterns of dots, stripes, etc that can be used for anything. I loved this stripe and was excited to use it for this card.  I colored the dog and balloon using blender pens. This is a fun way to color and offers some shading ability that you can't get with just using a marker itself. When you use blender pens, be sure to squeeze the lid of your ink pad gently, while closed and then use the ink that is on the lid and not the ink pad itself. That way, you aren't putting anything but a rubber stamp on your ink pad. This card also features some new framelits that are really handing... layering ovals!  There are 15 dies in this set, half are rounded and half are scalloped!  Great bargain for layering. It's hard to see, but we cut an oval out of the striped paper, adhered our dog image to the back and then made a frame with 2 more ovals and put that on with dimensionals to raise it up. I topped the card off with some fabulous rouched ribbon in Dapper Denim.  All my products are listed below so you can see what you need to make a card like this!

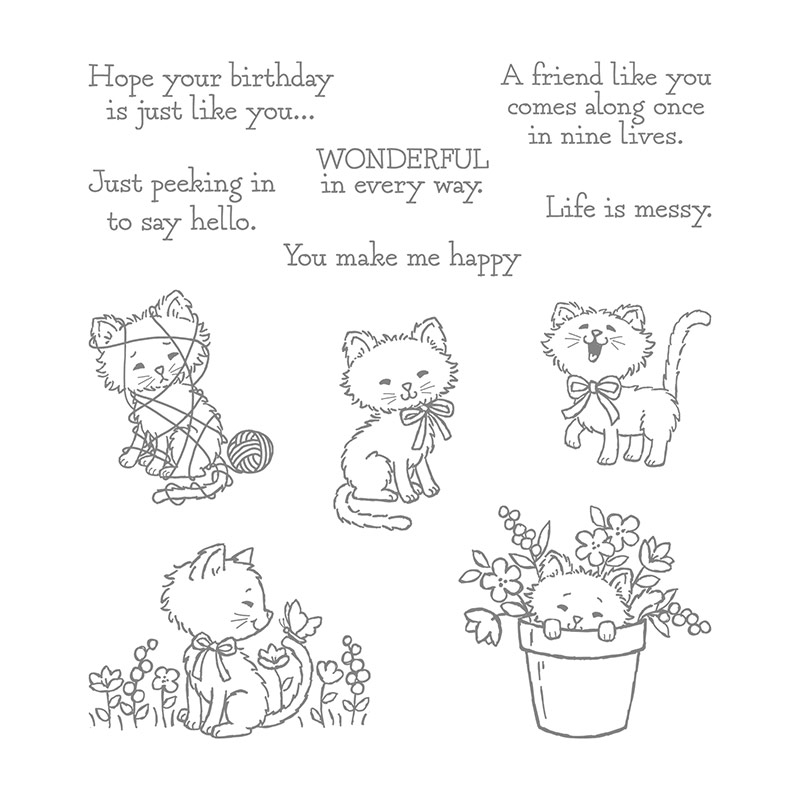
Here's a picture of the stamp set and all of its possibilities:


And here's a picture of the cat stamps!


As you can see, the same artist created both so they actually complement each other in style. Animals are a big part of our lives and they deserve some time on a card!

Hope you are having a great week! Thanks for stopping by and seeing what I'm up to!
Sarah
Tuesday, September 20, 2016

Foxy Friends

Good morning stampin' friends!  I just watched the sun try to peek out of the clouds as it rose over the Bridger Mountains, but it never quite made it. Clouds and rain for the rest of the week....

I wanted to share a card I had fun making recently. There are sure alot of creatures you can make with the "Foxy Friends" stamp set and coordinating punch!  I have been watching some really creative people come up with amazing animals on Pinterest and other Stampin'Up! forums and sites. Wow!  I decided to start with a fox and then go from there! Here's my card:


This is pretty basic stamping but there are a couple of things I wanted to point out. I double stamped the fox and punched out just the head of the second one so I could have an elevated head on my fox. It's an easy way to get some dimension to a card. All the other stamped features were just that... stamping.  It's really hard to see, but I added some copper metallic thread to the left of the fox, on top of the wild grass paper.  The wild grass paper comes from a wonderful 6 x 6 tablet of scenes that you can easily use to create some interest and fake texture.

I then branched out and tried some more animals... Here are my results:


and another fox!


What do you think?  Still not enough variety for you?  How about this!


This isn't the greatest image but is the work of Joanne Hodge, another SU demonstrator!  If you are into animals, this would be a fun set to own, especially if you have kids in your life. Can you imagine all the birthday cards and decorations that could be made?

Look for this suite and others in our store!  There's a link just to the right and you can set up an online profile and start shopping right from your home!

Happy Stampin'!
Sarah

Monday, September 19, 2016

Birds and Blossoms

I'm back after a week of vacation, or should I say "staycation"!  We slept in our own bed every night but we averaged about 50 miles a day in a 4-wheeler in all different directions!  It was really fun as we shared our adventure with my husband's parents. I think we hit NE, NW, W, SE and S of Bozeman, five different mountain ranges, five days in a row!

Now I'm back to focusing on Stampin'Up! and all the wonderful creativity to be had with paper and ink.  I've got a great stamp set to show you today with a wonderful coordinating framelit set... "Best Birds" and "Birds and Blossoms Thinlits".  The birds and branch are great, but what I really appreciate are all the sentiments that make this set so versatile.... even happy anniversary which isn't in very many sets!  Here's my card!


After fiddling a little with the color scheme, I settled on Pool Party, Delightful Dijon, Chocolate Chip and Wild Wasabi.  That sounds like a horrible recipe to eat, doesn't it! I wanted to draw your attention to the lighter colored background behind the bird and branch. This is the "Fancy Frost" specialty designer paper in the Holiday Catalog. There are 6 different embossed designs and you can use it as is or sponge it to color it- that's what I did with Pool Party ink. It's a fun way to make an interesting layer.  

Hope you find some inspiration there~!  The supplies are listed below. Back to the craft room for more fun!
Happy Stampin'!
Sarah


Friday, September 9, 2016

Cute, not scary, Scarecrow!

Hey friends!
Don't know about you, but I am seeing the beginning signs of fall all around me. Since we moved out of town, I drive past several corn and hay fields to get to my house. There are aspen trees in my yard (always wanted, never had until now), the mornings are definitely chilly enough for my heaviest bathrobe and slippers and I saw my first bowl of candy corn at the place where I work part time!  It must be fall!!  It's my favorite season because of the nostalgic feelings it evokes for me. I love the color palette associated with fall, pumpkin anything and I love football and marching bands. Yeah!  Perfect time of year!

To get in the spirit of autumn, I'm playing with some more new products. I knew I wanted to make a scarecrow card and out of the blue, got the idea on how to make a field for him to be in.  Here's my card:


Have you seen the cute cookie cutter punch in the new Holiday Catalog?  Well Stampin'Up! hit a home run with this one because they included a winter themed stamp set and a fall themed stamp set! There are 9 different characters you can stamp  and punch out between the two of the sets!  That's alot of value for one punch!  If you are wondering about the field my scarecrow is standing in, I used 3 different yellow shades of card stock and cut it with our fringe scissors!  I love this card because it's so cheerful and happy. To those of you in Bozeman, it wasn't on purpose, but it ended up being a BOBCAT themed card too!  (First home game is tomorrow... GO CATS!!). The balloons are cut from the envelope paper we sell.  All in all, a great birthday card for a fall birthday and for any age.

Thanks for stopping by!  I would love it if you would leave a comment. I changed my settings so I don't think you have to register or sign in or anything. Please let me know if that isn't true!  Trying to enhance my blog but I'm self-taught so there's always more to learn and figure out ;)

Happy Weekend!
Sarah

Thursday, September 8, 2016

Country Livin'

I'm continuing to show some stamps I've gotten and had time to play with. I make lots of thank you cards to sell (and use!) and it's fun to turn almost any artwork into a thank you card. this concept also works really well for birthdays.  I love the simplicity of this artwork and anything country looking or nostalgic always catches my eye. Here are some cards I made:


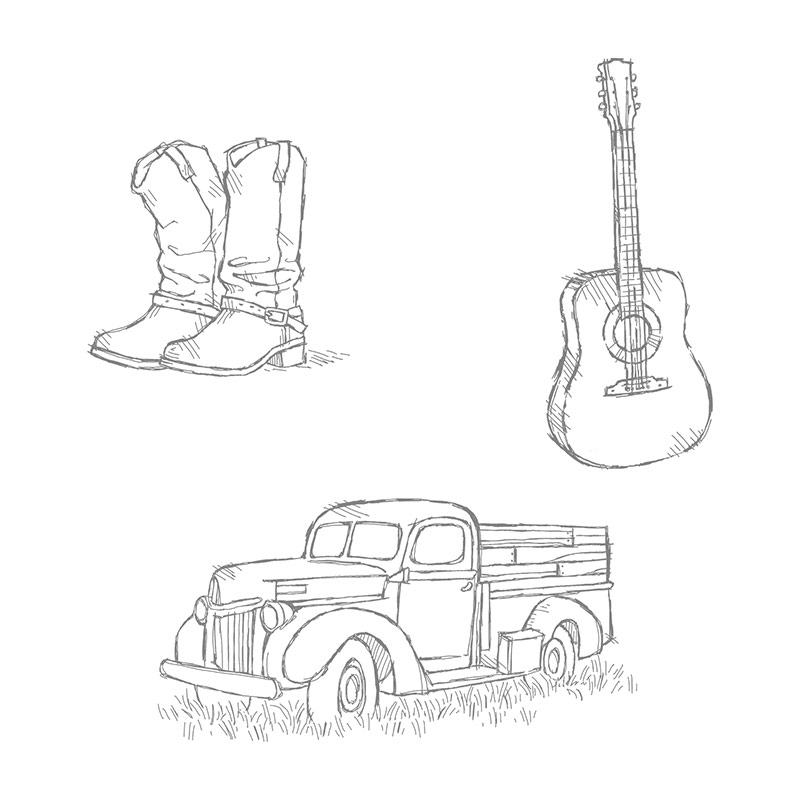
And here's the stamp set that inspired me!


While I just stamped the images, they would also be fun to color with markers, Aqua painters, blender pens or colored pencils.  Since I was just playing around, I also used some retired and non-Stampin'Up elements on my cards. Before I joined Stampin'Up! as a demonstrator, almost 5 years ago now,  I already had a good stash of stuff and I keep it in circulation now and then, though I great prefer SU's quality of product, especially the paper, ink and stamps ;)

I have some classes today and tomorrow and I'll be featuring those cards next so come back to see what's next! Thanks so much for taking a peek at what I've been up to!

Happy Stampin'
Sarah


Wednesday, September 7, 2016

Happy Hour

One of the many reasons I love Stampin'Up! products is that they appeal to a wide audience... different regions of the world, different hobbies and interests, different activities and artistic styles. In the last couple of years, brew pubs and wine tasting rooms have exploded in Montana and I would guess, they have elsewhere too.  I wanted to make some cards that capture that phenomenon, even though I rarely drink myself.  I have to admit it's a fun social outing, especially if there is food to go along with whatever new beer or wine you are taste testing!  The "Mixed Drinks" set was perfect for what I wanted to do. Here's my cards:


These stamps feature 2 step stamping where you stamp the glass/mug in one color and come back and stamp the beverage in another. It can be a challenge to line it up normally, but with our photopolymer stamps, completely see through, it is easy-peasey.  If you are wondering where I got the background "beer bottle" paper, it is some wrapping paper from a store I was in recently. I'm always on the lookout for elements to add to my cards that aren't necessarily in our catalogs. I recently scored a decent sized bag of felt at a garage sale that has to be useful for something, right?

I hope my cards give you some ideas and inspire you to make something today!  Let me know if you need any supplies, advice or motivation. I always have lots of supply ideas and most of the time have advice and motivation, haha!

Happy Stampin'!
Sarah


Tuesday, September 6, 2016

Autumn "Glamping"

We have just had a cold and wet weekend with some snow in the high country to remind us all what living in Montana means weather-wise! BRRRRRR.....  Now this week is supposed to be in the 70's and gorgeous so we can get back to our transition to glorious autumn in all its beauty!

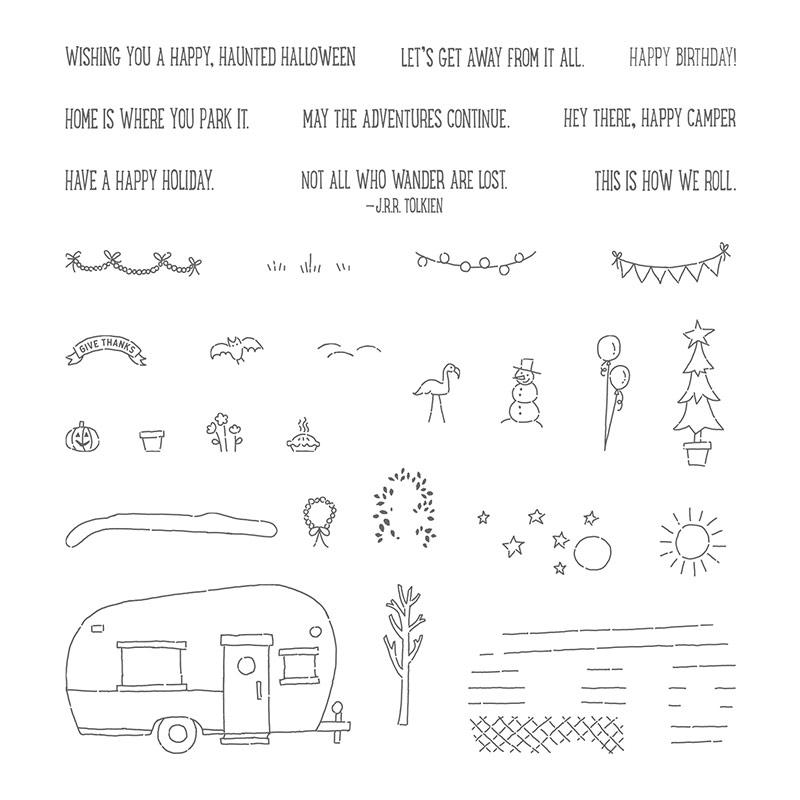
I'm eager to share one of my favorites stamp sets with you, from the new Holiday Catalog, "Glamper Greetings". We love to camp and this set reminded me how much I love camping.  It's a fun set with interchangeable stamps to make a scene for any time of year so I made a fall scene. Here it is:


I think Stampin'Up! did an especially great job with the sentiments in this stamp set. Here's the set itself:


As you can see, there are several combos of stamps that help you create the perfect card for your camping friends.  Here's a peek at the Designer Suite Paper I used as well, "Petals and Paisleys".


I hope you have a great start to your week and get in some creative time soon!  I have several classes coming up so check out my calendar on my SU website (link is on the right side of blog) and I promise some fun!

Happy Stampin'!
Sarah


Friday, September 2, 2016

Top Ten Favorites from the Holiday Catalog


I know, I know... how do you limit yourself to 10?  I guess it's because I rarely hear the top 8 best whatever or the top 12 best whatever ;)

I'm so glad September 1st finally got here so I can talk about these fabulous new products and actually show you pictures and you can even order them if you want. We don't have to talk hypothetically anymore!  Here ya go (in no particular order):

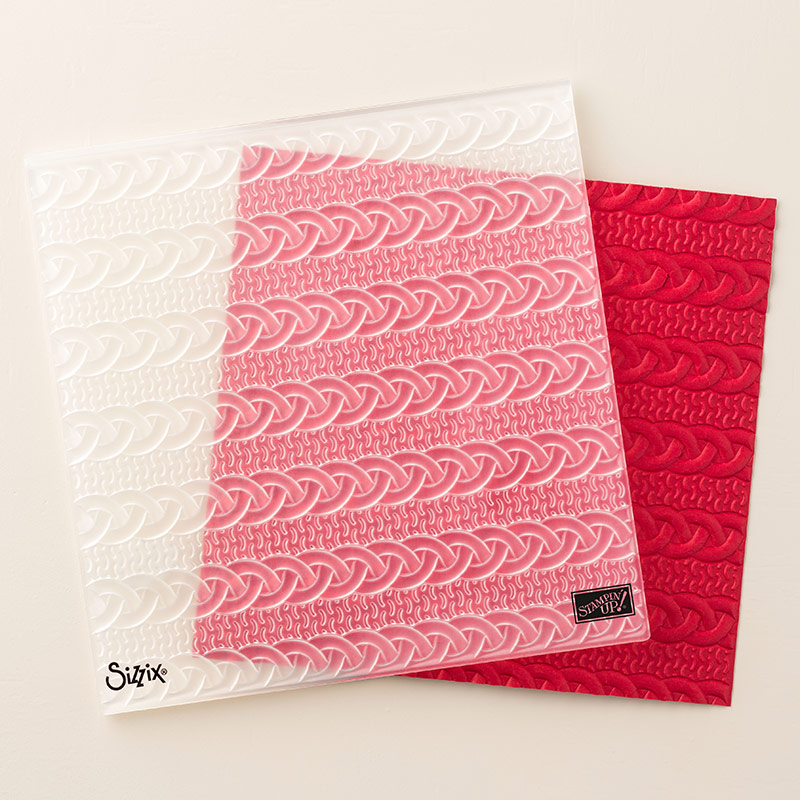
1.  Cable Knit Dynamic Textured Impressions Embossing Folder, pg. 13 -   This is twice as thick as the normal folders and makes a really deep impression!  I'm a knitter and love, love, love this!


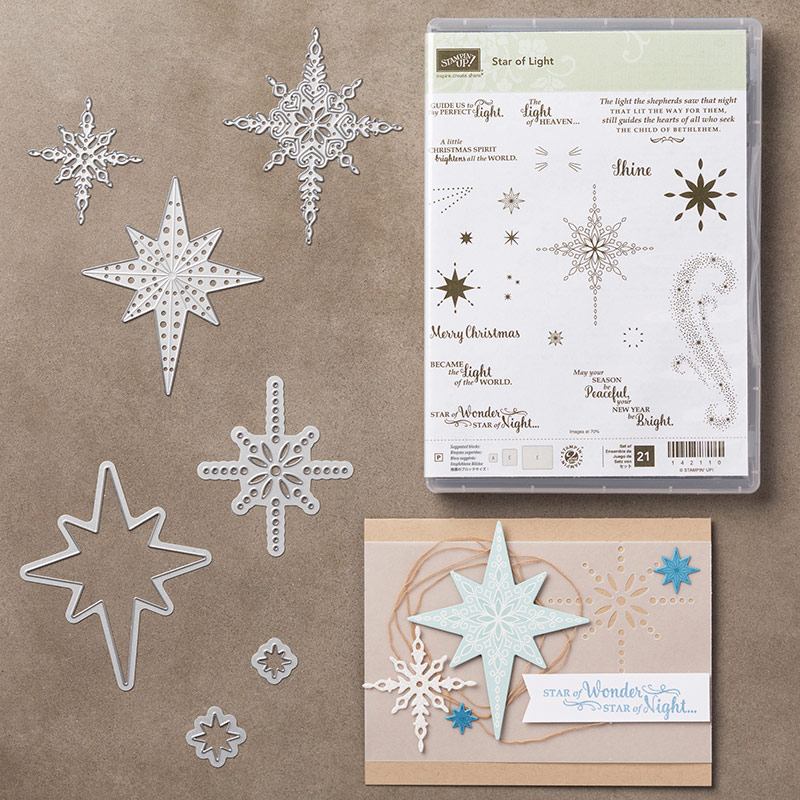
2.  Star of  Light Bundle, pg 9 - Features some amazing stars and Scripture verses with my favorite being the big swirl of stars. Can you even imagine how cool that is with heat embossing?


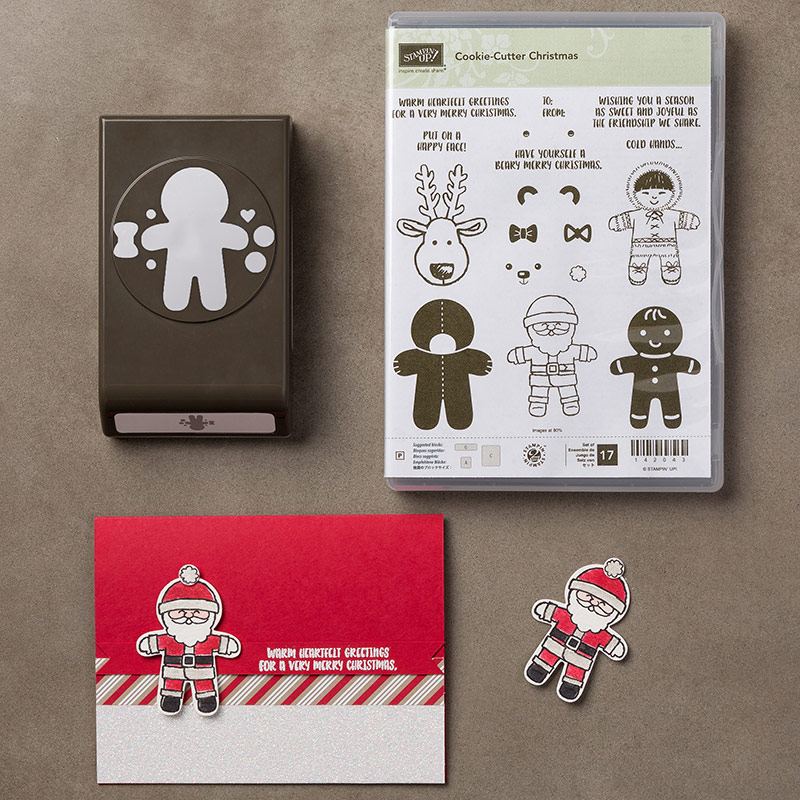
3. Cookie Cutter Christmas Bundle, pg 6 and pg 53 - This set wins for most versatility!  You can make reindeer, Eskimos, Santas, Gingerbread men, teddy bears, scarecrows, Draculas, etc. The punch is really cute and I'm already thinking up some non-holiday uses like baby cards, birthday, etc.


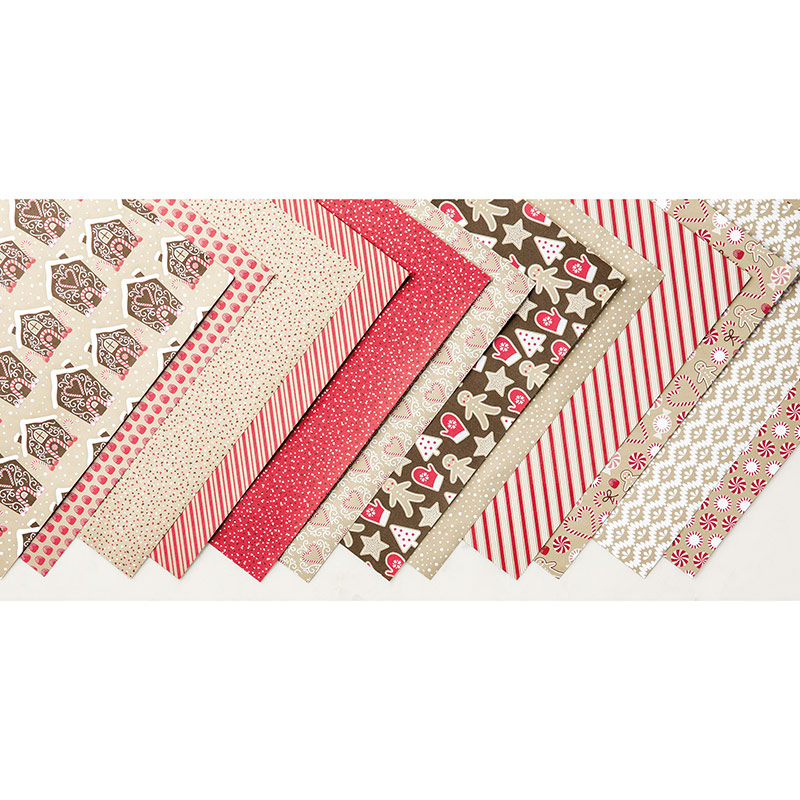
4. Candy Cane Lane Designer Series Paper, pg 5 - LOVE red and browns together with a touch of white. The gumdrop paper is the best!


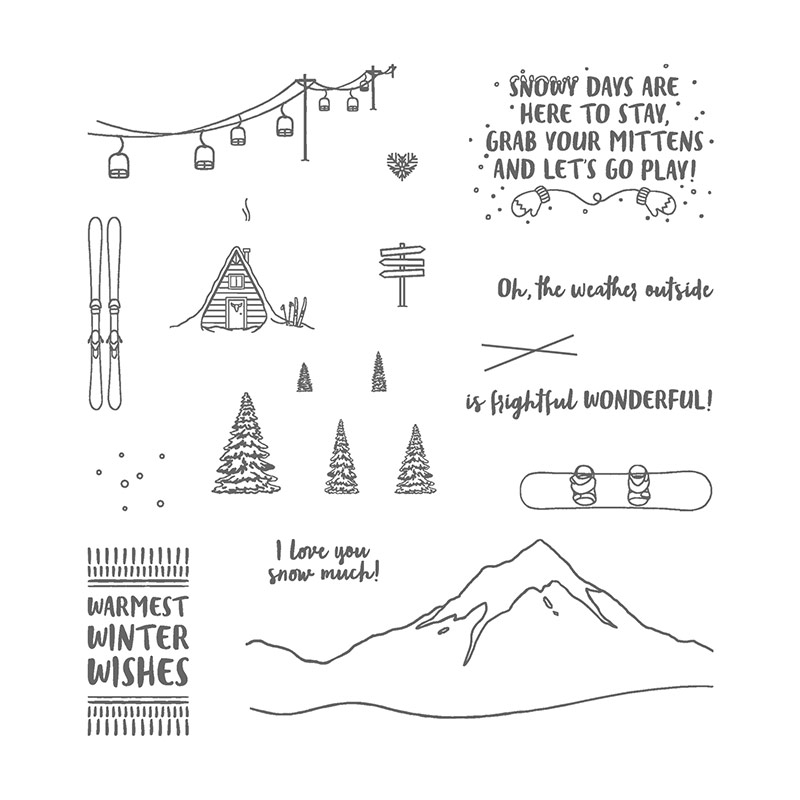
5.  Mountain Adventure Stamp set, pg 44 - This set does not scream Christmas so should be a great go to set for birthdays and other occasions when there is snow and if you live in Montana, you know there's at least 7 months of that!!


6. Glamper Greetings Stamp set, pg 42 - We love to camp and this camper is adorable along with lots of extra stamps to make it any time of the year!  Like they say, "Home is Where You Park It" !!


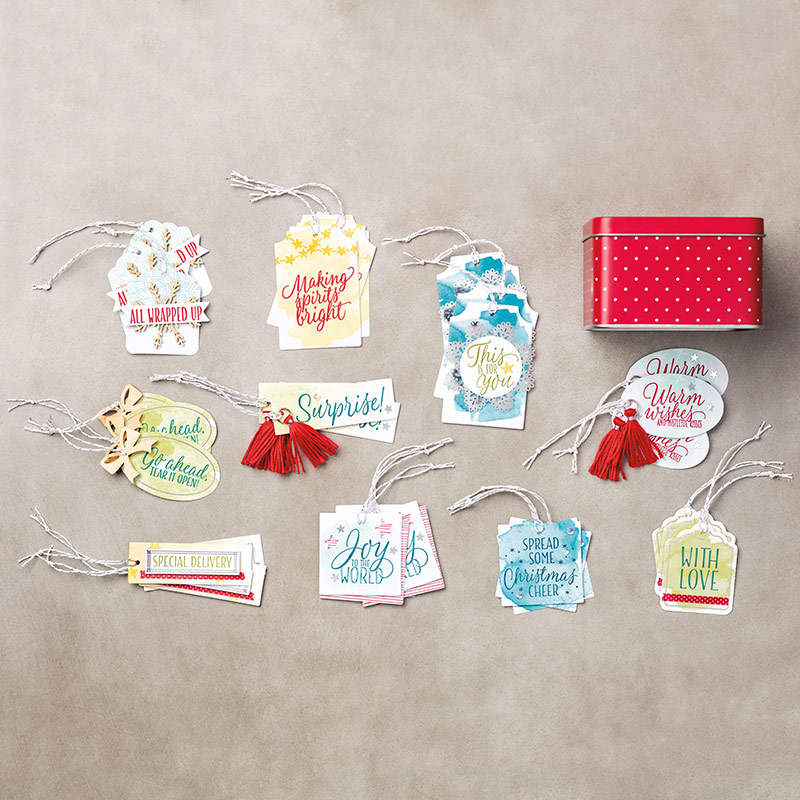
7. Tin of Tags kit and stamp set, pg 33 - This is almost worth the price just to get that cute little red tin box!  I love red... oh yeah, I already said that!  Makes 30 tags for all your gift giving needs, including presents, baked goods, gift cards, etc.


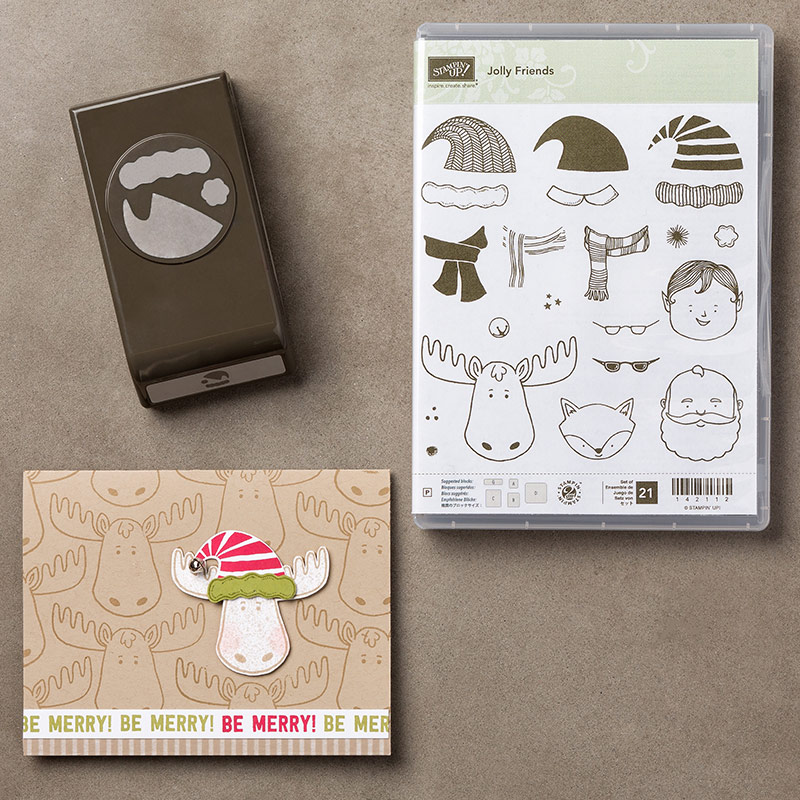
8. Jolly Friends Bundle, pg 29 - Cute, cute stocking caps and heads and scarves!  Again, I will be using this all winter, not just for Christmas. There are even some mini jingle bells to attach at the end of the stocking cap!


9. Santa's Sleigh bundle, pg 24 - I was very excited to see the deer and sleigh stamps and framelits!  This set also won't be restricted to just the holidays!


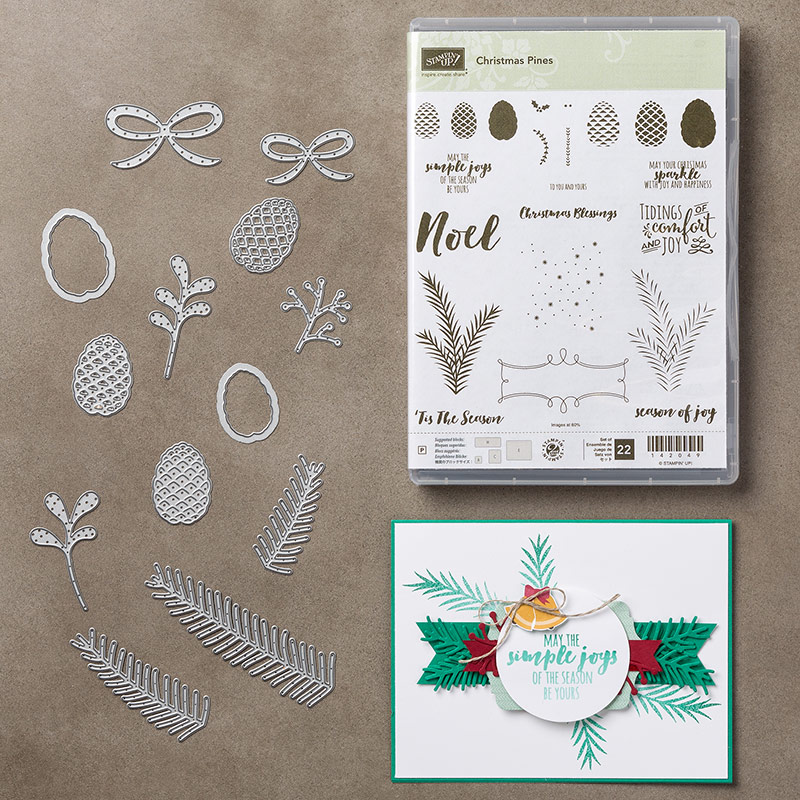
10. Christmas Pines bundle, pg 19 -  Yeah for more pine cones and evergreen boughs!  These framelits work amazingly well and are not hard to use at all!


Well, there you have my list. Of course, there's more, but I restricted myself to 10. Have fun making your own Top 10 wish list and get going on some creative goodness today!  The catalog is available to look at online (link is towards the top of the blog, on the right) and if you would like a paper version, contact me!

I will be hosting classes all fall with these and other great products so sign up for a class and learn how fun making your own cards/paper projects can be!
Have a great Labor Day Weekend!

Sarah

Thursday, September 1, 2016

It's Time! The Holiday Catalog is here!!

You've been waiting patiently and here it is!  Have fun looking it over and contact me if you can't wait any longer to get going on a fun project ;)


I'll be back later today with more !
Sarah